Why Does My Phone Show Sos? When your phone displays “SOS” or “SOS only,” it indicates that while you’re disconnected from your primary cellular network, you can still make emergency calls via other available networks. WHY.EDU.VN is dedicated to helping you understand why this happens and providing reliable solutions to restore your regular cellular service, covering everything from basic troubleshooting to advanced settings. Understand cellular network connectivity, troubleshoot connection issues, and explore alternative communication methods.
1. Understanding the SOS Signal on Your Phone
The SOS signal on your phone is an indicator that your device has lost its connection to your usual cellular network but can still connect to other networks for emergency calls. Let’s delve into the details of what this means and why it happens.
1.1. What Does SOS or “SOS Only” Mean?
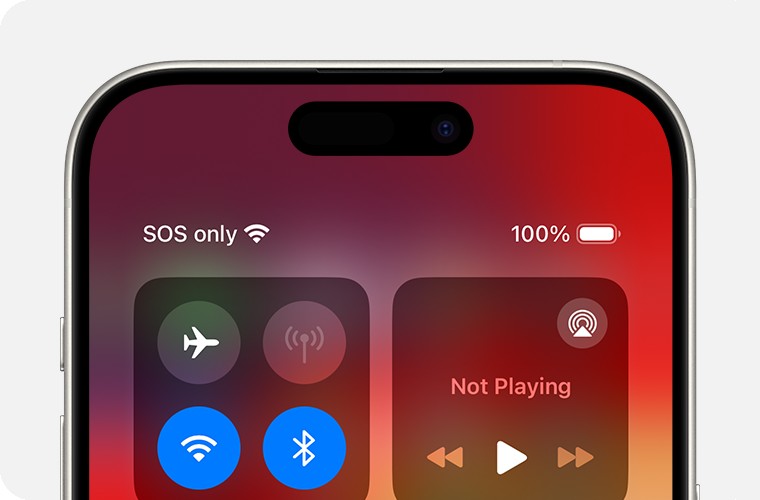
When your phone displays “SOS” or “SOS only” in the status bar, it signifies that your device is disconnected from its registered cellular network but can still make emergency calls through available networks, regardless of the carrier. This feature is available in many countries, including the United States, Canada, and Australia. According to a study by the National Emergency Number Association (NENA), approximately 80% of emergency calls are made via mobile phones, highlighting the importance of SOS functionality during network outages.
1.2. How Does Emergency SOS Work?
Emergency SOS functionality allows your phone to connect to any available cellular network to place an emergency call, even if you don’t have a subscription with that specific carrier. Here’s how it generally works:
- Network Scanning: Your phone constantly scans for available cellular networks.
- Emergency Connection: If your registered network is unavailable, it attempts to connect to other networks to establish a connection for emergency services.
- Emergency Call: Once connected, you can dial emergency numbers like 911 (in the US), 112 (in Europe), or 000 (in Australia).
1.3. Differences Between SOS, No Service, and Searching
Understanding the differences between “SOS,” “No Service,” and “Searching” can help you better diagnose the issue:
- SOS/SOS Only: Indicates that emergency calls are possible via other networks.
- No Service: Means your phone cannot connect to any cellular network, preventing all calls, including emergency calls.
- Searching: Indicates your phone is actively trying to find an available cellular network.
2. Common Reasons Why Your Phone Shows SOS
There are several reasons why your phone might display the SOS signal. Let’s explore these causes in detail.
2.1. Network Outages
Cellular network outages are a primary reason for your phone showing SOS. These outages can be caused by several factors:
- Equipment Failure: Base stations or other network equipment may fail due to technical issues.
- Natural Disasters: Events like hurricanes, earthquakes, or floods can damage network infrastructure. A study by the Federal Communications Commission (FCC) found that natural disasters are responsible for approximately 60% of major network outages.
- Maintenance: Scheduled maintenance or upgrades can temporarily disrupt network service.
2.2. Location and Coverage Issues
Your location significantly impacts your phone’s ability to connect to a cellular network.
- Remote Areas: If you are in a remote area, there might be limited or no cellular coverage.
- Buildings and Underground Locations: Thick walls, basements, and underground locations can block cellular signals. According to a report by Ofcom, signal strength can decrease by up to 50% inside buildings with reinforced concrete.
- Dead Zones: Some areas are known as “dead zones” due to geographical or structural reasons that prevent reliable cellular coverage.
2.3. SIM Card Problems
The SIM card is essential for connecting your phone to the cellular network. Issues with the SIM card can lead to an SOS signal.
- Damaged or Misplaced SIM Card: If the SIM card is damaged or not properly inserted, your phone may not be able to connect to the network.
- SIM Card Activation Issues: Sometimes, a new SIM card might not be activated correctly by your carrier. A survey by the Cellular Telecommunications Industry Association (CTIA) indicated that approximately 5% of new SIM card activations face initial issues.
- Outdated SIM Card: Older SIM cards may not be compatible with newer network technologies.
2.4. Software and Configuration Errors
Software glitches and incorrect settings can also cause your phone to display the SOS signal.
- Outdated iOS/iPadOS: Running an outdated operating system can lead to connectivity issues.
- Incorrect Network Settings: Incorrectly configured network settings can prevent your phone from connecting to the cellular network.
- Software Bugs: Occasionally, software bugs can cause connectivity problems.
2.5. Account and Carrier Issues
Issues with your carrier account can also be a reason for the SOS signal.
- Account Suspension: If your account is suspended due to non-payment or other reasons, your service might be interrupted.
- Incorrect Data Plan: An incorrect or expired data plan can prevent your phone from connecting to the network.
- IMEI Registration Issues: Some countries require IMEI registration for phones purchased abroad, and failure to register can lead to service disruptions.
3. Basic Troubleshooting Steps
Before diving into advanced solutions, try these basic troubleshooting steps to resolve the SOS signal issue on your phone.
3.1. Check Airplane Mode
Airplane Mode turns off all wireless connections on your phone, including cellular.
- Access Control Center: Swipe down from the top-right corner of your screen (or swipe up from the bottom on older models).
- Toggle Airplane Mode: Ensure the Airplane Mode icon is turned off. If it’s on, tap it to turn it off and wait for your phone to reconnect to the cellular network.
3.2. Restart Your iPhone or iPad
Restarting your device can resolve minor software glitches that may be causing the SOS signal.
- iPhone:
- Press and hold either volume button and the side button until the power-off slider appears.
- Drag the slider, then wait 30 seconds for your device to turn off.
- To turn your device back on, press and hold the side button until you see the Apple logo.
- iPad:
- Press and hold the top button and either volume button until the power-off slider appears.
- Drag the slider, then wait 30 seconds for your device to turn off.
- To turn your device back on, press and hold the top button until you see the Apple logo.
3.3. Check Cellular Coverage
Ensure you are in an area with adequate cellular coverage.
- Move to a Different Location: Go outside or move to a different part of the building.
- Check Coverage Maps: Use online coverage maps provided by your carrier to see if your area should have coverage.
3.4. Reinsert Your SIM Card
A loose or improperly seated SIM card can cause connectivity issues.
- Power Off Your Device: Turn off your phone before removing the SIM card.
- Remove the SIM Card: Use a SIM eject tool or a paperclip to remove the SIM card tray.
- Reinsert the SIM Card: Place the SIM card back into the tray and ensure it is properly seated.
- Power On Your Device: Turn your phone back on and wait for it to reconnect to the cellular network.
3.5. Update Carrier Settings
Updating your carrier settings ensures your phone has the latest configurations for connecting to your carrier’s network.
- Connect to Wi-Fi: Ensure your phone is connected to a stable Wi-Fi network.
- Go to Settings: Open the Settings app.
- General: Tap on General.
- About: Tap on About. If an update is available, you will see a prompt to update your carrier settings.
4. Advanced Troubleshooting Techniques
If the basic troubleshooting steps don’t resolve the issue, try these advanced techniques to fix the SOS signal on your phone.
4.1. Update Your iPhone or iPad to the Latest iOS/iPadOS
Keeping your device updated with the latest software is crucial for optimal performance and connectivity.
- Connect to Wi-Fi: Ensure your phone is connected to a stable Wi-Fi network.
- Go to Settings: Open the Settings app.
- General: Tap on General.
- Software Update: Tap on Software Update.
- Download and Install: If an update is available, tap Download and Install. Follow the on-screen instructions to complete the update.
4.2. Reset Network Settings
Resetting network settings can resolve configuration issues that may be causing the SOS signal.
- Go to Settings: Open the Settings app.
- General: Tap on General.
- Transfer or Reset iPhone: Tap on Transfer or Reset iPhone (or Reset on older models).
- Reset: Tap on Reset.
- Reset Network Settings: Tap on Reset Network Settings. You may need to enter your passcode.
Note: This will reset Wi-Fi passwords, cellular settings, and VPN settings.
4.3. Check Cellular Data Options
Incorrect cellular data settings can prevent your phone from connecting to the network.
- Go to Settings: Open the Settings app.
- Cellular: Tap on Cellular or Mobile Data.
- Cellular Data Options: Tap on Cellular Data Options.
- Enable LTE: Ensure that Enable LTE or 4G is turned on.
- Data Roaming: If you are traveling internationally, make sure Data Roaming is turned on.
4.4. Dual SIM Settings
If you have an iPhone with Dual SIM, ensure both lines are properly configured.
- Go to Settings: Open the Settings app.
- Cellular: Tap on Cellular or Mobile Data.
- Check Both Lines: Ensure both cellular lines are turned on.
- Preferred Line for Data: Set the preferred line for cellular data.
4.5. Contact Your Carrier
If none of the above steps work, there may be an issue with your account or the carrier’s network.
- Call Customer Support: Contact your carrier’s customer support.
- Verify Account Status: Ensure your account is active and in good standing.
- Check for Outages: Ask if there are any known outages in your area.
- IMEI Registration: Inquire about IMEI registration requirements if you purchased your phone abroad.
5. International Travel Considerations
Traveling internationally can often lead to connectivity issues. Here are some considerations to keep in mind.
5.1. Data Roaming
Data roaming allows you to use cellular data on foreign networks.
- Turn On Data Roaming: Go to Settings > Cellular > Cellular Data Options and turn on Data Roaming.
- Check Roaming Charges: Be aware of the roaming charges, which can be significant. Consider purchasing an international data plan or a local SIM card.
5.2. Local SIM Card
Using a local SIM card can be a cost-effective way to stay connected while traveling.
- Purchase a Local SIM: Buy a local SIM card from a carrier in the country you are visiting.
- Install the SIM Card: Replace your original SIM card with the local SIM card.
- Activate the SIM Card: Follow the instructions provided by the local carrier to activate the SIM card.
5.3. Check Compatibility
Ensure your phone is compatible with the cellular networks in the country you are visiting.
- Network Frequencies: Check the network frequencies used in the country and ensure your phone supports those frequencies.
- Unlocked Phone: Make sure your phone is unlocked, allowing you to use SIM cards from different carriers.
6. Understanding Network Technologies: 3G, 4G, and 5G
Understanding the different network technologies can help you troubleshoot connectivity issues, especially as older networks are phased out.
6.1. The Phasing Out of 3G Networks
Many carriers are phasing out 3G networks to make way for newer technologies like 4G and 5G.
- Impact on Older Devices: If you have an older device that only supports 3G, you may experience connectivity issues.
- Upgrade Your Device: Consider upgrading to a newer device that supports 4G or 5G.
- Contact Your Carrier: Contact your carrier to discuss your options.
6.2. Ensuring LTE (4G) is Enabled
LTE (Long Term Evolution) or 4G is the standard for most modern cellular networks.
- Go to Settings: Open the Settings app.
- Cellular: Tap on Cellular or Mobile Data.
- Cellular Data Options: Tap on Cellular Data Options.
- Enable LTE: Ensure that Enable LTE or 4G is turned on.
6.3. 5G Compatibility
5G is the latest generation of cellular technology, offering faster speeds and lower latency.
- Check Device Compatibility: Ensure your phone supports 5G.
- 5G Coverage: Be aware that 5G coverage may be limited in some areas.
- Enable 5G: In Settings, under Cellular Data Options, you may have an option to enable 5G if it is not already enabled.
7. Using Diagnostics Tools and Apps
Several diagnostic tools and apps can help you identify and resolve connectivity issues.
7.1. Apple Support App
The Apple Support app can run diagnostics to identify hardware and software issues.
- Download the App: Download the Apple Support app from the App Store.
- Run Diagnostics: Follow the instructions in the app to run diagnostics on your device.
- Interpret Results: The app will provide information about any issues it detects and suggest solutions.
7.2. Network Analyzer Apps
Network analyzer apps can provide detailed information about your cellular and Wi-Fi connections.
- Download a Network Analyzer App: Examples include “Network Analyzer” or “WiFi Analyzer.”
- Run the App: Follow the instructions in the app to analyze your network connections.
- Interpret Results: The app will provide information about signal strength, network speed, and other metrics that can help you troubleshoot connectivity issues.
7.3. Carrier-Specific Apps
Many carriers offer their own apps that can help you manage your account and troubleshoot connectivity issues.
- Download Your Carrier’s App: Download the app from the App Store.
- Log In: Log in with your account credentials.
- Use Troubleshooting Tools: The app may offer tools for checking your account status, testing your connection, and contacting customer support.
8. When to Seek Professional Help
If you have tried all the troubleshooting steps and your phone still shows the SOS signal, it may be time to seek professional help.
8.1. Contact Apple Support
Apple Support can provide expert assistance with hardware and software issues.
- Visit the Apple Support Website: Go to the Apple Support website.
- Schedule an Appointment: Schedule an appointment at an Apple Store or with an authorized service provider.
- Describe the Issue: Provide detailed information about the issue and the steps you have already tried.
8.2. Visit an Authorized Service Provider
Authorized service providers are trained to diagnose and repair Apple devices.
- Find a Provider: Use the Apple Support website to find an authorized service provider near you.
- Schedule an Appointment: Schedule an appointment to have your device inspected.
- Describe the Issue: Provide detailed information about the issue and the steps you have already tried.
8.3. Consider Hardware Issues
In some cases, the SOS signal may be caused by a hardware issue that requires repair or replacement.
- Antenna Problems: Issues with the phone’s antenna can affect its ability to connect to cellular networks.
- Logic Board Issues: Problems with the phone’s logic board can also cause connectivity issues.
- Professional Diagnosis: A professional technician can diagnose hardware issues and recommend the appropriate repairs.
9. Alternative Communication Methods When SOS is Displayed
Even when your phone displays the SOS signal, there are alternative ways to communicate.
9.1. Wi-Fi Calling
Wi-Fi Calling allows you to make and receive calls over a Wi-Fi network instead of the cellular network.
- Enable Wi-Fi Calling: Go to Settings > Phone > Wi-Fi Calling and turn it on.
- Connect to Wi-Fi: Ensure your phone is connected to a stable Wi-Fi network.
- Make Calls: Use the Phone app to make calls as usual.
9.2. Messaging Apps
Messaging apps like WhatsApp, Telegram, and Signal can be used to send and receive messages over a Wi-Fi network.
- Install a Messaging App: Download and install a messaging app from the App Store.
- Connect to Wi-Fi: Ensure your phone is connected to a stable Wi-Fi network.
- Send Messages: Use the app to send messages to your contacts.
9.3. Emergency SOS via Satellite (iPhone 14 and Later)
iPhone 14 models and later have a feature called Emergency SOS via satellite, which allows you to send messages to emergency services when you are outside of cellular and Wi-Fi coverage.
- Point Your Phone: Follow the on-screen instructions to point your phone towards the satellite.
- Send a Message: Use the interface to send a message to emergency services.
- Answer Questions: Answer the follow-up questions to provide more information about your situation.
10. Preventing Future SOS Issues
Taking proactive steps can help prevent the SOS signal from appearing on your phone in the future.
10.1. Regular Software Updates
Keep your phone updated with the latest iOS/iPadOS to ensure optimal performance and connectivity.
- Enable Automatic Updates: Go to Settings > General > Software Update and turn on Automatic Updates.
- Check for Updates Regularly: Manually check for updates periodically.
10.2. Monitor Your Account
Keep track of your account status to ensure it is active and in good standing.
- Check Your Account Online: Log in to your account on your carrier’s website or app.
- Pay Bills on Time: Ensure your bills are paid on time to avoid service interruptions.
- Update Your Plan: If necessary, update your data plan to meet your needs.
10.3. Physical SIM Care
Properly care for your SIM card to prevent damage or connectivity issues.
- Handle with Care: Avoid bending or scratching the SIM card.
- Keep it Clean: Clean the SIM card contacts with a soft, dry cloth if necessary.
- Proper Installation: Ensure the SIM card is properly seated in the SIM tray.
10.4. Network Monitoring
Be aware of potential network outages in your area.
- Check Carrier Websites: Monitor your carrier’s website or social media for outage announcements.
- Use Network Monitoring Apps: Use apps that provide real-time information about network status.
FAQ: Understanding and Resolving SOS Signal Issues
1. Why does my iPhone show SOS even when I am in a city with good coverage?
There could be several reasons, including temporary network issues, software glitches, or problems with your SIM card. Start by restarting your iPhone and checking for software updates. If the issue persists, contact your carrier.
2. How do I know if the SOS signal is due to a network outage in my area?
Check your carrier’s website or social media for outage announcements. You can also use third-party network monitoring apps to check the status of cellular networks in your area.
3. Can using a VPN cause my phone to show the SOS signal?
Yes, incorrect VPN settings can sometimes interfere with your phone’s ability to connect to the cellular network, resulting in an SOS signal. Try disabling your VPN to see if the issue resolves.
4. What should I do if I see the SOS signal while traveling internationally?
Ensure data roaming is enabled in your settings. If the issue persists, consider purchasing a local SIM card or contacting your carrier for international support.
5. Is it possible for my SIM card to be too old to work with current network technologies?
Yes, older SIM cards may not be compatible with newer network technologies like 4G and 5G. Contact your carrier to request a new SIM card that supports these technologies.
6. How can I test if my iPhone’s antenna is working correctly?
While there isn’t a direct way to test the antenna, you can use the Apple Support app to run diagnostics. If the diagnostics indicate a hardware issue, seek professional help from Apple Support or an authorized service provider.
7. Will resetting network settings erase my personal data?
No, resetting network settings only clears Wi-Fi passwords, cellular settings, and VPN settings. It does not erase your personal data like photos, contacts, or apps.
8. What is the difference between “SOS” and “Emergency SOS via satellite” on iPhone?
“SOS” indicates that you can make emergency calls via other available cellular networks, while “Emergency SOS via satellite” allows you to send messages to emergency services when you are outside of cellular and Wi-Fi coverage (available on iPhone 14 and later).
9. Can my carrier block my phone from receiving cellular services if I purchased it outside of my country?
Some countries require IMEI registration for phones purchased abroad. Failure to register your phone’s IMEI may result in blocked cellular services. Contact your carrier to inquire about IMEI registration requirements.
10. How often should I update my carrier settings on my iPhone?
You should update your carrier settings whenever an update is available. Apple typically releases carrier settings updates to improve network connectivity and performance. You will receive a prompt when an update is available.
Experiencing the SOS signal on your phone can be frustrating, but with the right troubleshooting steps, you can often resolve the issue and restore your cellular service. From basic checks like Airplane Mode to more advanced techniques like resetting network settings, this guide provides comprehensive solutions to help you stay connected. If you’re still facing difficulties or have more complex questions, remember that WHY.EDU.VN is here to provide expert answers and guidance. Visit why.edu.vn, located at 101 Curiosity Lane, Answer Town, CA 90210, United States, or contact us via WhatsApp at +1 (213) 555-0101 for personalized assistance.
