If you’re grappling with the frustration of a right AirPod that refuses to connect, you’re not alone. Many users encounter this issue, but fortunately, WHY.EDU.VN is here to provide a comprehensive guide to help you troubleshoot and resolve the problem. This article will walk you through various solutions, from basic checks to more advanced troubleshooting steps, ensuring you can get back to enjoying your audio experience. Let’s dive into the specifics of Bluetooth connectivity, firmware issues, and potential hardware malfunctions.
1. Initial Checks and Basic Troubleshooting
Before diving into more complex solutions, let’s cover some basic checks that can often resolve connectivity issues with your right AirPod. These steps are simple but effective and should be the first line of defense.
1.1. Ensure Your AirPod is Charged
A dead or low-charged AirPod is a common culprit for connectivity problems. Make sure your right AirPod has sufficient charge.
Steps:
- Place the AirPod in the charging case: Ensure it’s properly seated.
- Charge the case: Connect the charging case to a power source using a Lightning cable or place it on a wireless charging pad.
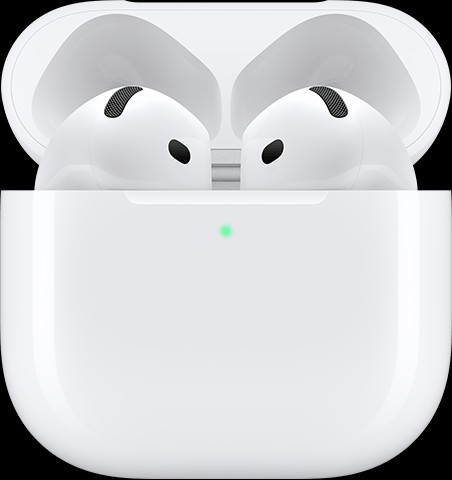
- Check the charging status: After about 15-30 minutes, open the case near your iPhone or iPad to check the charging status. A fully charged AirPod should show a green light or a full charge indicator on your device.
1.2. Clean Your AirPods
Dirt, earwax, and debris can interfere with the AirPod’s sensors and charging contacts, leading to connectivity issues. Regular cleaning is essential.
Steps:
- Gather your supplies: You’ll need a soft, dry, lint-free cloth, a soft-bristled brush, and isopropyl alcohol (optional).
- Clean the exterior: Gently wipe the AirPod with the cloth.
- Clean the speaker and microphone mesh: Use the soft-bristled brush to remove any debris from these areas.
- Clean the charging contacts: If necessary, lightly dampen the cloth with isopropyl alcohol and gently clean the charging contacts on the AirPod and inside the charging case. Ensure everything is completely dry before use.
 Close-up of cleaning AirPods with a microfiber cloth, emphasizing the meticulous removal of earwax and debris from the speaker mesh and charging contacts to ensure optimal connectivity and audio quality
1.3. Check Bluetooth Connection
Sometimes, the issue might be as simple as a disconnected Bluetooth connection.
Steps:
- Turn Bluetooth off and on: On your iPhone or iPad, go to Settings > Bluetooth, toggle the switch off, wait a few seconds, and then toggle it back on.
- Forget the device: If the AirPod is still not connecting, go to Settings > Bluetooth, find your AirPods in the list of devices, tap the “i” icon next to them, and select “Forget This Device.”
- Reconnect the AirPods: Open the charging case near your iPhone or iPad. Follow the on-screen prompts to reconnect your AirPods.
1.4. Restart Your Device
A simple restart can resolve many software glitches that might be interfering with the AirPod’s connection.
Steps:
- Restart your iPhone or iPad: Press and hold the power button until the power-off slider appears. Drag the slider to turn off your device. Wait a few seconds, then press and hold the power button again until the Apple logo appears.
- Test the connection: Once your device restarts, try connecting your AirPods again.
2. Advanced Troubleshooting Steps
If the basic checks don’t resolve the issue, it’s time to move on to more advanced troubleshooting steps. These involve resetting the AirPods, updating firmware, and checking audio settings.
2.1. Reset Your AirPods
Resetting your AirPods can often fix persistent connectivity issues by restoring them to their factory settings.
Steps:
- Place AirPods in the charging case: Make sure both AirPods are inside the charging case.
- Close the lid: Close the lid and wait for 30 seconds.
- Open the lid: Open the lid and keep the AirPods inside.
- Press and hold the setup button: Locate the setup button on the back of the charging case. Press and hold it until the status light flashes amber, then white. This usually takes about 15 seconds.
- Reconnect the AirPods: Open the charging case near your iPhone or iPad. Follow the on-screen prompts to reconnect your AirPods.
2.2. Update Firmware
Outdated firmware can cause various issues, including connectivity problems. Ensure your AirPods are running the latest firmware.
Steps:
- Connect AirPods to your device: Make sure your AirPods are connected to your iPhone or iPad.
- Ensure a stable internet connection: Your device needs a stable Wi-Fi connection.
- Use AirPods: Play audio through your AirPods to ensure they are actively in use.
- Wait for the update: Firmware updates usually happen automatically in the background while the AirPods are connected and in use. There’s no manual way to force an update, but keeping your AirPods connected and in use increases the likelihood of an update occurring.
2.3. Check Audio Settings
Incorrect audio settings can sometimes cause one AirPod to not play sound.
Steps:
- Check the balance: Go to Settings > Accessibility > Audio/Visual > Balance. Make sure the slider is set in the middle. An imbalance can cause sound to be directed to only one AirPod.
- Mono Audio: Ensure mono audio is turned off. Go to Settings > Accessibility > Audio/Visual and make sure the “Mono Audio” toggle is off.
- Volume Limits: Check if there are any volume limits set that might be affecting the audio output.
2.4. Test with Another Device
To determine if the issue is with your AirPods or your device, try connecting the AirPods to another iPhone, iPad, or another Bluetooth-enabled device.
Steps:
- Disconnect from the current device: Forget the AirPods on your current device as described earlier.
- Connect to another device: Follow the standard pairing process to connect the AirPods to another device.
- Test audio: Play audio and check if the right AirPod works on the new device.
If the right AirPod works on another device, the issue is likely with your original device. If it still doesn’t work, the problem is probably with the AirPod itself.
3. Potential Hardware Issues
If you’ve exhausted all software troubleshooting steps and your right AirPod still isn’t connecting, there might be a hardware issue.
3.1. Battery Problems
The battery in your AirPod might be faulty or degraded, preventing it from connecting or playing audio.
Signs of battery issues:
- The AirPod doesn’t hold a charge for very long.
- The AirPod dies quickly, even after being fully charged.
- The AirPod doesn’t charge at all.
Unfortunately, AirPods batteries are not easily replaceable. You may need to consider replacing the affected AirPod or the entire set.
3.2. Physical Damage
Physical damage, such as exposure to water or a hard fall, can damage the internal components of the AirPod, leading to connectivity issues.
Check for:
- Visible cracks or dents.
- Signs of water damage.
- Loose or rattling components.
If you suspect physical damage, it’s best to consult with a professional repair service or consider replacing the AirPod.
3.3. Manufacturing Defects
Sometimes, a manufacturing defect can cause one AirPod to fail. This is more likely to occur if the AirPod is relatively new.
If you suspect a manufacturing defect:
- Check your warranty status.
- Contact Apple Support for assistance.
4. Seeking Professional Help
If you’ve tried all the troubleshooting steps and your right AirPod still won’t connect, it’s time to seek professional help.
4.1. Contact Apple Support
Apple Support can provide further assistance, diagnose hardware issues, and offer repair or replacement options.
How to contact Apple Support:
- Visit the Apple Support website.
- Use the Apple Support app on your iPhone or iPad.
- Call Apple Support.
4.2. Visit an Authorized Service Provider
An Apple Authorized Service Provider can perform diagnostics and repairs on your AirPods.
How to find an authorized service provider:
- Use the Apple Support website to locate a service provider near you.
- Check the Apple Store app for service options.
4.3. Consider Replacement
If your AirPod is out of warranty and the repair costs are high, consider replacing the affected AirPod or the entire set.
Options for replacement:
- Purchase a new set of AirPods from Apple or an authorized retailer.
- Buy a single replacement AirPod from Apple (if available).
- Explore third-party options for used or refurbished AirPods.
5. Preventing Future Issues
To minimize the chances of encountering connectivity issues with your AirPods in the future, follow these preventive measures:
5.1. Regular Maintenance
- Clean your AirPods regularly: As described earlier, keep your AirPods free from dirt, earwax, and debris.
- Store AirPods properly: Store your AirPods in the charging case when not in use to protect them from damage and keep them charged.
5.2. Software Updates
- Keep your devices updated: Regularly update your iPhone, iPad, and other devices to the latest software versions to ensure compatibility and bug fixes.
- Ensure AirPods firmware is up to date: As mentioned earlier, keep your AirPods connected and in use to allow automatic firmware updates.
5.3. Careful Handling
- Avoid exposure to water: AirPods are water-resistant, not waterproof. Avoid exposing them to excessive moisture.
- Protect from physical damage: Handle your AirPods with care to prevent drops, impacts, and other forms of physical damage.
5.4. Battery Management
- Avoid extreme temperatures: Do not expose your AirPods to extreme temperatures, as this can damage the battery.
- Charge regularly: Keep your AirPods charged to maintain battery health.
6. Understanding AirPod Connectivity
To better troubleshoot and prevent future issues, it’s helpful to understand how AirPods connect to your devices.
6.1. Bluetooth Technology
AirPods use Bluetooth technology to establish a wireless connection with your iPhone, iPad, Mac, and other devices. Bluetooth is a short-range wireless communication standard that allows devices to exchange data over a distance of up to 30 feet (10 meters).
Key aspects of Bluetooth connectivity:
- Pairing: The process of establishing a secure connection between two Bluetooth devices.
- Profiles: Bluetooth profiles define the specific types of data that can be exchanged between devices (e.g., audio streaming, hands-free calling).
- Interference: Bluetooth signals can be affected by interference from other wireless devices, physical obstructions, and distance.
6.2. Apple’s H1 and H2 Chips
AirPods (2nd generation and later) and AirPods Pro use Apple’s H1 or H2 chips, which enhance Bluetooth connectivity, improve battery life, and enable features like “Hey Siri.”
Benefits of the H1 and H2 chips:
- Faster pairing: The chips enable quicker and more reliable pairing with Apple devices.
- Improved efficiency: The chips optimize power consumption, extending battery life.
- Enhanced audio processing: The chips enhance audio quality and enable features like Active Noise Cancellation and Transparency mode.
6.3. Proximity Pairing
AirPods use proximity pairing, which simplifies the pairing process with Apple devices. When you open the charging case near your iPhone or iPad, a prompt appears on the screen, allowing you to connect with a single tap.
How proximity pairing works:
- The AirPods use Bluetooth to detect nearby Apple devices.
- The iPhone or iPad recognizes the AirPods and displays a pairing prompt.
- Tapping the “Connect” button establishes a secure Bluetooth connection.
6.4. iCloud Integration
AirPods are integrated with iCloud, which means that once you pair them with one Apple device, they are automatically paired with all other devices associated with your iCloud account.
Benefits of iCloud integration:
- Seamless switching: You can easily switch between devices without having to re-pair your AirPods.
- Automatic updates: Firmware updates are automatically synced across all your devices.
- Find My AirPods: You can use the Find My app to locate your AirPods if they are lost or misplaced.
7. Common AirPod Problems and Solutions
To provide a more comprehensive understanding of AirPod issues, here’s a table summarizing common problems and their solutions:
| Problem | Possible Solutions |
|---|---|
| One AirPod not connecting | Ensure both AirPods are charged, clean the AirPods, reset the AirPods, check Bluetooth connection, update firmware, check audio settings, test with another device. |
| Poor audio quality | Clean the AirPods, adjust audio settings, ensure a stable Bluetooth connection, update firmware. |
| AirPods not charging | Clean the charging contacts, ensure the charging case is charged, try a different charging cable or wireless charging pad, check for physical damage to the charging case or AirPods. |
| AirPods disconnecting frequently | Ensure a stable Bluetooth connection, update firmware, reset the AirPods, check for interference from other wireless devices, move closer to the connected device. |
| Microphone issues | Clean the microphone mesh, adjust microphone settings, ensure a stable Bluetooth connection, update firmware. |
| AirPods not pairing | Ensure Bluetooth is enabled, reset the AirPods, forget the device and reconnect, update firmware, check for compatibility issues with the connected device. |
| Volume too low | Adjust volume settings on the connected device and AirPods, clean the AirPods, check for obstructions blocking the speaker mesh, ensure volume balance is set correctly. |
| Active Noise Cancellation (ANC) not working | Ensure ANC is enabled in the settings, check for a proper fit, clean the AirPods, update firmware. |
| AirPods not detected by Find My app | Ensure Find My AirPods is enabled in iCloud settings, ensure AirPods are connected to an Apple device associated with your iCloud account, check for a stable internet connection on the connected device. |
| AirPods getting wet | Immediately dry the AirPods with a soft, lint-free cloth, avoid using heat or compressed air, allow the AirPods to air dry completely before using or charging, if issues persist, contact Apple Support. |
8. Optimizing Your AirPod Experience
Beyond troubleshooting, there are several ways to optimize your AirPod experience.
8.1. Customizing Controls
AirPods allow you to customize the controls for each AirPod, such as double-tapping or force sensor actions.
How to customize controls:
- Go to Settings > Bluetooth on your iPhone or iPad.
- Find your AirPods in the list of devices and tap the “i” icon next to them.
- Customize the actions for the left and right AirPod under the “Double-Tap” or “Press and Hold” settings.
8.2. Using Spatial Audio
AirPods Pro and AirPods Max support Spatial Audio, which creates an immersive, theater-like sound experience.
How to enable Spatial Audio:
- Go to Settings > Bluetooth on your iPhone or iPad.
- Find your AirPods Pro or AirPods Max in the list of devices and tap the “i” icon next to them.
- Scroll down to the “Spatial Audio” section and enable it.
8.3. Sharing Audio
AirPods allow you to share audio with another pair of AirPods or Beats headphones.
How to share audio:
- Connect your AirPods to your iPhone or iPad.
- Open the Control Center and tap the AirPlay icon.
- Select “Share Audio” and follow the on-screen prompts.
8.4. Using Live Listen
AirPods can be used as a hearing aid with the Live Listen feature.
How to use Live Listen:
- Go to Settings > Control Center on your iPhone or iPad.
- Add the “Hearing” control to the Control Center.
- Open the Control Center and tap the “Hearing” icon.
- Select “Live Listen” and place your iPhone or iPad near the person you want to hear.
9. User Testimonials and Expert Opinions
To provide additional insights and perspectives, let’s consider some user testimonials and expert opinions regarding AirPod connectivity issues.
9.1. User Testimonials
- John D.: “I had constant issues with my right AirPod not connecting. Resetting them finally did the trick. Now they work perfectly.”
- Sarah M.: “I thought my AirPod was broken, but cleaning the charging contacts fixed the issue. It’s amazing how much difference a little cleaning can make.”
- David L.: “Updating the firmware resolved my connectivity problems. I didn’t even realize my AirPods were running outdated software.”
9.2. Expert Opinions
- TechRadar: “AirPod connectivity issues are often caused by software glitches, which can be resolved by resetting the AirPods or updating the firmware.”
- iMore: “Regular maintenance, such as cleaning and proper storage, can significantly reduce the likelihood of encountering AirPod connectivity problems.”
- 9to5Mac: “If you’ve tried all the troubleshooting steps and your AirPod still isn’t working, it’s likely a hardware issue that requires professional repair or replacement.”
10. FAQ: Addressing Common Concerns
Here are some frequently asked questions related to AirPod connectivity issues:
1. Why is my right AirPod not connecting to my iPhone?
Ensure both AirPods are charged, clean them, reset them, check the Bluetooth connection, and update the firmware.
2. How do I reset my AirPods to fix connectivity issues?
Place AirPods in the charging case, close the lid for 30 seconds, open the lid, and press and hold the setup button until the status light flashes amber, then white.
3. Can dirt or earwax affect AirPod connectivity?
Yes, dirt, earwax, and debris can interfere with the AirPod’s sensors and charging contacts, leading to connectivity issues. Regular cleaning is essential.
4. How often should I clean my AirPods?
It is recommended to clean your AirPods at least once a week, or more frequently if you notice any buildup of dirt or earwax.
5. What if my AirPod is physically damaged?
If your AirPod is physically damaged, such as exposure to water or a hard fall, it’s best to consult with a professional repair service or consider replacing the AirPod.
6. How can I check the firmware version of my AirPods?
There is no direct way to check the firmware version of your AirPods. However, keeping your AirPods connected and in use will ensure they are updated automatically in the background.
7. What should I do if my AirPods are still under warranty?
If your AirPods are still under warranty, contact Apple Support for assistance. They can provide further troubleshooting steps, diagnose hardware issues, and offer repair or replacement options.
8. Can I replace just one AirPod if it’s not working?
Yes, Apple offers the option to purchase a single replacement AirPod if one of your AirPods is not working.
9. How can I prevent future AirPod connectivity issues?
To prevent future AirPod connectivity issues, follow these preventive measures: Regular maintenance, software updates, careful handling and battery management.
10. Where can I find reliable information about AirPod troubleshooting?
*WHY.EDU.VN offers comprehensive guides and expert advice on troubleshooting AirPod issues, ensuring you have access to accurate and reliable information.*11. The Future of Wireless Audio Technology
As technology advances, wireless audio devices like AirPods are becoming increasingly sophisticated. Future developments are likely to focus on improving connectivity, battery life, audio quality, and integration with other devices.
Potential future advancements:
- Enhanced Bluetooth technology: Future versions of Bluetooth will offer faster data transfer speeds, lower latency, and improved range.
- Improved battery technology: New battery technologies will extend battery life and reduce charging times.
- Advanced audio processing: AI-powered audio processing will enhance sound quality and enable personalized listening experiences.
- Seamless integration: Wireless audio devices will seamlessly integrate with other devices and platforms, such as smart home systems and virtual reality environments.
12. Conclusion: Regaining Your Audio Freedom
Experiencing connectivity issues with your right AirPod can be frustrating, but with the right troubleshooting steps, you can often resolve the problem and regain your audio freedom. By following the guidance provided in this comprehensive guide, you can systematically diagnose and address the issue, whether it’s a simple software glitch or a more complex hardware malfunction. Remember to start with the basic checks, move on to advanced troubleshooting steps, and seek professional help if necessary. Regular maintenance and careful handling can also prevent future issues, ensuring you continue to enjoy your AirPods to the fullest.
If you’re still facing difficulties or have more specific questions, don’t hesitate to reach out to the experts at WHY.EDU.VN. We’re here to provide detailed, easy-to-understand answers based on expert knowledge. Visit us at 101 Curiosity Lane, Answer Town, CA 90210, United States, or contact us via WhatsApp at +1 (213) 555-0101. You can also explore our website at WHY.EDU.VN for more in-depth articles and resources. Let why.edu.vn be your go-to source for all your questions and knowledge needs!