Why isn’t my sourdough starter rising? The most common reasons a sourdough starter fails to rise are temperature fluctuations, improper feeding ratios, or using the wrong type of flour. At WHY.EDU.VN, we provide expert solutions to help you achieve a thriving starter and bake delicious sourdough bread. Addressing these issues can revitalize your starter, ensuring optimal fermentation and consistent performance in your baking endeavors, leading to successful bread making.
1. Understanding a Struggling Sourdough Starter
A struggling sourdough starter often exhibits sluggish fermentation activity, resulting in a prolonged rise time. Temperature plays a critical role; even at 70°F (21°C), fermentation can slow down significantly.
1.1. Optimal Temperature for Fermentation
The ideal temperature range for sourdough starter fermentation is between 74-76°F (23-24°C). Maintaining this temperature promotes healthy fermentation activity and enhances flavor development. According to a study by the University of California, Davis, temperature significantly impacts the metabolic activity of yeast and bacteria in sourdough starters.
1.2. Reviving a Sluggish Starter
To revive a struggling starter, provide extra attention, care, and nutritious food. This includes:
- Keeping the starter warm
- Feeding it with whole-grain rye flour (due to its increased nutrient content)
- Providing timely feedings of fresh flour and water when it’s ripe
1.3. Example Feeding Schedule
For a week, feed the starter twice daily with the following mixture:
| Ingredient | Example Weight (g) | Baker’s Percentage |
|---|---|---|
| White flour (all-purpose or medium protein bread flour) | 30 | 30% |
| Whole-grain rye flour (or whole wheat flour) | 70 | 70% |
| Water | 100 | 100% |
| Ripe sourdough starter carryover | 20 | 20% |
After a week of consistent fermentation activity and a stable rise and fall pattern, switch back to your regular maintenance recipe.
1.4. Feeding Ratio
A 1:5:5 ratio (starter:water:flour) is optimal for regular maintenance. This ratio ensures a balanced supply of nutrients for the microorganisms in the starter.
2. Determining If Your Sourdough Starter Is Dead
It is remarkably challenging to kill a sourdough starter. Starters can often be revived even after being left unattended for extended periods.
2.1. Starter Resilience
Sourdough starters can withstand a wide range of temperatures, provided they do not exceed 120°F (48°C), which is the temperature at which yeasts begin to die off. Maintaining a temperature below 85°F (29°C), ideally around 74°F (23°C), ensures a balanced yeast and bacteria culture.
2.2. Reviving an Neglected Starter
Even if a starter has been neglected on the counter for a week or in the refrigerator for a month, consistent feedings can often bring it back to life. Consistent feeding is key to revitalizing the microbial balance.
3. Addressing Unpleasant Odors in Your Sourdough Starter
The smell of your sourdough starter can indicate its health and activity. A healthy starter typically has a pleasant, slightly sour aroma.
3.1. Identifying Bad Smells
A foul or repulsive odor may indicate that the starter is not in good condition. Signs of mold should be investigated in such cases. According to research from the University of Reading, undesirable smells often correlate with the presence of spoilage microorganisms.
3.2. Identifying Good Smells
A healthy starter may smell like sulfur, ripe cheese, or yogurt. Starters fed with whole grain rye flour may have a pungent and musty aroma, which is normal and not indicative of spoilage.
3.3. The Importance of Aroma
The aroma is a crucial indicator of the starter’s fermentation activity and overall health. Familiarizing yourself with the characteristic smells of your starter can help you identify potential issues early on.
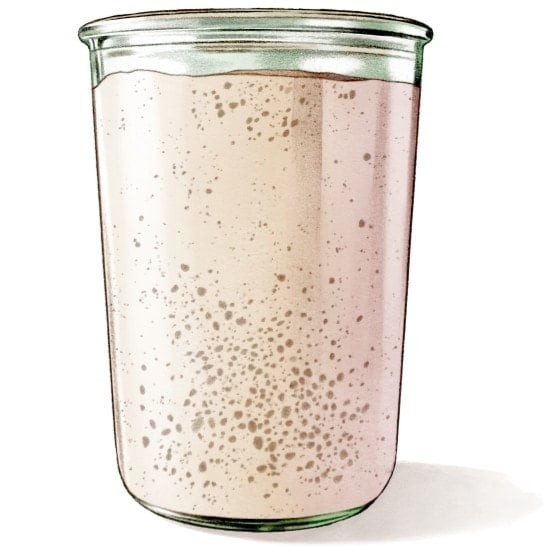
4. Identifying and Handling Mold in Your Sourdough Starter
Mold contamination is a serious issue that requires immediate attention. Recognizing the signs of mold is crucial for maintaining a healthy starter.
4.1. Recognizing Signs of Mold
Typical signs of mold include pink, orange, or green colors, fuzzy white spots, or dark areas with white patches on top. The presence of mold indicates that the starter is no longer safe to use.
4.2. Actionable Steps
If mold is present, discard the starter immediately and create a new one. It is not safe to try to salvage a moldy starter.
4.3. Creating a New Starter
Follow a guide to create a new sourdough starter from scratch. A fresh, healthy starter can be ready for baking in just seven days.
Alt text: Illustration of a sourdough starter jar, emphasizing the importance of maintaining a healthy starter to avoid mold contamination, as indicated by the fresh, clean appearance of the starter in the jar.
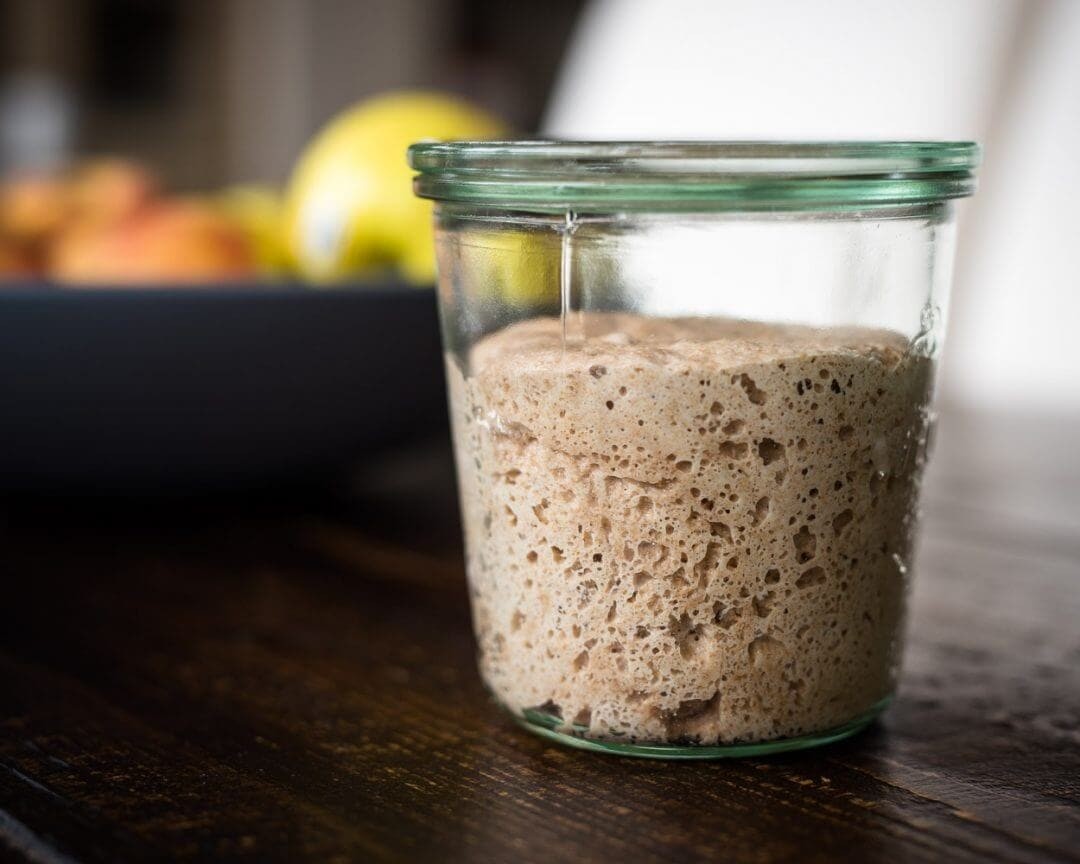
5. Understanding the Rise and Fall of Your Sourdough Starter
The rise and fall of a sourdough starter are natural processes that indicate fermentation activity. The extent of the rise and fall can vary depending on the flour used.
5.1. The Fermentation Process
As fermentation progresses, gases are produced and trapped in the dough, causing it to rise. This is a good sign of strong fermentation activity. The University of Ghent’s research indicates that gas production is directly related to the metabolic activity of yeast and bacteria.
5.2. Factors Affecting Rise Height
The type of flour used significantly affects the rise height. Starters fed with strong, high-protein white flour tend to rise higher due to the flour’s gas-trapping capabilities.
5.3. Flour Types and Their Effects
Flours like whole wheat or whole rye may not rise as high but are still suitable for baking. The rise height is not the only indicator of a starter’s health or strength.
5.4. When Starters Don’t Fall
Some starters may not fall or may only collapse slightly in the jar. This is related to the flour used and is not necessarily a negative sign. Other signs of fermentation should be used to determine when the starter is ripe and ready for feeding.
6. Optimizing Rise Height in Your Sourdough Starter
The height to which a sourdough starter rises in its jar is influenced by several factors, with flour type being a primary determinant.
6.1. The Role of Flour
High-protein white flour typically results in a starter that rises very high due to its superior gas-trapping capabilities. Conversely, whole wheat or whole rye flour may not yield as significant a rise but remains perfectly suitable for baking.
6.2. Other Signs of Fermentation
It’s essential to consider other signs of fermentation, such as aroma and consistency, in addition to rise height. These factors provide a more comprehensive assessment of starter health and ripeness.
6.3. Hydration Levels
Hydration levels also play a role. Starters with lower hydration may exhibit different rise characteristics compared to those with higher hydration levels.
7. Addressing Liquidity and Runny Consistency in Your Sourdough Starter
A loose or runny consistency in a sourdough starter is not necessarily a problem and is often related to hydration levels and the type of flour used.
7.1. Hydration Levels and Consistency
Starters with high hydration (a large amount of water relative to flour) tend to be more liquidy or runny than those with lower hydration.
7.2. The Impact of Hydration on Fermentation
Higher hydration levels can increase fermentation activity, assuming all other factors are equal. The increased water content facilitates the metabolic processes of the yeast and bacteria.
7.3. Flour Type and Consistency
The type of flour used also affects consistency. Whole grain flours may result in a slightly thicker consistency compared to white flours.
8. Understanding Bubble Formation in Your Sourdough Starter
The presence and size of bubbles in a sourdough starter are often related to the type of flour used for feedings.
8.1. Flour Type and Bubble Size
Large bubbles are not essential for a starter to be healthy. High-protein white flour typically produces more and larger bubbles due to its superior gas-trapping capabilities.
8.2. Whole Grain Flour and Bubbles
Whole grain flours, which have less gas-trapping capability, may not produce as many large bubbles. This does not mean the starter is unhealthy; it simply reflects the characteristics of the flour.
8.3. The Importance of Observation
Observing bubble formation can provide insights into the fermentation process, but it should not be the sole indicator of starter health.
9. Using Different Flours to Feed Your Sourdough Starter
It is perfectly acceptable to use different flours to feed your sourdough starter, provided they are suitable for baking.
9.1. Flexibility in Flour Choice
Any flour that can be used for baking can be used to feed a starter. Switching flours temporarily will not harm the starter.
9.2. Switching Back to Regular Flour
There is no need to gradually transition back to your typical flour. The starter can handle an immediate switch without any issues.
9.3. How to Feed Your Starter
Regular feeding practices are essential for maintaining a healthy and active starter.
10. Enhancing Activity in Your Sourdough Starter
To increase fermentation activity in your sourdough starter, consider the following strategies.
10.1. Temperature Control
Maintain a warm temperature, ideally between 74-76°F (23-24°C) or warmer. Temperature is a critical factor in fermentation activity.
10.2. Incorporating Whole Grains
Use more whole grains in each feeding. Whole grains provide additional nutrients that support microbial activity.
10.3. Timely Feedings
Feed the starter when it is ripe, not too early or too late. Ripe starters have a balanced population of yeast and bacteria.
10.4. Avoiding Refrigeration
Avoid placing the starter in the refrigerator, as this slows down fermentation. Room temperature is ideal for maintaining activity.
11. Adjusting Sourness in Your Sourdough Starter
Controlling the sourness of a sourdough starter involves several techniques that affect the balance of acids produced during fermentation.
11.1. Factors Influencing Sourness
While a sour starter can contribute to a sour flavor in bread, the levain and dough composition have a more significant impact.
11.2. Creating a Sourer Starter
To make a starter or levain sourer:
- Increase the proportion of whole grains
- Maintain a warmer temperature (around 80°F/26°C)
- Use or feed the starter after it is ripe
11.3. Levain vs. Starter
The levain, which is made from the starter, is where most efforts to increase sourness should be focused.
12. Addressing the Formation of a Thin, Clear Layer on Your Sourdough Starter
The formation of a thin, clear liquid layer, often called “hooch,” is a common occurrence and usually not a cause for concern.
12.1. Understanding “Hooch”
This layer indicates that the starter is hungry and needs feeding. It may have a strong aroma, similar to nail polish remover.
12.2. Remedial Steps
To address this issue:
- Pour off the clear liquid or stir it back into the starter
- Discard a portion of the starter
- Feed it as usual
12.3. Preventing Hooch Formation
If hooch forms frequently, it may be necessary to feed the starter more often. Consistent feeding schedules can help prevent its occurrence.
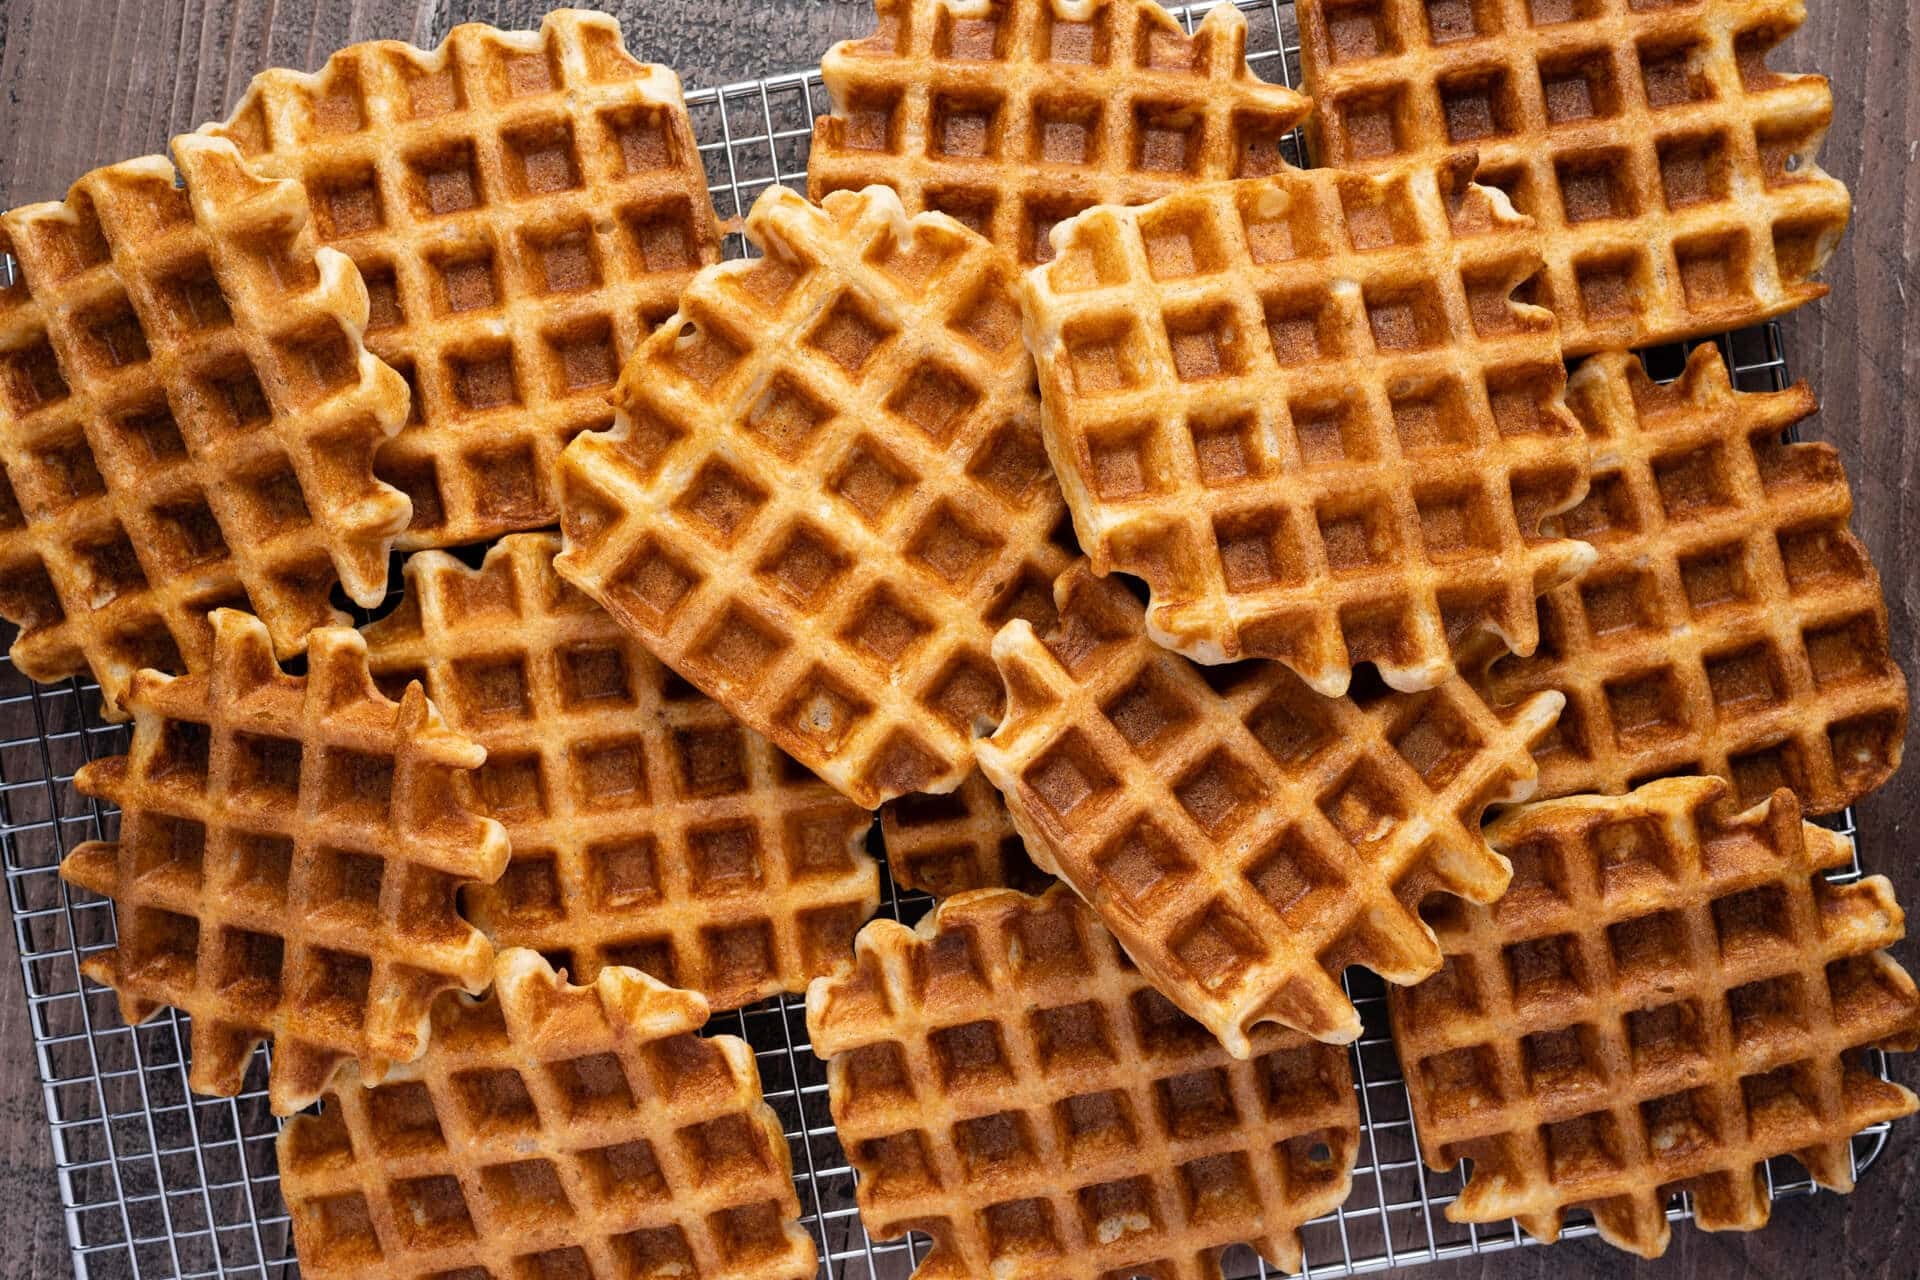
13. The Importance of Discarding Starter During Feedings
Discarding a portion of the sourdough starter each time it is fed is essential for maintaining its health and preventing it from growing too large.
13.1. Managing Starter Volume
If you did not discard, the starter would grow to an unmanageable size. Discarding helps maintain a manageable quantity.
13.2. Maintaining Balance
Discarding also prevents the starter from becoming overly acidic, which can harm the balance of bacteria and yeast.
13.3. Utilizing Discarded Starter
Instead of wasting the discarded starter, use it in various recipes.
Alt text: A plate of golden sourdough waffles made using discarded sourdough starter, showcasing a delicious and sustainable way to reduce waste and enjoy the tangy flavor of sourdough in a classic breakfast treat.
14. Storing Your Sourdough Starter in the Refrigerator
Storing a sourdough starter in the refrigerator is a convenient way to slow down fermentation and reduce the frequency of feedings.
14.1. Benefits of Refrigeration
Refrigeration is suitable for short-term storage (one to two weeks). It slows down the metabolic activity of the yeast and bacteria.
14.2. Reviving After Refrigeration
After refrigeration, it is helpful to take the starter out, feed it, and let it ferment on the counter before placing it back in the fridge.
14.3. Using Starter Directly from the Refrigerator
Avoid using the starter directly from the refrigerator. Instead, revive it with a few timely feedings before using it to make a levain.
14.4. Storing for Long-Term
Proper storage techniques are essential for maintaining the starter’s health over extended periods.
15. Handling Missed Feedings of Your Sourdough Starter
Missing a feeding of your sourdough starter is usually not a significant issue, provided it is addressed promptly.
15.1. Addressing Missed Feedings
If you miss a feeding, give the starter a feeding as soon as you remember and continue with your regular schedule.
15.2. Consequences of Repeated Missed Feedings
Missing too many feedings can degrade the starter’s performance, making it overly acidic and reducing fermentation activity.
15.3. Restoring Regular Activity
If the starter’s activity is significantly reduced, return to your regular feeding schedule until you see steady, reliable fermentation.
16. Cleaning Your Sourdough Starter Jar
Regular cleaning of your sourdough starter jar is essential for maintaining a hygienic environment for fermentation.
16.1. Frequency of Cleaning
Clean the jar as often as necessary to prevent excessive buildup of dried starter. This typically involves transferring a small amount of starter to a clean jar every two weeks.
16.2. Preventing Contamination
Regular cleaning helps prevent the growth of unwanted microorganisms and ensures a healthy starter.
16.3. Maintaining Hygiene
Maintaining a clean environment is crucial for the overall health and performance of the starter.
17. Using Tap Water to Feed Your Sourdough Starter
Using tap water to feed your sourdough starter is generally acceptable, provided the water is safe to drink.
17.1. Water Quality
Any water that is safe for human consumption can be used to feed a sourdough starter. The University of Minnesota Extension recommends using filtered water if your tap water contains high levels of chlorine.
17.2. Chlorine Levels
While high levels of chlorine may inhibit fermentation, this is typically not a significant issue for an established starter.
17.3. Ensuring Water Safety
Ensuring the water is free from contaminants is essential for maintaining a healthy starter.
18. Understanding the Float Test for Sourdough Starters
The float test is a common method used to assess the activity and readiness of a sourdough starter, but it is not always definitive.
18.1. Limitations of the Float Test
The float test is not a foolproof indicator of starter health. Starters maintained with 100% rye flour, for example, may not float due to the flour’s lower gas-trapping capability.
18.2. Comprehensive Assessment
Instead of relying solely on the float test, assess the starter holistically. Look for signs such as rising, bubbles, a sour aroma, and a loose consistency.
18.3. Indicators of Ripeness
These indicators provide a more accurate assessment of the starter’s ripeness and readiness for baking.
19. Creating a Gluten-Free Sourdough Starter
It is possible to create and maintain a gluten-free sourdough starter using flours such as brown rice flour or buckwheat flour.
19.1. Suitable Gluten-Free Flours
These flours provide the necessary sugars and minerals to support fermentation by lactic acid bacteria and yeasts. The Academy of Nutrition and Dietetics supports the use of gluten-free sourdough starters for those with celiac disease or gluten sensitivity.
19.2. Supporting Fermentation
Despite not containing gluten, these flours facilitate the fermentation process, allowing for the creation of gluten-free sourdough bread.
19.3. Versatility
Gluten-free sourdough starters offer a versatile alternative for those with dietary restrictions.
20. Converting Between Stiff and Liquid Sourdough Starters
Converting between a stiff (50-65% hydration) and liquid (90-110% hydration) starter is a straightforward process.
20.1. Adjusting Hydration
To convert a stiff starter to a liquid starter, simply add water. To convert a liquid starter to a stiff starter, remove water.
20.2. Immediate Adjustment
This conversion does not need to be gradual. The hydration level can be adjusted at the next feeding.
20.3. Flexibility
This flexibility allows bakers to adapt their starter to different recipes and preferences.
Alt text: A close-up view of a stiff sourdough starter, highlighting its firm texture and readiness for baking, showcasing the ideal consistency for certain sourdough recipes that require a less hydrated starter.
21. Understanding Sourdough Starter Feeding Ratios
Sourdough starter feeding ratios are based on baker’s percentages, where all ingredients are related to the total flour in the mixture.
21.1. Ratio Notation
Ratios are often represented as 1:2:2, indicating one part ripe starter to two parts water to two parts flour.
21.2. Example Ratios
For 12-hour feedings, a typical ratio is 1:5:5 (starter:water:flour). For example, 20g of ripe starter would require 100g of water and 100g of flour.
21.3. Factors Affecting Ratios
Successful ratios depend on the flour used and the environment, particularly temperature.
21.4. Flexibility in Ratios
There are many common sourdough starter feeding ratios, and any can be effective depending on the specific conditions and flour.
Final Thoughts on Sourdough Starter Problems
Addressing common sourdough starter problems requires observation, attention, and adaptation.
Observation and Adaptation
By observing your starter daily, you can learn to spot signs of issues and adapt your practices accordingly.
Key Factors for Success
Understanding factors such as temperature, flour type, and feeding ratios is crucial for maintaining a healthy and active sourdough starter.
Expert Assistance at WHY.EDU.VN
For more in-depth information and expert solutions to any questions, visit WHY.EDU.VN, where you can connect with specialists ready to assist you.
FAQ: Troubleshooting Your Sourdough Starter
1. Why is my sourdough starter not doubling in size?
A sourdough starter may not double in size due to temperature fluctuations, inconsistent feeding schedules, or an imbalance in the yeast and bacteria populations. Maintaining a consistent warm environment and regular feedings can help improve its activity.
2. How often should I feed my sourdough starter?
The feeding frequency depends on whether the starter is kept at room temperature or in the refrigerator. At room temperature, feed it once or twice daily. If refrigerated, feed it once a week after taking it out to activate.
3. What type of water is best for feeding my sourdough starter?
Use non-chlorinated or filtered water to avoid inhibiting the fermentation process. Tap water that has been left to sit for 24 hours to allow chlorine to evaporate is also suitable.
4. Can I use bread flour instead of all-purpose flour for my starter?
Yes, bread flour can be used. Its higher protein content can boost the starter’s activity. Experiment to see which flour yields the best results for your specific environment and starter.
5. How do I know when my sourdough starter is ready to use?
A ripe starter will have doubled in size, be full of bubbles, and have a slightly sour aroma. It should also pass the float test, although this is not always definitive.
6. What does it mean if my sourdough starter smells like alcohol?
A strong alcohol smell indicates that the starter is hungry and needs to be fed. This smell is due to the yeast producing alcohol as a byproduct of fermentation.
7. Can I revive a dried-out sourdough starter?
Yes, even a dried-out starter can often be revived. Scrape off the dried layer and begin feeding the starter regularly with equal parts flour and water until it becomes active again.
8. How can I make my sourdough starter more sour?
To increase sourness, use whole grain flours, maintain a warmer temperature, and extend the time between feedings. These conditions favor the production of lactic acid, which contributes to a sour flavor.
9. What is the ideal consistency for a sourdough starter?
The ideal consistency is similar to pancake batter, thick enough to hold its shape briefly but thin enough to pour. Adjust the water-to-flour ratio to achieve this consistency.
10. Is it normal for liquid to form on top of my sourdough starter?
Yes, a clear or dark liquid (hooch) forming on top is normal. It indicates that the starter is hungry. Pour off the liquid and feed the starter.
At WHY.EDU.VN, we understand the challenges you face in finding accurate and reliable answers. That’s why we’ve created a platform where you can ask any question and receive detailed, expert-backed responses. Our team of specialists is dedicated to providing you with the knowledge you need to succeed.
Ready to get your questions answered? Visit WHY.EDU.VN, located at 101 Curiosity Lane, Answer Town, CA 90210, United States, or contact us via WhatsApp at +1 (213) 555-0101. Let us help you unlock the answers you’ve been searching for. Discover reliable solutions and expert insights at why.edu.vn today! We are committed to providing comprehensive support and guidance to address any challenges you may encounter.