Why Is My Sourdough Starter Runny? At WHY.EDU.VN, we understand the frustration of a sourdough starter that isn’t behaving as expected; a runny consistency is a common issue with several potential causes and straightforward solutions. Understanding the balance of hydration and flour types can lead to a thriving starter, paving the way for delicious sourdough bread. Let’s explore the reasons behind a liquidy sourdough starter and how to remedy it, ensuring a perfect bake every time with insights on sourdough consistency and starter troubleshooting.
1. What Makes a Sourdough Starter Runny?
A runny sourdough starter, characterized by a loose and liquid consistency, is primarily due to the hydration level and type of flour used. The higher the hydration (more water relative to flour), the more liquid the starter will be. Let’s dive into the factors that influence the consistency of your sourdough starter and how to address them.
1.1 High Hydration Levels
A starter with high hydration has a significant amount of water compared to the flour. This increased water content leads to a more liquid consistency.
- Explanation: Hydration refers to the ratio of water to flour in your starter. Starters are often maintained at 100% hydration (equal parts water and flour), but variations exist. A starter with a higher hydration level (e.g., more water than flour) will naturally be more runny.
- Solution: If your starter is too runny, reduce the amount of water in the next feeding. For example, if you typically use a 1:1:1 ratio (starter:water:flour), try a 1:0.75:1 ratio to decrease the hydration.
- Example: Imagine your starter recipe calls for 50g of starter, 50g of water, and 50g of flour. To reduce the hydration, use 50g of starter, 37.5g of water, and 50g of flour.
1.2 Type of Flour Used
The type of flour significantly impacts your starter’s consistency. Different flours absorb water differently, affecting the overall texture.
- Explanation: High-protein flours, like bread flour, absorb more water than lower-protein flours, such as all-purpose flour. Whole grain flours, such as whole wheat or rye, also absorb more water due to their higher fiber content.
- Solution: If you’re using a low-protein flour and your starter is too runny, switch to a higher-protein flour. Bread flour or a mix of bread flour and whole wheat flour can help create a thicker consistency.
- Example: If you’ve been using all-purpose flour, try switching to bread flour for your next few feedings. This adjustment can help your starter hold more water and become less runny.
1.3 Fermentation Activity
The fermentation process itself can also contribute to a runny starter. As the yeast and bacteria consume the sugars in the flour, they produce byproducts that can affect the starter’s viscosity.
- Explanation: During fermentation, enzymes break down the starches in the flour, which can result in a more liquid consistency. This breakdown is more pronounced in starters with higher hydration levels.
- Solution: Ensure you are feeding your starter regularly to maintain a healthy balance of yeast and bacteria. Over-fermentation can lead to a runny texture, so feed your starter when it peaks (doubles in size) to prevent it from becoming overly acidic and liquid.
- Example: If your starter consistently becomes runny before you feed it, try feeding it more frequently or using a lower hydration ratio to slow down the fermentation process.
1.4 Temperature Fluctuations
Temperature plays a crucial role in fermentation. Higher temperatures accelerate fermentation, leading to a quicker breakdown of starches and a potentially runny starter.
- Explanation: Yeast and bacteria thrive in warm environments, which speeds up their metabolic processes. This increased activity can lead to a faster breakdown of starches and a more liquid consistency.
- Solution: Maintain a consistent temperature for your starter. Aim for a temperature between 70-75°F (21-24°C). If your kitchen is too warm, consider placing your starter in a cooler spot or using a temperature-controlled environment.
- Example: During the summer months, you might need to adjust your feeding schedule or lower the hydration of your starter to counteract the effects of higher temperatures.
1.5 Inconsistent Feeding Schedule
An inconsistent feeding schedule can disrupt the balance of yeast and bacteria in your starter, leading to various issues, including a runny consistency.
- Explanation: Regular feedings provide the necessary nutrients for the yeast and bacteria to thrive. Irregular feedings can cause the starter to become overly acidic or starved, affecting its texture and performance.
- Solution: Establish a consistent feeding schedule, typically once or twice a day, depending on the temperature and activity of your starter. Consistency helps maintain a stable environment for the microorganisms.
- Example: If you typically feed your starter every 12 hours, stick to this schedule as closely as possible. If you need to adjust, do so gradually to avoid shocking the starter.
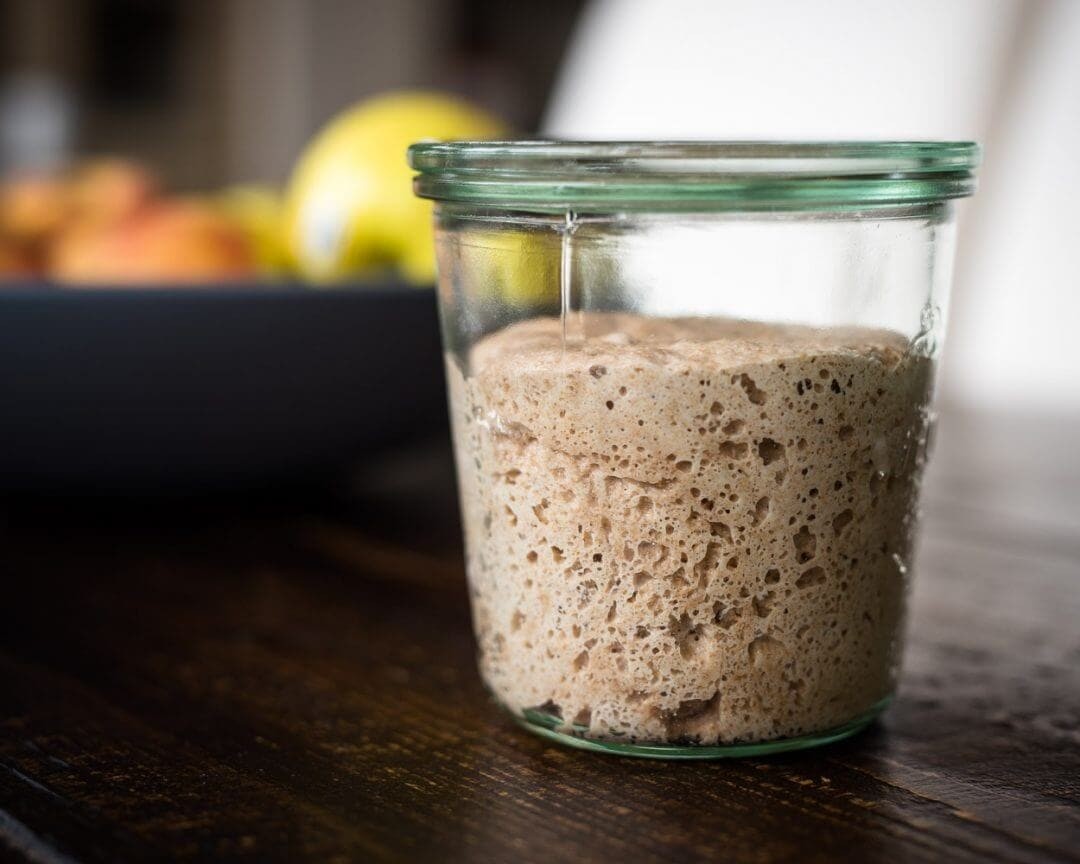 Runny sourdough starter texture
2. Detailed Steps to Fix a Runny Sourdough Starter
Fixing a runny sourdough starter involves adjusting hydration, flour types, feeding schedules, and temperature control. Here’s a step-by-step guide to help you restore your starter to the desired consistency.
2.1 Reduce Hydration Gradually
Start by reducing the hydration level incrementally to avoid shocking your starter.
- Assess Current Hydration: Determine the current hydration level of your starter (e.g., 100% hydration means equal parts water and flour).
- Reduce Water Amount: Reduce the amount of water by 10-20% in each feeding. For example, if you use a 1:1:1 ratio (starter:water:flour), switch to a 1:0.8:1 ratio.
- Monitor Consistency: Observe the consistency of your starter over the next few feedings. If it’s still too runny, reduce the water amount further.
- Adjust Gradually: Make small adjustments to avoid disrupting the balance of your starter.
2.2 Switch to Higher Protein Flour
Changing the type of flour can significantly improve the consistency of your starter.
- Choose High-Protein Flour: Opt for bread flour, which has a higher protein content than all-purpose flour.
- Gradual Transition: Gradually introduce bread flour into your feedings. Start by using a mix of 50% all-purpose flour and 50% bread flour.
- Monitor Absorption: Observe how the flour absorbs water. Bread flour should help create a thicker consistency.
- Adjust as Needed: If necessary, transition entirely to bread flour for optimal results.
2.3 Implement Consistent Feeding Schedule
A regular feeding schedule is crucial for maintaining a healthy and stable starter.
- Determine Feeding Frequency: Decide on a feeding schedule based on your starter’s activity and the ambient temperature. Typically, once or twice a day is sufficient.
- Set Reminders: Use reminders to ensure you don’t miss feedings. Consistency is key.
- Feed at Peak Activity: Feed your starter when it has doubled in size or reached its peak activity. This ensures the microorganisms have enough food to thrive.
- Avoid Over-Fermentation: Over-fermentation can lead to a runny consistency. Feed your starter before it becomes overly acidic or breaks down too much.
2.4 Control Temperature
Temperature control is essential for managing the fermentation process.
- Maintain Optimal Temperature: Keep your starter at a consistent temperature between 70-75°F (21-24°C).
- Use a Thermometer: Use a thermometer to monitor the temperature of your starter.
- Adjust Placement: If your kitchen is too warm, place your starter in a cooler spot. In colder environments, use a proofing box or warming mat.
- Avoid Extremes: Avoid exposing your starter to extreme temperatures, as this can harm the microorganisms.
2.5 Adjust Flour Ratio with Whole Grains
Adding whole grains like rye or whole wheat can influence the thickness and activity of your starter.
- Incorporate Whole Grains: Introduce a portion of whole grain flour into your feedings. Start with 20-30% whole grain flour.
- Monitor Hydration: Whole grains absorb more water, so you may need to adjust the hydration accordingly.
- Assess Activity: Observe the activity of your starter. Whole grains can boost fermentation and improve the rise.
- Adjust as Needed: Experiment with different ratios of whole grain to white flour to find the right balance for your starter.
3. Addressing Specific Runny Starter Issues
Certain specific issues can contribute to a runny starter. Here’s how to address them:
3.1 Hooch Formation
Hooch is a liquid layer that forms on top of the starter, indicating that it is hungry and needs feeding.
- Explanation: Hooch is a byproduct of fermentation and is essentially alcohol. It forms when the starter has exhausted its food supply.
- Solution: Pour off the hooch (or stir it back in) and feed your starter immediately. If hooch forms frequently, increase the frequency of feedings.
3.2 Over-Fermentation
Over-fermentation occurs when the starter is left too long without feeding, leading to a breakdown of starches and a runny consistency.
- Explanation: Over time, the microorganisms in the starter consume all available sugars, leading to a more acidic and liquid environment.
- Solution: Feed your starter more frequently and ensure it has enough food to sustain its activity. Discard a larger portion of the starter before feeding to reduce acidity.
3.3 Inactive Starter
An inactive starter may not be fermenting properly, leading to a runny consistency and poor rise.
- Explanation: An inactive starter lacks the necessary microbial activity to leaven bread effectively.
- Solution: Revive your starter by feeding it regularly, keeping it warm, and using high-quality flour. Consider adding a small amount of rye flour to boost activity.
4. Advanced Techniques for Starter Management
For those looking to fine-tune their starter management skills, here are some advanced techniques:
4.1 Stiff vs. Liquid Starters
Understanding the difference between stiff and liquid starters can help you tailor your approach to achieve the desired consistency.
- Stiff Starter: Typically has a hydration level of 50-65%. It is less prone to running and can provide a more controlled fermentation.
- Liquid Starter: Typically has a hydration level of 100% or higher. It is more active but can be more prone to running.
4.2 Autolyse
Autolyse is a technique where you mix the flour and water together and let it sit before adding the starter. This can improve the texture and consistency of your dough.
- Explanation: Autolyse allows the flour to fully hydrate, which can lead to a more extensible and elastic dough.
- Application: Mix your flour and water and let it sit for 20-60 minutes before adding your starter.
4.3 Cold Fermentation
Cold fermentation involves slowing down the fermentation process by refrigerating the dough. This can improve the flavor and texture of your bread.
- Explanation: Cold fermentation allows for a longer, slower fermentation, which develops more complex flavors.
- Application: After mixing your dough, refrigerate it for 12-24 hours before shaping and baking.
5. Troubleshooting Scenarios with Runny Sourdough Starter
Let’s explore specific scenarios you might encounter with your runny starter and how to address them effectively.
5.1 Starter is Runny and Smells Sour
A runny starter that also smells overly sour is likely over-fermented.
- Cause: This indicates that the yeast and bacteria have consumed all the available sugars and are producing excessive amounts of acid.
- Solution: Discard a larger portion of the starter before feeding (e.g., discard 90% and keep only 10%). Feed it with fresh flour and water, and increase the feeding frequency to prevent over-fermentation.
5.2 Starter is Runny and Not Rising
A runny starter that isn’t rising indicates that it is likely inactive and not fermenting properly.
- Cause: This could be due to a lack of nutrients, improper temperature, or an imbalance of yeast and bacteria.
- Solution: Ensure your starter is kept at the right temperature (70-75°F or 21-24°C). Feed it regularly with high-quality flour, and consider adding a small amount of rye flour to boost activity. Be patient and give it a few days to recover.
5.3 Starter is Runny After Refrigeration
A starter that becomes runny after being stored in the refrigerator might need some reactivation.
- Cause: Refrigeration slows down the fermentation process, but it can also lead to a separation of liquids and solids.
- Solution: Take the starter out of the refrigerator and let it come to room temperature. Discard the runny liquid (hooch) and feed the remaining starter with fresh flour and water. Give it a few feedings at room temperature to revive its activity before using it in a recipe.
5.4 Starter is Runny and Has Small Bubbles
A runny starter with small bubbles might be fermenting, but not vigorously enough.
- Cause: This could be due to insufficient gluten development or a lack of strength in the starter.
- Solution: Try using bread flour, which has a higher protein content, to improve gluten development. Ensure your starter is fed regularly and kept at the right temperature to encourage more vigorous fermentation.
5.5 Starter is Runny with No Other Symptoms
If your starter is simply runny but otherwise smells fine and is rising properly, it might just be the hydration level.
- Cause: This is often due to a higher hydration level (more water than flour) or the type of flour used.
- Solution: Reduce the hydration level slightly by using less water in your feedings. If you’re using all-purpose flour, try switching to bread flour to see if that helps improve the consistency.
6. The Science Behind Sourdough Starter Consistency
Understanding the science behind sourdough fermentation can provide insights into why your starter behaves the way it does.
6.1. Microbial Activity
Sourdough starters are teeming with microbial life, primarily yeast and lactic acid bacteria (LAB). These microorganisms work together to ferment the flour and water, producing the gases and acids that give sourdough bread its unique flavor and texture.
- Yeast: Responsible for producing carbon dioxide, which leavens the bread.
- LAB: Produce lactic acid and acetic acid, which contribute to the sour flavor and help preserve the dough.
6.2. Enzymatic Activity
Enzymes in the flour break down starches into simpler sugars, which the yeast and bacteria then consume. This process can affect the viscosity of the starter.
- Amylases: Break down starches into sugars.
- Proteases: Break down proteins, which can affect the gluten structure.
6.3. Gluten Development
Gluten, formed from the proteins in wheat flour, provides structure and elasticity to the dough. Proper gluten development is essential for trapping gases and creating a light, airy bread.
- Hydration: Proper hydration is necessary for gluten to develop.
- Mixing: Mixing helps align the gluten proteins, creating a strong network.
6.4. Acid Production
The acids produced by LAB lower the pH of the dough, which can affect enzyme activity, gluten strength, and flavor.
- Lactic Acid: Contributes to a mild, tangy flavor.
- Acetic Acid: Contributes to a more sharp, vinegary flavor.
7. How to Maintain a Healthy Sourdough Starter
Maintaining a healthy sourdough starter involves consistent care and attention to detail. Here are some tips to keep your starter thriving:
- Use High-Quality Flour: Choose unbleached, high-protein flour for best results.
- Feed Regularly: Establish a consistent feeding schedule based on your starter’s activity and the ambient temperature.
- Control Temperature: Keep your starter at a consistent temperature between 70-75°F (21-24°C).
- Monitor Activity: Observe your starter for signs of healthy fermentation, such as a consistent rise and fall, bubbles, and a pleasant aroma.
- Adjust Hydration: Adjust the hydration level as needed to achieve the desired consistency.
- Cleanliness: Keep your starter jar clean to prevent the growth of unwanted microorganisms.
- Be Patient: Sourdough baking requires patience and attention to detail. Don’t be discouraged by initial setbacks.
8. Common Sourdough Starter Feeding Ratios
Starter feeding ratios are crucial for maintaining the health and activity of your sourdough starter. These ratios determine the proportions of starter, flour, and water used in each feeding. Understanding and using the correct ratios can help you control the fermentation process, achieve the desired consistency, and ensure your starter is ready for baking.
| Ratio | Starter (parts) | Water (parts) | Flour (parts) | Notes |
|---|---|---|---|---|
| 1:1:1 | 1 | 1 | 1 | Equal parts starter, water, and flour. A common and balanced ratio suitable for daily maintenance. |
| 1:2:2 | 1 | 2 | 2 | Double the amount of water and flour compared to the starter. Encourages faster fermentation and is useful for activating a starter before baking. |
| 1:5:5 | 1 | 5 | 5 | A larger ratio with significantly more water and flour. Slows down fermentation, often used for maintenance when you want to feed less frequently. |
| 1:10:10 | 1 | 10 | 10 | Even larger ratio, further slowing down fermentation. Useful for long-term storage in the refrigerator or when you want to minimize feeding frequency. |
| 1:0.5:1 | 1 | 0.5 | 1 | Lower hydration ratio, resulting in a stiffer starter. Can enhance flavor development and is suitable for specific bread recipes that require a drier starter. |
| 1:1:0.5 | 1 | 1 | 0.5 | More flour than water results in very thick dough. It gives the final bread chewier texture. |
9. FAQ about Runny Sourdough Starters
9.1 Why is my sourdough starter so liquidy even after feeding?
If your starter remains liquidy after feeding, it could be due to high hydration, low-protein flour, or over-fermentation. Adjust the hydration and flour type, and ensure regular feedings.
9.2 Can I still use a runny sourdough starter for baking?
Yes, you can still use a runny sourdough starter, but it may affect the dough’s hydration. Adjust the amount of water in your recipe accordingly.
9.3 How often should I feed my sourdough starter if it’s runny?
Feed your starter more frequently to prevent it from becoming overly acidic and liquidy. Aim for once or twice a day, depending on its activity.
9.4 What type of flour is best for a sourdough starter that’s too runny?
Bread flour, with its high protein content, is best for a runny sourdough starter. It absorbs more water and helps create a thicker consistency.
9.5 How does temperature affect a runny sourdough starter?
High temperatures can accelerate fermentation, leading to a quicker breakdown of starches and a potentially runny starter. Maintain a consistent temperature between 70-75°F (21-24°C).
9.6 Is hooch formation a sign of a bad sourdough starter?
Hooch formation indicates that the starter is hungry and needs feeding. It’s not necessarily a sign of a bad starter, but it should be addressed promptly.
9.7 How can I revive a runny sourdough starter after refrigeration?
Take the starter out of the refrigerator and let it come to room temperature. Discard the runny liquid (hooch) and feed the remaining starter with fresh flour and water.
9.8 Can I convert a runny starter to a stiff starter?
Yes, you can convert a runny starter to a stiff starter by gradually reducing the amount of water in your feedings.
9.9 What are the signs of a healthy sourdough starter?
Signs of a healthy sourdough starter include a consistent rise and fall, bubbles, a pleasant aroma, and a slightly tangy flavor.
9.10 How do whole grains affect the consistency of my sourdough starter?
Whole grains absorb more water than white flour, so adding whole grains can influence the thickness and activity of your starter. Adjust the hydration accordingly.
10. Conclusion: Mastering Sourdough Starter Consistency
Dealing with a runny sourdough starter is a common challenge, but with the right knowledge and techniques, you can easily restore it to a healthy, balanced state. Understanding the factors that influence starter consistency—hydration, flour type, fermentation activity, temperature, and feeding schedule—is key to successful sourdough baking. By following the steps outlined in this guide, you can troubleshoot and correct a runny starter, ensuring it performs optimally and delivers delicious results every time.
Remember, sourdough baking is a journey of experimentation and learning. Don’t be afraid to adjust your approach based on your starter’s unique characteristics and your own baking goals. With patience and persistence, you’ll develop a deep understanding of your starter and master the art of sourdough baking.
Are you still struggling with your sourdough starter or have more questions about sourdough baking? Visit WHY.EDU.VN, where our experts are ready to provide detailed answers and personalized guidance. Post your questions and get the support you need to master sourdough and other baking challenges. Contact us at 101 Curiosity Lane, Answer Town, CA 90210, United States, or reach out via WhatsApp at +1 (213) 555-0101. Let why.edu.vn be your trusted partner in your baking journey, ensuring you achieve the perfect bake every time.