Is your sourdough dough persistently sticky, making it difficult to handle? At WHY.EDU.VN, we understand the frustrations of sourdough baking, and a sticky dough is a common hurdle, but don’t worry, it’s a problem with solutions, and we’re here to guide you through them with easy fixes. Discover effective tips and techniques for a smoother, more manageable dough, leading to perfect loaves every time with the right starter strength and proper flour hydration.
1. Understanding Sourdough Stickiness: A Comprehensive Guide
A sticky sourdough can be a baker’s nightmare. It’s crucial to understand why your dough is so unmanageable. Several factors can contribute to this issue, including hydration levels, gluten development, starter activity, and environmental conditions. Let’s dive deep into each of these aspects to help you identify the root cause of your sticky dough and find effective solutions.
1.1. The Hydration Factor: Balancing Water and Flour
Hydration, or the ratio of water to flour in your dough, plays a pivotal role in its texture. Sourdough recipes often call for high hydration levels to achieve that coveted open crumb structure. However, too much water can result in a sticky, difficult-to-handle dough.
1.1.1. Flour Absorption Rates
Different types of flour absorb water differently. For instance, bread flour, with its high protein content, typically absorbs more water than all-purpose flour. Whole wheat flour, due to the presence of bran, also tends to soak up more liquid.
Table 1: Flour Types and Water Absorption
| Flour Type | Protein Content | Water Absorption | Notes |
|---|---|---|---|
| Bread Flour | High | High | Ideal for sourdough due to its gluten-forming potential. |
| All-Purpose Flour | Medium | Medium | Can be used, but may result in a less structured loaf. |
| Whole Wheat Flour | Medium | High | Adds flavor and nutrients but can make the dough denser. |
| Rye Flour | Low | High | Adds a distinctive flavor but should be used in moderation. |
1.1.2. Environmental Considerations
Humidity levels in your environment can also affect how flour absorbs water. In humid climates, flour tends to absorb moisture from the air, leading to a wetter dough. Conversely, in dry climates, flour may require more water to achieve the desired consistency. According to a study by the American Association of Cereal Chemists, flour’s moisture content can vary by as much as 15% depending on the surrounding humidity.
1.1.3. Adjusting Hydration Levels
To combat stickiness caused by high hydration, consider reducing the amount of water in your recipe. Start by holding back about 10-20% of the water and gradually add it until the dough feels smooth and elastic, not overly sticky. Remember, you can always add more water, but you can’t take it away.
1.2. Gluten Development: The Key to Dough Strength
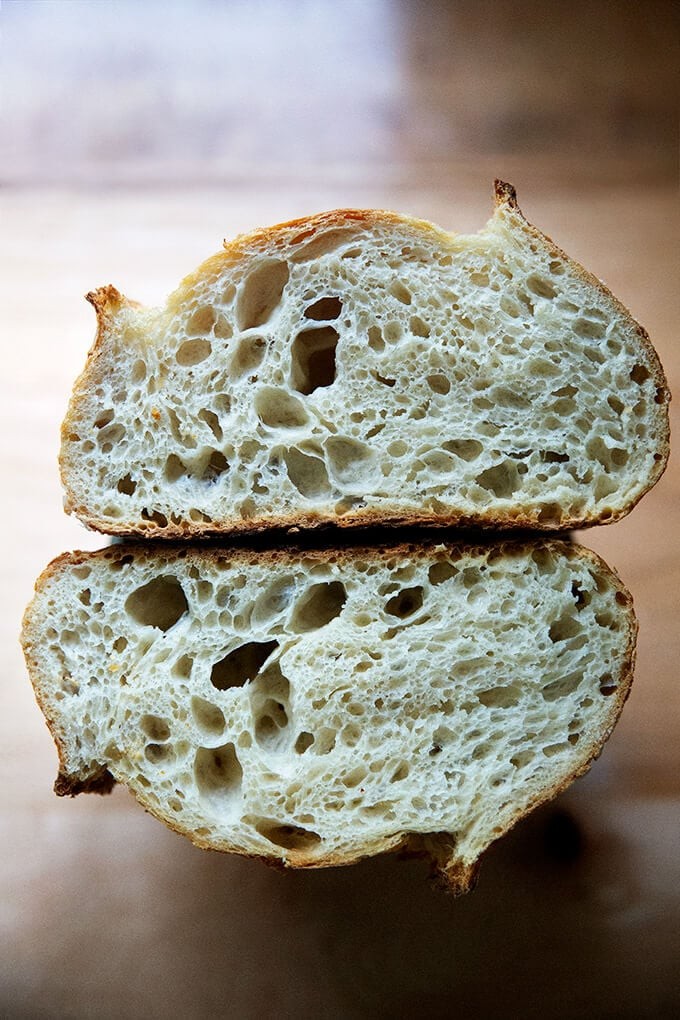
Gluten, the protein formed when flour is mixed with water, is essential for dough strength and elasticity. Proper gluten development allows the dough to trap gases produced during fermentation, resulting in a light and airy loaf. Insufficient gluten development can lead to a weak, sticky dough that struggles to hold its shape.
1.2.1. Kneading Techniques
Kneading is the process of working the dough to develop gluten. There are several kneading techniques, including:
- Traditional Kneading: Involves pushing, folding, and turning the dough on a floured surface.
- Stretch and Fold: A gentler method where the dough is stretched and folded over itself at regular intervals during bulk fermentation.
- No-Knead Method: Relies on long fermentation times to develop gluten without manual kneading.
1.2.2. The Importance of Autolyse
Autolyse, a technique where flour and water are mixed and allowed to rest before adding the starter and salt, can significantly improve gluten development. During autolyse, the flour fully hydrates, allowing gluten to form more readily during kneading.
1.2.3. Enhancing Gluten Development
To improve gluten development, try the following:
- Knead the dough for a longer time, ensuring it becomes smooth and elastic.
- Incorporate the autolyse technique into your baking process.
- Use high-protein flour, such as bread flour, to provide ample gluten-forming potential.
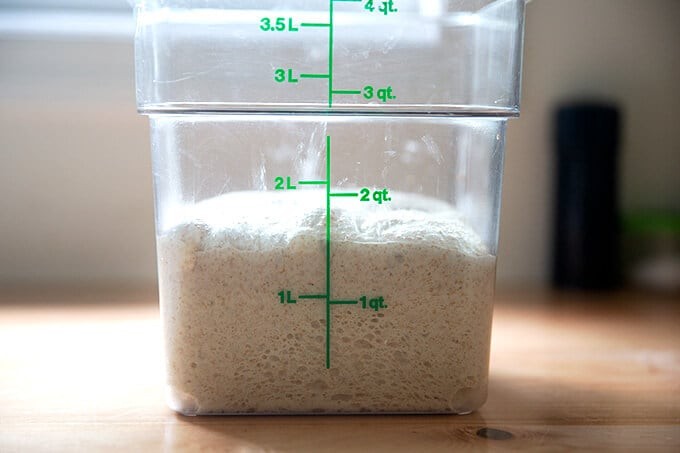
1.3. Starter Activity: The Heart of Sourdough
A healthy and active starter is crucial for successful sourdough baking. The starter’s wild yeasts and bacteria ferment the dough, producing gases that give it rise and flavor. A weak or inactive starter can result in a slow-rising, sticky dough that lacks structure.
1.3.1. Signs of a Healthy Starter
A healthy starter should exhibit the following characteristics:
- Doubles in volume within 4-8 hours after feeding.
- Has a bubbly, airy texture.
- Smells pleasantly sour, not moldy or vinegary.
- Floats in water when a small spoonful is dropped in.
1.3.2. Strengthening a Weak Starter
If your starter is weak, try the following steps to strengthen it:
- Feed Regularly: Feed the starter with equal parts flour and water every 12-24 hours.
- Use High-Quality Flour: Use unbleached, all-purpose or bread flour to feed your starter.
- Maintain Proper Temperature: Keep the starter at a warm temperature (70-75°F) to encourage activity.
- Discard Regularly: Discard a portion of the starter before each feeding to prevent it from becoming too acidic.
1.3.3. Using Starter at Its Peak
For best results, use your starter when it’s at its peak activity, typically when it has doubled in volume after feeding. This ensures that the dough has enough leavening power to rise properly.
1.4. Over-Fermentation: When Too Much Is Too Much
Fermentation is a crucial process in sourdough baking, but over-fermentation can lead to a sticky, weak dough. During fermentation, yeasts and bacteria in the starter consume sugars in the flour, producing gases and acids. Over time, these acids can break down the gluten structure, resulting in a slack, sticky dough.
1.4.1. Recognizing Over-Fermentation
Signs of over-fermentation include:
- Dough that has more than doubled in volume.
- A sour, vinegary smell.
- A sticky, slack texture that lacks elasticity.
- Visible bubbles on the surface of the dough.
1.4.2. Controlling Fermentation
To prevent over-fermentation, consider the following:
- Reduce the amount of starter in your recipe.
- Lower the fermentation temperature.
- Shorten the fermentation time.
- Use the refrigerator to slow down fermentation.
1.5. Dealing with Sticky Dough: Practical Techniques
Even with careful attention to hydration, gluten development, starter activity, and fermentation, you may still encounter sticky dough from time to time. Here are some practical techniques for handling sticky dough:
1.5.1. Use Wet Hands
Wet your hands with water before handling the dough. This will prevent the dough from sticking to your fingers.
1.5.2. Flour Your Work Surface
Lightly flour your work surface to prevent the dough from sticking. Use just enough flour to create a barrier between the dough and the surface.
1.5.3. Use a Dough Scraper
A dough scraper is an invaluable tool for handling sticky dough. Use it to lift, fold, and shape the dough without tearing or stretching it.
1.5.4. Cold Proofing
Cold proofing, or refrigerating the shaped dough for an extended period, can make it easier to handle. The cold temperature firms up the dough, making it less sticky and more manageable.
2. Step-by-Step Solutions for Common Scenarios
Let’s examine some common scenarios that lead to sticky sourdough and provide step-by-step solutions.
2.1. Scenario 1: Dough Is Too Wet
Problem: The dough is extremely wet and difficult to shape.
Solution:
- Reduce Hydration: In future bakes, reduce the amount of water in the recipe by 10-20%.
- Flour Your Hands and Surface: Use wet hands and flour your work surface generously.
- Gentle Handling: Handle the dough gently to avoid tearing or stretching it.
- Cold Proof: Cold proof the dough for an extended period (12-24 hours) to firm it up.
2.2. Scenario 2: Dough Lacks Gluten Development
Problem: The dough is weak and lacks elasticity, making it sticky and difficult to handle.
Solution:
- Knead Longer: Knead the dough for a longer time, ensuring it becomes smooth and elastic.
- Incorporate Autolyse: Allow the flour and water to autolyse for 30-60 minutes before adding the starter and salt.
- Use High-Protein Flour: Use bread flour with a protein content of at least 12%.
- Stretch and Fold: Perform several sets of stretch and folds during bulk fermentation to strengthen the dough.
2.3. Scenario 3: Dough Is Over-Fermented
Problem: The dough has more than doubled in volume, has a sour smell, and is sticky and slack.
Solution:
- Adjust Fermentation Time: Reduce the bulk fermentation time in future bakes.
- Lower Temperature: Ferment the dough at a cooler temperature.
- Reduce Starter: Use less starter in your recipe.
- Monitor Closely: Keep a close eye on the dough during fermentation to prevent over-proofing.
2.4. Scenario 4: Using Too Much Whole Wheat or Rye Flour
Problem: Dough is dense and sticky due to high percentage of whole wheat or rye flour.
Solution:
- Reduce Whole Grain Flour: Decrease the amount of whole wheat or rye flour in the recipe.
- Increase Hydration Slightly: Whole grain flours absorb more water, so increase the water slightly to compensate.
- Soak the Flour: Consider soaking the whole grain flour in water before adding it to the dough to soften the bran.
- Mix with Bread Flour: Combine whole wheat or rye flour with bread flour for a lighter texture.
3. Advanced Techniques for Sourdough Perfection
Once you’ve mastered the basics of sourdough baking, you can explore advanced techniques to further improve your dough’s texture and flavor.
3.1. Lamination
Lamination is a technique where the dough is stretched very thin and folded over itself multiple times. This creates many thin layers of dough, resulting in a light, airy crumb and a crispy crust.
3.2. Coil Folds
Coil folds are a gentle way to strengthen the dough during bulk fermentation. The dough is lifted from the center and allowed to coil back onto itself. This helps to align the gluten strands and improve dough strength.
3.3. Cold Retardation
Cold retardation involves refrigerating the dough for an extended period, typically 12-72 hours. This slows down fermentation, allowing the flavors to develop and the dough to become more manageable.
4. Troubleshooting Table: Quick Solutions to Sticky Situations
| Problem | Possible Cause(s) | Solution(s) |
|---|---|---|
| Dough is too wet | High hydration, inaccurate measurements, humid environment | Reduce water, measure accurately, adjust for humidity |
| Dough lacks gluten development | Insufficient kneading, poor-quality flour, lack of autolyse | Knead longer, use bread flour, incorporate autolyse, perform stretch and folds |
| Dough is over-fermented | Excessive fermentation time, too much starter, high temperature | Reduce fermentation time, use less starter, lower temperature, refrigerate dough |
| Too much whole grain flour | High percentage of whole wheat or rye flour | Reduce whole grain flour, increase hydration slightly, soak flour, mix with bread flour |
| Handling sticky dough | Dry hands, dry work surface | Use wet hands, flour work surface, use a dough scraper, cold proof |
5. Expert Tips and Tricks for Sourdough Success
Here are some expert tips and tricks to help you achieve sourdough perfection:
- Invest in a good digital scale: Accurate measurements are essential for consistent results.
- Use a Dutch oven: Baking in a Dutch oven creates a steamy environment that promotes oven spring and a crispy crust.
- Score your dough properly: Scoring allows the dough to expand evenly in the oven, preventing it from bursting in unexpected places.
6. Addressing Concerns About Ingredients and Equipment
6.1. Flour Types
Using the right flour is critical. Bread flour, with its high protein content, is ideal for sourdough. All-purpose flour can be used, but it may result in a less structured loaf. Whole wheat and rye flours add flavor and nutrients but can make the dough denser.
6.2. Water Quality
The water you use can also affect your dough. Tap water may contain chlorine or other chemicals that can inhibit starter activity. Use filtered or bottled water for best results.
6.3. Essential Equipment
Investing in the right equipment can make sourdough baking easier and more enjoyable. Essential equipment includes:
- Digital scale
- Mixing bowls
- Dough scraper
- Proofing basket
- Dutch oven
- Bread knife
7. The Science Behind Sourdough: A Deeper Dive
Sourdough baking is not just an art; it’s also a science. Understanding the chemical and biological processes that occur during fermentation can help you troubleshoot problems and improve your baking.
7.1. The Role of Yeasts and Bacteria
Sourdough starters contain a complex community of wild yeasts and bacteria. These microorganisms work together to ferment the dough, producing gases, acids, and other compounds that contribute to flavor and texture.
7.2. Gluten Formation and Development
Gluten, the protein formed when flour is mixed with water, is responsible for the dough’s elasticity and structure. Proper gluten development is essential for trapping gases and creating a light, airy loaf.
7.3. The Impact of Fermentation on Flavor
During fermentation, yeasts and bacteria produce a variety of organic acids, including lactic acid and acetic acid. These acids contribute to the characteristic sour flavor of sourdough bread.
8. Frequently Asked Questions (FAQs)
Q1: Why is my sourdough starter not doubling?
A1: Your starter may be weak or inactive. Feed it regularly, use high-quality flour, and maintain a warm temperature.
Q2: Can I use all-purpose flour for sourdough?
A2: Yes, but bread flour is preferred for its higher protein content and better gluten development.
Q3: How long should I knead my sourdough dough?
A3: Knead the dough until it becomes smooth and elastic, typically 8-10 minutes.
Q4: What is autolyse and why is it important?
A4: Autolyse is the process of mixing flour and water and letting it rest before adding the starter and salt. It improves gluten development and dough extensibility.
Q5: How can I prevent my sourdough from being too sour?
A5: Reduce the fermentation time, use less starter, and avoid over-proofing.
Q6: Why is my sourdough bread dense and gummy?
A6: This could be due to under-fermentation, insufficient gluten development, or using too much whole wheat flour.
Q7: What is the best temperature for baking sourdough bread?
A7: Preheat your Dutch oven to 500°F (260°C) and then lower the oven temperature to 450°F (232°C) after placing the dough inside.
Q8: How do I score my sourdough bread?
A8: Use a sharp blade to make a 1/2-inch deep slash on the surface of the dough. This allows the dough to expand evenly in the oven.
Q9: Can I freeze sourdough bread?
A9: Yes, you can freeze sourdough bread. Wrap it tightly in plastic wrap and then in foil.
Q10: What can I do with sourdough discard?
A10: Sourdough discard can be used in a variety of recipes, including pancakes, waffles, tortillas, and crackers.
9. Call to Action
Are you still struggling with sticky sourdough? Do you have more questions about sourdough baking? Visit WHY.EDU.VN to ask questions and find answers from our community of experts. Our team is dedicated to providing accurate and reliable information to help you succeed in your baking endeavors. Reach out to us at 101 Curiosity Lane, Answer Town, CA 90210, United States, or contact us via WhatsApp at +1 (213) 555-0101.
10. Conclusion
Baking sourdough bread can be a rewarding experience, but it’s not without its challenges. A sticky dough is a common problem, but with the right knowledge and techniques, you can overcome this obstacle and create beautiful, delicious loaves. Remember to pay close attention to hydration levels, gluten development, starter activity, and fermentation time. With practice and patience, you’ll be well on your way to sourdough success. For further assistance and expert advice, visit why.edu.vn, where we are committed to helping you master the art of sourdough baking. Let our expert team help you navigate hydration management, gluten strengthening techniques, and fermentation control strategies.