Is your sourdough dough refusing to rise? At WHY.EDU.VN, we understand the frustration. Sourdough baking is both an art and a science, and a failure to rise can be due to several factors. Let’s troubleshoot common issues and explore solutions for achieving that perfect, airy loaf with the help of expert advice and techniques. From starter strength to temperature control, we’ll cover all the essential aspects to help you become a successful sourdough baker. By mastering these techniques, you’ll be baking perfect loaves of bread in no time, with the proper proofing and crumb structure.
1. Understanding the Importance of a Robust Sourdough Starter
The foundation of any successful sourdough bread lies in the vitality of your sourdough starter. A weak or inactive starter simply lacks the power to leaven your dough effectively. The yeast and bacteria within the starter are responsible for producing the gases that cause the dough to rise. To ensure a robust starter, consider the following:
- Regular Feeding Schedule: Maintain a consistent feeding schedule, typically once or twice a day, depending on room temperature.
- Flour Quality: Use high-quality flour, preferably unbleached, to provide the necessary nutrients for the starter’s microorganisms.
- Water Quality: Use filtered, dechlorinated water. Chlorine can inhibit the activity of the yeast and bacteria.
- Temperature Control: Keep the starter in a warm environment, ideally between 70-75°F (21-24°C), to encourage optimal microbial activity.
A healthy starter should exhibit these characteristics:
- Doubling in Size: After feeding, the starter should double in volume within 4-8 hours, indicating active fermentation.
- Bubble Formation: Abundant bubbles on the surface and throughout the starter signify vigorous yeast activity.
- Pleasant Aroma: A slightly tangy, yeasty aroma is indicative of a healthy balance of yeast and bacteria.
If your starter is not performing as expected, consider these corrective actions:
- Increase Feeding Frequency: More frequent feedings can invigorate a sluggish starter.
- Adjust Hydration: Experiment with different hydration levels (the ratio of water to flour) to find what works best for your starter.
- Change Flour Type: Try using a different type of flour, such as whole wheat or rye, to provide a boost of nutrients.
1.1. Conducting a Float Test: Verifying Starter Readiness
A float test is a simple yet effective way to determine if your starter is ready to use. Here’s how to perform the test:
- Prepare a Glass of Water: Fill a glass with room-temperature water.
- Add a Teaspoon of Starter: Gently drop a teaspoon of your starter onto the surface of the water.
- Observe the Result: If the starter floats, it is ready to use. If it sinks, it needs more time to develop.
The float test works because a mature, active starter is full of gas produced by fermentation. This gas makes the starter less dense than water, allowing it to float. If the starter sinks, it indicates that it has not yet produced enough gas to leaven bread effectively.
1.2. Understanding the Science Behind Starter Activity
The activity of your sourdough starter is driven by a symbiotic relationship between yeast and bacteria. Yeast produces carbon dioxide, which causes the dough to rise, while bacteria produce lactic and acetic acids, which contribute to the distinctive tangy flavor of sourdough. The balance between these microorganisms is influenced by several factors, including:
- pH Level: The pH of the starter affects the activity of both yeast and bacteria. A slightly acidic pH (around 4.0-4.5) is ideal.
- Nutrient Availability: The flour provides essential nutrients, such as sugars and starches, that fuel the microorganisms.
- Temperature: Temperature affects the rate of fermentation. Warmer temperatures accelerate fermentation, while cooler temperatures slow it down.
- Hydration: The hydration level influences the texture and consistency of the starter, affecting microbial activity.
Understanding these factors can help you fine-tune your starter management practices and ensure consistent results.
1.3 Common Starter Problems and Solutions
| Problem | Possible Cause | Solution |
|---|---|---|
| Slow to Rise | Cold temperature, infrequent feeding | Increase feeding frequency, move to warmer location |
| Weak Bubbles | Old flour, tap water, poor feeding habits | Use fresh, unbleached flour, use filtered water, consistent feeding schedule |
| Sinking in Float Test | Underdeveloped gluten, not enough gas production | Allow more time to ferment, ensure starter doubles in size after feeding before using |
| Mold or Unpleasant Smell | Contamination, improper care | Discard starter, sanitize jar, start over with new flour and water, and be mindful of cleanliness |
| Inconsistent Rise | Fluctuating temperatures, inconsistent hydration | Use a stable proofing environment, measure water and flour accurately during feeding |
2. Mastering Temperature Control for Optimal Dough Rise
Temperature plays a pivotal role in the fermentation process. Enzymes that break down starches and proteins work more efficiently within a specific temperature range. Ideal dough temperature typically falls between 75-80°F (24-27°C) for bulk fermentation and 70-75°F (21-24°C) for proofing.
2.1. The Impact of Ambient Temperature on Dough
Ambient temperature significantly impacts dough rise time. In warmer conditions, fermentation accelerates, leading to a faster rise. Conversely, colder conditions slow down fermentation, extending the rise time. Here’s how to adjust for different ambient temperatures:
- Warm Environment (Above 80°F):
- Reduce the amount of starter in the dough.
- Use cooler water when mixing the dough.
- Monitor the dough closely to prevent over-proofing.
- Cold Environment (Below 70°F):
- Increase the amount of starter in the dough.
- Use warmer water when mixing the dough.
- Extend the bulk fermentation and proofing times.
2.2. Practical Tips for Maintaining Consistent Dough Temperature
To maintain a consistent dough temperature, consider these methods:
- Use a Dough Thermometer: Monitor the dough’s internal temperature to ensure it stays within the ideal range.
- Create a Proofing Box: A proofing box provides a controlled environment for fermentation. You can purchase a commercial proofing box or create a DIY version using an insulated container and a heat source.
- Oven Proofing: Use your oven as a makeshift proofing box by setting it to the lowest temperature, then turning it off. Place the dough inside with a bowl of hot water to create a humid environment.
- Warm Water Bath: Place the dough in a bowl and set it in a larger bowl filled with warm water. Replace the water as needed to maintain a consistent temperature.
- Insulated Container: Use an insulated cooler or container to protect the dough from temperature fluctuations.
2.3. Advanced Techniques for Temperature Control
For more precise temperature control, consider these advanced techniques:
- Water Temperature Adjustment: Adjust the temperature of the water used in the dough to compensate for ambient temperature. Use warmer water in cold environments and cooler water in warm environments.
- Refrigeration: Slow down fermentation by refrigerating the dough. This can be useful for scheduling your baking or developing more complex flavors.
- Temperature-Controlled Fermentation: Use a temperature controller to maintain a precise temperature throughout the fermentation process. These devices are commonly used in brewing and can be adapted for sourdough baking.
2.4 Temperature Troubleshooting Chart
| Issue | Possible Cause | Solution |
|---|---|---|
| Slow Rise in Cold Room | Low ambient temperature, cold ingredients | Use warmer water, proof in a warmer location, extend bulk fermentation and proofing times |
| Over Proofing in Heat | High ambient temperature, too much starter | Reduce starter, use cooler water, monitor closely, shorten bulk fermentation and proofing times |
| Inconsistent Results | Temperature fluctuations | Use a proofing box, insulate dough, keep track of dough temperatures with a thermometer |
| Damp Dough | High humidity can lead to a sticky dough that’s hard to work with. | Use a dehumidifier or add some flour to the counter to better shape the loaf, reduce the amount of water content in the recipe. |
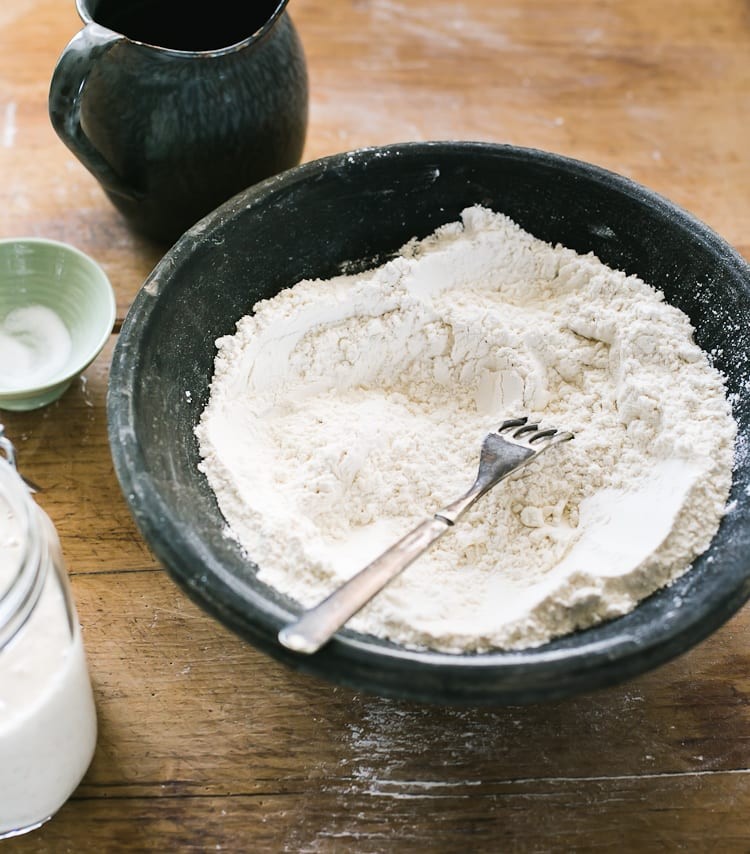
3. The Role of Flour in Sourdough Bread Making
The type and quality of flour used in sourdough bread making significantly affect the dough’s rise and overall structure. Different flours have varying protein contents, which influence gluten development and gas retention.
3.1. Understanding Different Types of Flour
- Bread Flour: With a high protein content (12-14%), bread flour is ideal for sourdough because it promotes strong gluten development, resulting in a well-risen loaf with a chewy texture.
- All-Purpose Flour: All-purpose flour has a moderate protein content (9-11%) and can be used in sourdough, but it may not produce as much rise or structure as bread flour.
- Whole Wheat Flour: Whole wheat flour contains the entire wheat kernel, including the bran and germ. It adds flavor and nutrients but can inhibit gluten development due to the presence of bran.
- Rye Flour: Rye flour has a unique flavor and can add complexity to sourdough. It has a lower gluten content than wheat flour, so it’s often used in combination with bread flour.
3.2. Gluten Development: The Key to Dough Structure
Gluten is a protein complex formed when flour is mixed with water. It provides the structure and elasticity necessary for the dough to trap gases produced during fermentation. Proper gluten development is essential for a well-risen loaf. Here are some techniques to enhance gluten development:
- Autolyse: Combine the flour and water in the recipe and let it rest for 20-60 minutes before adding the starter and salt. This allows the flour to fully hydrate, promoting better gluten development.
- Kneading: Kneading aligns the gluten strands, creating a strong and elastic dough. Use a stand mixer or knead by hand for 8-12 minutes.
- Stretch and Fold: During bulk fermentation, perform stretch and fold maneuvers to strengthen the gluten structure. Gently stretch a portion of the dough upwards and fold it over onto itself. Repeat this process around the perimeter of the dough.
3.3. Flour Blends: Achieving Optimal Flavor and Texture
Combining different types of flour can enhance the flavor and texture of sourdough bread. Here are some common flour blends:
- Bread Flour and Whole Wheat: This blend provides a balance of structure and flavor. Use a ratio of 80% bread flour and 20% whole wheat for a slightly nutty flavor and increased nutritional value.
- Bread Flour and Rye: This blend adds a unique flavor and aroma to the bread. Use a ratio of 90% bread flour and 10% rye for a subtle rye flavor or increase the rye content for a more pronounced taste.
- All-Purpose Flour and Bread Flour: This blend is useful when you don’t have enough bread flour on hand. Use a ratio of 50% all-purpose flour and 50% bread flour to achieve a decent rise and structure.
3.4 Flour Quality Troubleshooting Chart
| Issue | Possible Cause | Solution |
|---|---|---|
| Dense, Flat Bread | Low protein flour, weak gluten development | Use bread flour with higher protein, improve kneading technique, autolyse flour before mixing |
| Crumbly Texture | Too much whole grain flour, over-fermentation | Reduce whole grain flour, adjust hydration, shorten bulk fermentation, monitor dough closely |
| Poor Gluten Development | Insufficient kneading, incorrect flour hydration | Knead dough longer, check water temperature and ratio, use a dough thermometer |
| Sticking Dough | Over-hydration, flour not strong enough | Reduce water slightly, add bread flour, use a bench scraper and lightly floured surface when handling |
4. The Impact of Hydration Levels on Sourdough Dough
Hydration, the ratio of water to flour in a dough, significantly influences the texture, rise, and overall quality of sourdough bread. Understanding how to adjust hydration levels can help you achieve the desired results.
4.1. Low Hydration vs. High Hydration
- Low Hydration Dough (60-70%):
- Easier to handle and shape.
- Produces a denser crumb with a chewier texture.
- Suitable for beginners.
- High Hydration Dough (75-85% or higher):
- More challenging to handle due to its stickiness.
- Results in an open, airy crumb with a crisp crust.
- Requires more advanced techniques.
4.2. Adjusting Hydration for Different Flours
Different flours absorb water differently. Whole wheat and rye flours, for example, absorb more water than bread flour. Therefore, it’s essential to adjust the hydration level based on the type of flour you’re using. Here’s a general guideline:
- Bread Flour: 70-75% hydration
- All-Purpose Flour: 65-70% hydration
- Whole Wheat Flour: 75-80% hydration
- Rye Flour: 80-85% hydration
To adjust hydration, simply increase or decrease the amount of water in the recipe while keeping the flour quantity constant.
4.3. Techniques for Handling High Hydration Dough
Handling high hydration dough can be tricky, but with the right techniques, you can achieve excellent results:
- Wet Hands: Keep your hands wet to prevent the dough from sticking.
- Bench Scraper: Use a bench scraper to lift and fold the dough without tearing it.
- Lamination: Stretch the dough thinly on a lightly oiled surface to strengthen the gluten structure.
- Coil Folds: Gently lift the dough from the center and let the ends fold underneath. This builds strength and tension.
- Cold Fermentation: Refrigerating the dough can make it easier to handle and shape.
4.4 Hydration Troubleshooting Chart
| Issue | Possible Cause | Solution |
|---|---|---|
| Dough Too Sticky to Handle | Over-hydration, weak gluten | Reduce water in the recipe, use bread flour, increase kneading time, incorporate folds to build strength |
| Dough Too Dry and Stiff | Under-hydration, flour absorbing too much water | Add water gradually, autolyse flour longer, ensure flour is not old or expired |
| Dough Spreading Out After Shaping | Weak gluten, over-fermentation | Improve gluten development with more folds, proof dough in a banneton for support, shorten fermentation time |
| Dense Crumb with Insufficient Rise | Low hydration, underdeveloped gluten | Increase water content gradually, knead longer, use a high protein flour |
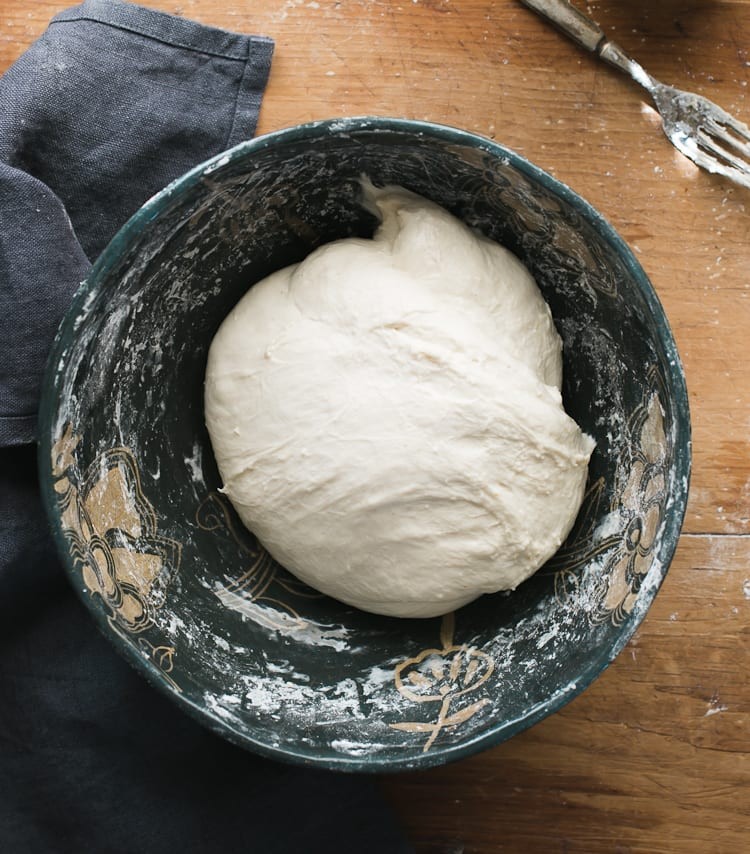
5. Mastering the Bulk Fermentation Process
Bulk fermentation, also known as the first rise, is a critical stage in sourdough bread making. During this period, the dough develops flavor, texture, and strength. Proper bulk fermentation ensures that the dough has enough gas production to rise properly.
5.1. Visual Cues for Determining Readiness
Instead of relying solely on time, use visual cues to determine when the dough is ready for the next step. Look for these signs:
- Increase in Volume: The dough should increase in volume by about 25-50%.
- Air Bubbles: Visible air bubbles should be present throughout the dough.
- Jiggly Texture: The dough should have a slightly jiggly texture.
- Domed Surface: The surface of the dough should be domed and smooth.
5.2. Techniques for Strengthening the Dough During Bulk Fermentation
Strengthening the dough during bulk fermentation helps to improve its structure and gas retention. Here are some effective techniques:
- Stretch and Fold: Perform stretch and fold maneuvers every 30-60 minutes for the first few hours of bulk fermentation.
- Coil Folds: Use coil folds to build strength and tension in the dough.
- Lamination: Stretch the dough thinly on a lightly oiled surface to strengthen the gluten structure.
5.3. Troubleshooting Common Bulk Fermentation Issues
| Issue | Possible Cause | Solution |
|---|---|---|
| Slow Fermentation | Cold temperature, weak starter | Increase temperature, use more starter, extend bulk fermentation time |
| Over-Fermentation | Warm temperature, too much starter | Reduce temperature, use less starter, shorten bulk fermentation time, monitor dough closely |
| Dough Not Increasing Volume | Insufficient gluten development, wrong hydration | Improve kneading technique, adjust hydration, ensure starter is active |
| Dough Collapsing | Over-fermentation, weak gluten | Handle gently, shorten bulk fermentation time, improve gluten development, shape carefully |
6. Shaping and Proofing Techniques for Optimal Rise
Shaping and proofing are crucial steps that determine the final shape, texture, and rise of your sourdough bread. Proper shaping creates surface tension, which helps the dough hold its form during baking, while proofing allows the dough to rise fully before it enters the oven.
6.1. Mastering Shaping Techniques
- Round (Boule): Gently round the dough by pulling the edges underneath to create a tight surface tension.
- Oblong (Bâtard): Shape the dough into an oblong shape by folding and rolling it.
- Bagette: Roll the dough into a long, thin cylinder.
6.2. Choosing the Right Proofing Method
- Banneton Basket: A banneton basket provides support and shape to the dough during proofing. Dust the basket with rice flour to prevent sticking.
- Lined Bowl: A bowl lined with a floured cloth can also be used for proofing.
- Cold Proofing: Slow down fermentation by proofing the dough in the refrigerator. This can develop more complex flavors and make the dough easier to score.
6.3. Scoring Techniques for Oven Spring
Scoring the dough before baking allows it to expand in a controlled manner, creating a beautiful crust and preventing it from bursting. Use a sharp knife or lame to make shallow cuts on the surface of the dough.
- Straight Cut: A single straight cut down the center of the loaf.
- Cross Cut: Two intersecting cuts forming a cross.
- Decorative Cuts: Create intricate patterns with multiple cuts.
6.4 Proofing Problems and Solutions Chart
| Issue | Possible Cause | Solution |
|---|---|---|
| Dough Spreads After Shaping | Weak gluten, over-fermentation, shaping problems | Improve gluten development, shorten fermentation, shape tighter, use a banneton for support |
| Dough Cracks During Baking | Insufficient scoring, too much tension | Score deeper, reduce shaping tension, ensure proper hydration |
| Over-Proofed Dough | Too warm, too long | Reduce proofing time, lower temperature, test dough with a poke test |
| Under-Proofed Dough | Too cold, too short | Increase proofing time, raise temperature, look for signs of readiness like slight jiggle and domed surface |
7. Baking Your Sourdough to Perfection
Baking is the final act in the sourdough process, bringing together all your hard work. Achieving the perfect crust and crumb requires careful attention to oven temperature, steaming, and baking time.
7.1 Preheating and Steaming Your Oven
- Preheating: Preheat your oven to a high temperature, typically 450-500°F (232-260°C), to create a hot and stable environment.
- Steaming: Introduce steam into the oven during the first part of baking to promote oven spring and create a crisp, shiny crust. You can achieve this by:
- Placing a cast iron skillet on the bottom rack of the oven and adding hot water when you load the dough.
- Using a Dutch oven or covered baking dish.
- Spraying water into the oven with a spray bottle.
7.2 Baking in a Dutch Oven vs. on a Baking Stone
- Dutch Oven: Baking in a Dutch oven traps steam and creates a humid environment, resulting in a loaf with a crisp crust and open crumb.
- Baking Stone: Baking on a baking stone provides even heat distribution and a crispy bottom crust.
7.3 Adjusting Baking Times and Temperatures
Baking times and temperatures may vary depending on your oven and the size of the loaf. Here’s a general guideline:
- Dutch Oven: Bake covered at 450°F (232°C) for 20 minutes, then uncovered for 20-30 minutes until the crust is deeply golden brown.
- Baking Stone: Bake with steam at 450°F (232°C) for 15-20 minutes, then reduce the temperature to 425°F (220°C) and continue baking for 20-30 minutes until the crust is deeply golden brown.
7.4 Common Baking Problems and Solutions Chart
| Issue | Possible Cause | Solution |
|---|---|---|
| Pale Crust | Low oven temperature, insufficient steaming | Increase oven temperature, ensure proper steaming, bake longer |
| Burnt Crust | Too high oven temperature, baking too long | Reduce oven temperature, shorten baking time, cover loaf with foil if crust is browning too quickly |
| Gummy Crumb | Underbaked, too much moisture | Bake longer, ensure internal temperature reaches 205-210°F (96-99°C), cool completely before slicing |
| Dense Crumb | Under-proofed, weak starter | Extend proofing time, ensure starter is active, improve gluten development |
8. Analyzing Your Sourdough: Understanding the Crumb and Crust
Understanding the characteristics of your sourdough crumb and crust can provide valuable insights into the baking process and help you identify areas for improvement.
8.1. Assessing the Crumb Structure
- Open Crumb: Large, irregular holes indicate a well-fermented, high-hydration dough.
- Tight Crumb: Small, uniform holes indicate a lower-hydration dough or insufficient fermentation.
- Gummy Crumb: A sticky, dense crumb indicates underbaking or excessive moisture.
8.2. Evaluating the Crust Characteristics
- Crisp Crust: A thin, brittle crust with a satisfying snap indicates proper steaming and baking.
- Chewy Crust: A slightly chewy crust is often desired in sourdough bread.
- Hard Crust: A thick, hard crust may indicate overbaking or insufficient hydration.
8.3. Identifying Flavor Profiles
- Tangy Flavor: A pronounced tangy flavor is characteristic of sourdough and results from the lactic and acetic acids produced by the bacteria in the starter.
- Nutty Flavor: Whole wheat and rye flours contribute a nutty flavor to the bread.
- Sweet Flavor: A subtle sweetness can develop during long fermentation due to the breakdown of starches into sugars.
8.4 Troubleshooting Chart: Crumb & Crust Imperfections
| Problem | Possible Cause | Solution |
|---|---|---|
| Crumb is Too Dense | Not enough fermentation, low-quality ingredients | Extend fermentation time (bulk fermentation and proofing), ensure your starter is active and vigorous, use high-quality flour and filtered water. |
| Crumb is Gummy | Under-baking, not enough cooling | Increase baking time until the internal temperature reaches 205-210°F (96-99°C), allow the bread to cool completely on a wire rack before slicing (at least 2-3 hours). |
| Crust is Too Thick | Over-baking, too much heat | Reduce baking time or decrease the oven temperature by 25°F (14°C), consider covering the loaf with foil during the last part of baking to prevent it from browning too quickly. |
| Crust is Too Pale | Not enough heat, not enough steaming | Increase the oven temperature by 25°F (14°C), use more steam in the initial baking phase (e.g., more water in the cast iron skillet or a tighter seal on the Dutch oven). |
| Large, Irregular Holes (Crumb) | Over-fermentation, too much handling | Reduce the bulk fermentation time or the amount of starter used, handle the dough gently during shaping and avoid degassing it too much. |
| No Sour Flavor | Under-fermentation, not enough acid production | Extend the bulk fermentation time, use a starter with a more acidic profile (achieved through specific feeding and maintenance practices), consider using a portion of whole wheat or rye flour. |
9. Advanced Techniques for Sourdough Baking
For experienced sourdough bakers looking to elevate their skills, here are some advanced techniques:
9.1. Long Fermentation
Extending the fermentation time, especially during bulk fermentation, can enhance the flavor and texture of sourdough bread. Long fermentation allows the enzymes in the dough to break down complex carbohydrates and proteins, resulting in a more complex flavor and improved digestibility.
9.2. Cold Retardation
Cold retardation, or proofing the dough in the refrigerator, is a technique used to slow down fermentation and develop more complex flavors. Cold retardation can also make the dough easier to handle and score.
9.3. Using Ancient Grains
Experimenting with ancient grains, such as spelt, emmer, and einkorn, can add unique flavors and textures to sourdough bread. These grains have different gluten structures than modern wheat, so they may require adjustments to the recipe.
9.4. Sourdough Discard Recipes
Don’t throw away your sourdough discard! It can be used in a variety of recipes, such as pancakes, waffles, crackers, and cakes. Sourdough discard adds flavor and moisture to these recipes.
10. Frequently Asked Questions (FAQs) About Sourdough Baking
-
Why is my sourdough starter not doubling?
- Possible causes include cold temperature, infrequent feeding, or weak starter.
-
How do I know if my sourdough starter is ready to use?
- The starter should double in size after feeding, have visible bubbles, and pass the float test.
-
Why is my sourdough dough not rising?
- Possible causes include weak starter, cold temperature, insufficient fermentation, or incorrect hydration.
-
How can I control the temperature of my dough?
- Use a proofing box, warm water bath, or adjust oven temperature.
-
What type of flour is best for sourdough bread?
- Bread flour with a high protein content is ideal.
-
How long should I knead my sourdough dough?
- Knead for 8-12 minutes until the dough is smooth and elastic.
-
How can I strengthen the dough during bulk fermentation?
- Use stretch and fold or coil fold techniques.
-
How do I shape my sourdough dough?
- Gently round or shape the dough by pulling the edges underneath to create surface tension.
-
How do I score my sourdough dough?
- Use a sharp knife or lame to make shallow cuts on the surface of the dough.
-
Why is my sourdough crust too pale?
- Increase oven temperature or use more steam during baking.
Sourdough baking is a journey of experimentation and learning. At WHY.EDU.VN, we’re committed to providing the information and support you need to succeed. Remember, consistent practice and attention to detail will help you master the art of sourdough and create delicious, well-risen loaves every time. Don’t be discouraged by initial failures; each attempt brings you closer to understanding the nuances of sourdough.
Are you still struggling to get your sourdough to rise? Do you have more specific questions about your baking process? Visit WHY.EDU.VN to connect with our community of baking experts and get personalized advice. Our team is dedicated to helping you overcome any challenges and achieve baking success. Contact us at 101 Curiosity Lane, Answer Town, CA 90210, United States, Whatsapp: +1 (213) 555-0101, or visit our website at why.edu.vn. Let’s turn your baking questions into delicious answers!
This article incorporates information from reliable sources and expert insights to ensure accuracy and provide comprehensive guidance for troubleshooting sourdough rising issues.