Is your right AirPod not charging? This is a common issue, but don’t worry, WHY.EDU.VN is here to provide you with several potential solutions, from simple cleaning to more advanced troubleshooting, ensuring you can get back to enjoying your wireless audio experience; we will also provide you with tips to maximize battery lifespan and maintain peak performance. In this article, we’ll explore the common causes and effective solutions to address this charging problem to address these charging issues, along with ways to keep your AirPods performing their best, and understanding the possible cause of AirPod battery drain.
Table of Contents
- Identify the Search Intent
- Check the Charging Case
- Clean the AirPods and Charging Case
- Restart or Reset Your AirPods
- Update Your AirPods Firmware
- Check Bluetooth Connection
- Try Different Charging Cables and Adapters
- Examine Battery Health
- Contact Apple Support
- Frequently Asked Questions (FAQs)
1. Identify the Search Intent
Understanding the search intent behind “Why Is My Right Airpod Not Charging” is crucial to providing a comprehensive and satisfying answer. Here are five key intentions users might have when searching for this:
- Troubleshooting: Users want to identify the cause of the problem and find quick, easy-to-follow solutions to fix it themselves.
- Understanding the Problem: Some users are simply looking for an explanation of why this issue occurs. They want to know the common reasons behind an AirPod not charging.
- Seeking Expert Advice: Users might want to know when it’s necessary to seek professional help, such as contacting Apple Support or visiting a repair shop.
- Finding Reliable Information: Users are looking for trustworthy sources that provide accurate and up-to-date information on how to resolve the charging issue.
- Preventative Measures: Users may also be interested in learning how to prevent this problem from happening in the future, including tips on AirPod maintenance and care.
2. Check the Charging Case
The charging case is the primary power source for your AirPods. Ensuring it’s functioning correctly is the first step in troubleshooting charging issues.
2.1. Verify the Case Has Power
- How to Check: Open the charging case lid. If the LED light inside the case doesn’t illuminate, the case likely has no charge.
- Solution: Connect the charging case to a power source using the Lightning cable. Allow it to charge for at least 15-30 minutes. Check the LED light again to see if it indicates charging status (amber light) or full charge (green light).
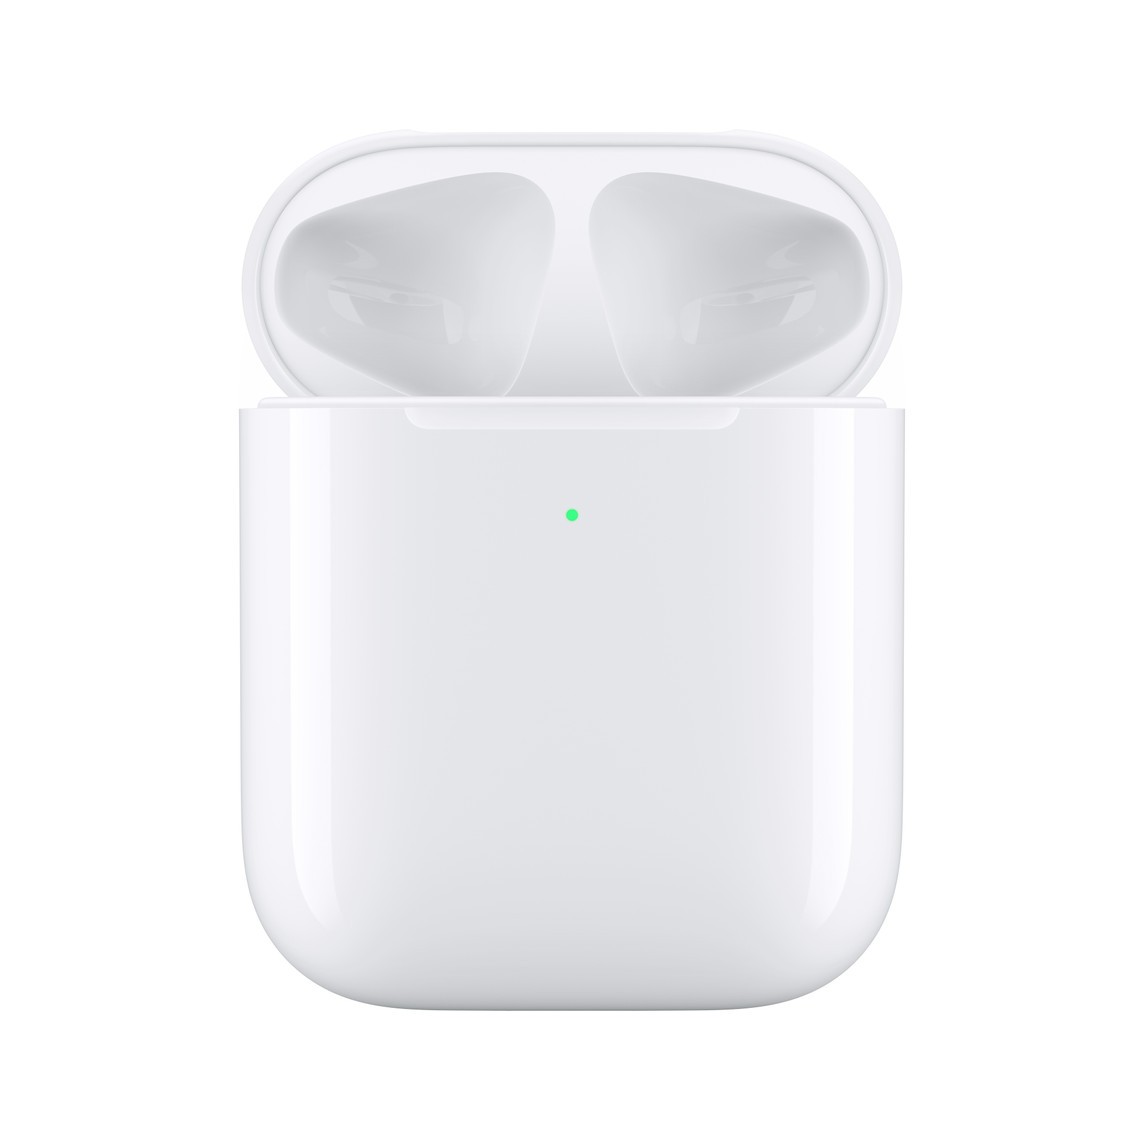 AirPods Charging Case Charging Status
2.2. Ensure Proper Contact
- How to Check: Make sure the AirPods are correctly seated in the charging case. Sometimes, they might not be fully inserted, preventing them from making contact with the charging points.
- Solution: Remove the AirPods from the case and reinsert them, ensuring they click into place. Close the lid and wait a few minutes to see if the charging status appears.
2.3. Check for Damage or Debris
- How to Check: Inspect the charging case for any visible damage, such as bent charging pins, debris, or corrosion.
- Solution: If you notice any debris, gently clean the case using a dry, lint-free cloth or a soft brush. For bent pins, contact Apple Support for assistance, as attempting to fix them yourself may cause further damage.
2.4. Charging Case Firmware
- How to Check: Charging case firmware issues are rare but can occur. You can’t directly check the charging case firmware, but keeping your paired iPhone updated will also update the firmware on your AirPods and their case.
- Solution: Ensure your iPhone is running the latest version of iOS. Go to Settings > General > Software Update to check for updates. Keeping your devices updated ensures optimal performance and compatibility.
2.5. Wireless Charging Issues (if applicable)
- How to Check: If you have a charging case that supports wireless charging, ensure the charging pad is working correctly.
- Solution: Try using a different wireless charging pad or a Lightning cable to charge the case. Make sure the case is properly aligned on the charging pad.
2.6. Battery Degradation of the Case
- How to Check: Over time, the battery in the charging case can degrade, affecting its ability to fully charge the AirPods. If the case battery drains quickly, this could be the issue.
- Solution: Monitor the charging case’s battery life. If it consistently drains quickly, even when not charging the AirPods, consider contacting Apple Support for a battery replacement or case replacement.
2.7. Environmental Factors
- How to Check: Avoid charging the AirPods or the charging case in extreme temperatures (very hot or very cold), as this can affect battery performance and charging efficiency.
- Solution: Charge your AirPods and case in a temperature-controlled environment (ideally between 62° to 72° F or 16° to 22° C).
3. Clean the AirPods and Charging Case
One of the most common reasons why an AirPod might not charge is due to dirt, debris, or earwax buildup on the charging contacts. Cleaning your AirPods and charging case regularly can help ensure a proper connection and efficient charging.
3.1. Gather Your Cleaning Supplies
- Lint-Free Cloth: Essential for wiping down the surfaces without leaving residue.
- Soft-Bristled Brush: A small brush (like a clean toothbrush) can help dislodge debris from hard-to-reach areas.
- Cotton Swabs (Q-tips): Useful for cleaning the charging contacts and crevices.
- Isopropyl Alcohol (70%): For stubborn dirt, a small amount of isopropyl alcohol can be used, but sparingly and carefully.
3.2. Cleaning the AirPods
-
Visual Inspection: Start by inspecting the AirPods for any visible dirt or earwax.
-
Dry Wipe: Use a dry, lint-free cloth to gently wipe the entire surface of the AirPods.
-
Brush Away Debris: Use the soft-bristled brush to gently brush away any debris from the speaker mesh and around the edges.
Alt Text: Cleaning AirPods with a soft brush.
-
Clean Charging Contacts: Pay close attention to the charging contacts at the bottom of the AirPods. Use a cotton swab, slightly dampened with isopropyl alcohol (ensure it’s not dripping), to gently clean these contacts.
-
Dry Thoroughly: After cleaning with alcohol, use a dry cotton swab or the lint-free cloth to ensure the contacts are completely dry before placing the AirPods back in the case.
3.3. Cleaning the Charging Case
- Visual Inspection: Check the charging case for any dirt, debris, or lint.
- Dry Wipe: Use a dry, lint-free cloth to wipe the exterior and interior of the case.
- Clean Charging Ports: Use a cotton swab, slightly dampened with isopropyl alcohol, to clean the charging ports inside the case where the AirPods make contact. Be gentle to avoid damaging the pins.
- Remove Debris: Use the soft-bristled brush to remove any debris from the corners and crevices of the case.
- Dry Thoroughly: Ensure the case is completely dry before placing the AirPods back inside. Leave the case open for a few minutes to air dry.
3.4. Additional Tips for Effective Cleaning
- Avoid Liquids: Never submerge your AirPods or charging case in water or any other liquid.
- Be Gentle: Avoid using excessive force when cleaning, as this can damage the components.
- Regular Cleaning: Clean your AirPods and charging case regularly, ideally once a week, to prevent buildup.
- Compressed Air: For hard-to-reach areas, a short burst of compressed air can help dislodge debris, but use it sparingly and from a distance to avoid damaging the components.
- Proper Storage: Store your AirPods in the charging case when not in use to protect them from dust and debris.
3.5. What to Avoid When Cleaning
- Sharp Objects: Avoid using sharp objects, such as needles or metal tools, to clean the AirPods or charging case, as they can cause permanent damage.
- Abrasive Materials: Do not use abrasive cloths or cleaning agents, as they can scratch the surface of the AirPods and case.
- Excessive Moisture: Avoid using too much liquid, as it can seep into the internal components and cause corrosion or short circuits.
- Non-Approved Cleaners: Do not use harsh chemicals, bleach, or solvents, as they can damage the materials and electronics.
4. Restart or Reset Your AirPods
Sometimes, software glitches can cause charging issues. Restarting or resetting your AirPods can resolve these temporary problems and restore normal functionality.
4.1. Restarting Your AirPods
Restarting your AirPods involves placing them back in their charging case and then taking them out again. This process can help refresh their connection and resolve minor software hiccups.
- Place AirPods in the Case: Put both AirPods back into their charging case.
- Close the Lid: Close the lid of the charging case.
- Wait: Wait for about 15-30 seconds. This allows the AirPods to disconnect and reset.
- Remove AirPods: Open the lid and take the AirPods out of the case.
- Reconnect: Place the AirPods near your device (iPhone, iPad, or Mac). Follow the on-screen prompts to reconnect them.
4.2. Resetting Your AirPods
Resetting your AirPods involves a more thorough process that erases their current settings and restores them to their factory defaults. This is useful for resolving persistent charging or connectivity issues.
-
Place AirPods in the Case: Ensure both AirPods are inside the charging case.
-
Close the Lid: Close the lid and wait for about 30 seconds.
-
Open the Lid: Open the lid of the charging case.
-
Press and Hold the Setup Button: Locate the setup button on the back of the charging case. Press and hold this button.
-
Observe the Status Light: Keep holding the button until the status light flashes amber a few times, then changes to white. This usually takes about 15 seconds.
Alt Text: Resetting AirPods by holding the setup button on the charging case.
-
Reconnect: After the light flashes white, your AirPods have been reset. Place them near your device, and follow the on-screen instructions to reconnect.
4.3. When to Restart vs. Reset
- Restart: Use this method for minor, temporary issues like connection problems or if one AirPod isn’t charging. It’s a quick and easy first step.
- Reset: Use this method for more persistent problems, such as chronic charging issues, pairing difficulties, or if the AirPods are not functioning correctly after troubleshooting.
4.4. Potential Benefits of Restarting or Resetting
- Resolves Software Glitches: Restarting or resetting can clear out temporary software bugs that may be causing charging or connectivity issues.
- Improves Pairing: It can help resolve issues with pairing the AirPods to your devices, especially after software updates.
- Restores Functionality: If one AirPod is not working, restarting or resetting can sometimes bring it back to normal operation.
- Optimizes Performance: Regular resets can help maintain the overall performance and responsiveness of your AirPods.
4.5. Important Considerations
- Backup Settings: Before resetting, ensure you understand that this will erase any custom settings. You may need to reconfigure your preferences afterward.
- Firmware Updates: Make sure your AirPods have the latest firmware installed before and after restarting or resetting, as outdated firmware can cause issues.
- Contact Apple Support: If restarting or resetting doesn’t resolve the problem, it may indicate a hardware issue, and you should contact Apple Support for further assistance.
5. Update Your AirPods Firmware
Keeping your AirPods firmware up to date is crucial for optimal performance. Firmware updates often include bug fixes, performance improvements, and solutions to known issues, including charging problems.
5.1. How to Check Your AirPods Firmware Version
- Connect Your AirPods: Make sure your AirPods are connected to your iPhone or iPad.
- Go to Settings: Open the Settings app on your iOS device.
- Navigate to Bluetooth: Tap on Bluetooth.
- Find Your AirPods: Locate your AirPods in the list of connected devices and tap the “i” icon next to them.
- View Firmware Version: Scroll down to find the Version number. This is your AirPods’ current firmware version.
5.2. How to Update Your AirPods Firmware
AirPods firmware updates are typically installed automatically in the background when the following conditions are met:
- AirPods are in the Charging Case: Place your AirPods in their charging case.
- Charging Case is Connected to Power: Ensure the charging case is plugged into a power source.
- Paired with an iOS Device: The AirPods must be paired with an iPhone or iPad that has an active Wi-Fi connection.
- Proximity: Keep the charging case near your iPhone or iPad.
Since the update process is automatic, there is no manual way to force a firmware update. However, you can encourage the update by ensuring all the above conditions are met.
5.3. Troubleshooting Firmware Updates
- Ensure a Stable Wi-Fi Connection: A stable Wi-Fi connection is essential for downloading and installing the firmware update.
- Keep AirPods in Close Proximity: Keep the AirPods charging case close to your iPhone or iPad to ensure a continuous connection.
- Charge Both AirPods and Case: Make sure both the AirPods and the charging case have sufficient charge.
- Restart Your iOS Device: Sometimes, restarting your iPhone or iPad can help initiate the update process.
- Check for iOS Updates: Ensure your iPhone or iPad is running the latest version of iOS, as this can impact the firmware update process for AirPods.
5.4. Benefits of Updating Firmware
- Bug Fixes: Firmware updates often include fixes for known bugs and issues, including charging problems.
- Performance Improvements: Updates can improve the overall performance and stability of your AirPods.
- New Features: Some firmware updates may introduce new features or enhancements to your AirPods.
- Compatibility: Keeping your firmware up to date ensures compatibility with the latest iOS devices and features.
- Security Updates: Firmware updates can also include security patches to protect your device from potential vulnerabilities.
5.5. What to Do If the Firmware Update Fails
If your AirPods firmware update fails, try the following steps:
- Restart the Update Process: Ensure your AirPods are in the charging case, the case is connected to power, and your iPhone or iPad is nearby with a stable Wi-Fi connection.
- Reset Your AirPods: Reset your AirPods by pressing and holding the setup button on the back of the charging case until the status light flashes amber, then white.
- Reconnect to Your Device: Reconnect your AirPods to your iPhone or iPad and try the update process again.
- Contact Apple Support: If the update continues to fail, contact Apple Support for further assistance. There may be a hardware issue or other problem that requires professional attention.
6. Check Bluetooth Connection
A stable Bluetooth connection is essential for your AirPods to function correctly. Connectivity issues can sometimes manifest as charging problems or erratic behavior.
6.1. How to Check Your Bluetooth Connection
- Open Settings: On your iPhone, iPad, or Mac, open the Settings app (or System Preferences on Mac).
- Go to Bluetooth: Navigate to the Bluetooth settings.
- Verify Connection: Ensure that Bluetooth is turned on and that your AirPods are listed as connected. If they are not connected, try reconnecting them.
6.2. Common Bluetooth Issues and Solutions
- AirPods Not Connecting:
- Solution: Make sure your AirPods are charged. Place them in the charging case, wait a few seconds, and then take them out. They should automatically attempt to connect to your device.
- Intermittent Connection:
- Solution: Bluetooth signals can be affected by interference from other electronic devices. Move away from potential sources of interference, such as Wi-Fi routers, microwaves, and other Bluetooth devices.
- One AirPod Not Working:
- Solution: Try restarting your AirPods. Place them in the charging case, close the lid, wait 15 seconds, and then take them out. This can help reset the connection.
- Device Not Recognizing AirPods:
- Solution: Reset your AirPods by pressing and holding the setup button on the back of the charging case until the status light flashes amber, then white. Then, reconnect them to your device.
6.3. Removing and Re-Pairing Your AirPods
Removing and re-pairing your AirPods can often resolve persistent Bluetooth connectivity issues.
- Unpair AirPods:
- On iPhone/iPad: Go to Settings > Bluetooth, find your AirPods, tap the “i” icon, and select Forget This Device.
- On Mac: Go to System Preferences > Bluetooth, find your AirPods, and click the “X” icon to remove them.
- Re-Pair AirPods:
- Open the charging case with the AirPods inside, near your device.
- Follow the on-screen prompts to reconnect your AirPods.
6.4. Bluetooth Troubleshooting Tips
- Update Your Device’s Software: Ensure your iPhone, iPad, or Mac is running the latest version of the operating system. Software updates often include Bluetooth improvements.
- Restart Your Device: Restart your iPhone, iPad, or Mac. This can help clear out temporary Bluetooth glitches.
- Check for Interference: As mentioned earlier, Bluetooth signals can be affected by interference. Move away from potential sources of interference.
- Reset Network Settings (iOS): On your iPhone or iPad, go to Settings > General > Transfer or Reset iPhone > Reset and select Reset Network Settings. This will reset Wi-Fi passwords, Bluetooth pairings, and other network settings.
- Test with Another Device: Try connecting your AirPods to another device to see if the issue persists. This can help determine whether the problem is with the AirPods or the original device.
6.5. Advanced Bluetooth Troubleshooting
- Bluetooth Diagnostic Mode (Mac):
- Hold down the Option key and click the Bluetooth icon in the menu bar.
- Select Debug and then choose Remove all devices.
- Restart your Mac and re-pair your AirPods.
- Check Bluetooth Profiles:
- Ensure the correct Bluetooth profiles are enabled for your AirPods.
- On Mac, go to System Preferences > Bluetooth, select your AirPods, and click Advanced. Make sure the appropriate profiles are checked.
7. Try Different Charging Cables and Adapters
If your right AirPod is not charging, the problem might be with the charging cable or adapter you are using. Testing different cables and adapters can help you identify if one of them is faulty.
7.1. Testing Different Charging Cables
- Check the Current Cable:
- Inspect the Lightning cable you usually use for any visible damage, such as frayed wires, bent connectors, or breaks in the cable.
- Try using the cable with another device to see if it charges properly. If it doesn’t, the cable is likely faulty.
- Try a Different Apple-Certified Cable:
- Use an Apple-certified Lightning cable (or a high-quality third-party cable that is MFi certified). These cables are designed to work optimally with Apple devices.
- Connect the cable to the charging case and plug it into a power source. Check if the charging case LED lights up to indicate charging.
- Avoid Damaged Cables:
- Do not use cables with visible damage, as they can be unreliable and potentially unsafe.
- Clean the Cable Connector:
- Sometimes, dust or debris can accumulate in the Lightning connector. Gently clean it with a dry, lint-free cloth or a soft brush.
7.2. Testing Different Power Adapters
- Check the Current Adapter:
- Ensure the power adapter you are using is functioning correctly. You can test it by using it to charge another device.
- Try a Different Adapter:
- Use a different power adapter to charge the AirPods charging case. It’s best to use an Apple-branded adapter or a high-quality third-party adapter.
- Check the Power Output:
- Make sure the power adapter provides sufficient power output. Apple recommends using a 5W USB power adapter for charging the AirPods charging case.
- Wall Outlet vs. USB Port:
- Try charging the AirPods charging case using a wall outlet instead of a USB port on a computer. Wall outlets generally provide more consistent and reliable power.
7.3. Wireless Charging Considerations
- Check the Wireless Charger:
- If you have a wireless charging case, ensure the wireless charger is functioning correctly. Test it with another device that supports wireless charging.
- Ensure Proper Alignment:
- Place the AirPods charging case in the center of the wireless charging pad. Misalignment can prevent proper charging.
- Remove Obstructions:
- Make sure there are no obstructions between the charging case and the wireless charger, such as dust, debris, or a case that is too thick.
- Compatibility:
- Ensure the wireless charger is compatible with the AirPods charging case. Some older wireless chargers may not work efficiently with newer devices.
7.4. Troubleshooting Charging Issues
- Monitor Charging Status:
- After connecting the charging case to a power source, monitor the LED light on the case to see if it lights up. An amber light indicates that the case is charging, while a green light indicates that it is fully charged.
- Leave it Charging:
- Sometimes, the AirPods or charging case may need to charge for a while before they start functioning properly. Leave them connected to the power source for at least 30 minutes.
- Check for Overheating:
- Avoid charging the AirPods or charging case in direct sunlight or hot environments, as this can cause overheating and affect charging performance.
7.5. Best Practices for Charging Cables and Adapters
- Use Apple-Certified Accessories:
- Always use Apple-certified charging cables and power adapters to ensure compatibility and optimal performance.
- Store Cables Properly:
- Store charging cables properly to prevent damage. Avoid wrapping them too tightly or bending them excessively.
- Regularly Inspect Cables:
- Regularly inspect charging cables for any signs of wear and tear. Replace them if you notice any damage.
- Keep Connectors Clean:
- Keep the Lightning connectors on both the charging cable and the AirPods charging case clean to ensure a good connection.
8. Examine Battery Health
The battery health of your AirPods and charging case can significantly impact their ability to charge and hold a charge. Over time, rechargeable batteries degrade, which can lead to reduced battery life and charging issues.
8.1. Understanding Battery Health
- Battery Degradation: Like all rechargeable batteries, the batteries in your AirPods and charging case degrade over time. This means they gradually lose their capacity to hold a charge.
- Factors Affecting Battery Health: Several factors can affect battery health, including:
- Charging Habits: Frequent full charges and discharges can accelerate battery degradation.
- Temperature: Exposure to extreme temperatures (hot or cold) can damage batteries.
- Age: The age of the AirPods and charging case plays a significant role, as batteries naturally degrade over time.
- Symptoms of Poor Battery Health:
- Reduced Battery Life: AirPods need to be charged more frequently.
- Slow Charging: AirPods take longer to charge fully.
- Inconsistent Charging: AirPods charge unevenly or not at all.
- Sudden Battery Drain: AirPods discharge quickly, even when not in use.
8.2. Checking Battery Health on iOS Devices
Apple provides a way to check the battery health of devices like iPhones and iPads, but unfortunately, there is no direct way to check the battery health of AirPods or their charging case through iOS. However, you can infer battery health by observing their performance.
- Monitor Battery Performance:
- Pay attention to how long your AirPods last on a single charge. If you notice a significant decrease in battery life compared to when they were new, it could indicate battery degradation.
- Check Charging Behavior:
- Observe how quickly your AirPods charge. If they take longer to charge fully, it may be a sign of reduced battery capacity.
8.3. Third-Party Apps and Tools
While Apple doesn’t offer a built-in tool to check AirPods battery health, some third-party apps claim to provide this functionality. However, use these apps with caution, as they may not be accurate and could pose privacy risks.
8.4. Managing and Maximizing Battery Health
Although you can’t directly check the battery health, you can take steps to manage and maximize the lifespan of your AirPods batteries:
- Avoid Extreme Temperatures:
- Do not expose your AirPods or charging case to extreme temperatures. Avoid leaving them in direct sunlight or in a hot car.
- Optimal Charging Habits:
- Try to avoid fully charging or fully discharging your AirPods frequently. Partial charges are generally better for battery health.
- Store Properly:
- When not in use, store your AirPods in their charging case to protect them from dust and debris.
- Keep Firmware Updated:
- Ensure your AirPods have the latest firmware installed, as updates often include battery management improvements.
8.5. When to Consider Battery Replacement
If you notice a significant decline in battery performance despite following the tips above, it may be time to consider battery replacement. Here are some signs that indicate it’s time for a replacement:
- Drastic Reduction in Battery Life: AirPods barely last an hour on a full charge.
- Frequent Charging: AirPods need to be charged multiple times a day with normal usage.
- Inconsistent Charging: One or both AirPods fail to charge properly.
- Case Battery Drains Quickly: The charging case loses its charge quickly, even when not charging the AirPods.
8.6. Battery Replacement Options
- Apple Support:
- Contact Apple Support to inquire about battery replacement options. Apple may offer battery replacement services for a fee.
- Authorized Service Providers:
- Visit an Apple Authorized Service Provider for battery replacement services.
- Third-Party Repair Services:
- Use third-party repair services with caution, as they may not use genuine Apple parts, and the quality of their service can vary.
- Ensure any third-party repair service is reputable and offers a warranty on their work.
9. Contact Apple Support
If you’ve tried all the troubleshooting steps and your right AirPod is still not charging, it may be time to contact Apple Support. They can provide further assistance and determine if there is a hardware issue that needs to be addressed.
9.1. When to Contact Apple Support
- Persistent Charging Issues: If your AirPod continues to have charging problems despite trying all the troubleshooting steps.
- Hardware Damage: If you notice any visible damage to the AirPods or charging case, such as bent pins, cracks, or water damage.
- Warranty Coverage: If your AirPods are still under warranty, Apple may be able to repair or replace them free of charge.
- Unusual Behavior: If your AirPods are behaving erratically, such as frequently disconnecting, producing distorted sound, or not responding to commands.
- Firmware Update Issues: If you encounter problems updating the firmware on your AirPods.
9.2. How to Contact Apple Support
- Online Support:
- Visit the official Apple Support website.
- You can initiate a support request, chat with a support representative, or schedule a call.
- Apple Support App:
- Download the Apple Support app from the App Store on your iPhone or iPad.
- The app provides personalized support options, including troubleshooting guides, chat support, and appointment scheduling.
- Phone Support:
- Call Apple Support directly. You can find the appropriate phone number for your region on the Apple Support website.
- Apple Store:
- Visit an Apple Store and speak with a Genius Bar technician. They can diagnose the problem and provide repair or replacement options.
9.3. Preparing for Your Support Contact
- Gather Information:
- Before contacting Apple Support, gather as much information as possible about the issue.
- Note the model of your AirPods (e.g., AirPods 2nd generation, AirPods Pro).
- Note the serial number of your AirPods (found on the charging case).
- Describe the problem in detail, including when it started, what troubleshooting steps you’ve already tried, and any error messages you’ve encountered.
- Warranty Status:
- Check the warranty status of your AirPods. You can do this on the Apple Support website by entering the serial number of your device.
- Proof of Purchase:
- If possible, have your proof of purchase (receipt) available. This may be required if your AirPods are under warranty.
9.4. What to Expect from Apple Support
- Troubleshooting:
- Apple Support will likely guide you through additional troubleshooting steps to try to resolve the issue.
- Diagnosis:
- If the problem cannot be resolved through troubleshooting, Apple Support may diagnose the issue remotely or ask you to bring your AirPods to an Apple Store for further evaluation.
- Repair or Replacement:
- If a hardware issue is identified and your AirPods are under warranty or covered by AppleCare+, Apple may offer to repair or replace them.
- Service Options:
- Apple Support will provide you with available service options, including mail-in repair, in-store repair, or replacement.
9.5. AppleCare+ for AirPods
- Coverage:
- AppleCare+ for AirPods provides extended warranty coverage and accidental damage protection.
- Benefits:
- With AppleCare+, you may be eligible for discounted repair or replacement services, including battery service if your battery health drops below a certain threshold.
- Eligibility:
- You can purchase AppleCare+ for your AirPods within 60 days of the original purchase date.
10. Frequently Asked Questions (FAQs)
Here are some frequently asked questions related to AirPods charging issues, along with detailed answers to help you troubleshoot and understand the problem.
10.1. Why is only one of my AirPods charging?
- Answer: Several factors can cause only one AirPod to charge. The most common reasons include dirt or debris on the charging contacts, a faulty charging case, software glitches, or battery degradation. Start by cleaning the AirPods and charging case, restarting the AirPods, and ensuring the charging case has enough power.
10.2. How do I clean my AirPods charging contacts?
- Answer: To clean your AirPods charging contacts, use a dry, lint-free cloth or a cotton swab slightly dampened with isopropyl alcohol (70%). Gently wipe the charging contacts on the AirPods and inside the charging case. Ensure everything is completely dry before placing the AirPods back in the case.
10.3. How do I reset my AirPods?
- Answer: To reset your AirPods, place them in their charging case and close the lid. Wait for 30 seconds, then open the lid. Press and hold the setup button on the back of the case until the status light flashes amber a few times, then turns white. Your AirPods are now reset and ready to be reconnected to your device.
10.4. How do I know if my AirPods charging case is charging?
- Answer: When you plug in your AirPods charging case, the LED light on the front of the case indicates the charging status. An amber light means the case is charging, while a green light indicates that it is fully charged. If there is no light, ensure the case is properly connected to a power source and try a different cable and adapter.
10.5. Can extreme temperatures affect AirPods charging?
- Answer: Yes, extreme temperatures can negatively affect AirPods charging. Avoid charging your AirPods or their charging case in direct sunlight, hot cars, or very cold environments. Apple recommends using AirPods in temperatures between 62° to 72° F (16° to 22° C) for optimal performance.
10.6. How do I check the battery health of my AirPods?
- Answer: Unfortunately, Apple does not provide a direct way to check the battery health of AirPods. However, you can monitor their performance by observing how long they last on a single charge and how quickly they charge. A significant decrease in battery life may indicate battery degradation.
10.7. What do I do if my AirPods are still under warranty?
- Answer: If your AirPods are still under warranty, contact Apple Support for assistance. They may be able to repair or replace your AirPods free of charge. You can check your warranty status on the Apple Support website by entering the serial number of your device.
10.8. How can I extend the battery life of my AirPods?
- Answer: To extend the battery life of your AirPods, avoid extreme temperatures, optimize charging habits (partial charges are better), store them properly in their case when not in use, and keep the firmware updated. Additionally, lower the volume and turn off features like spatial audio if you don’t need them.
10.9. Can I replace the battery in my AirPods?
- Answer: Yes, Apple offers battery replacement services for AirPods for a fee. Contact Apple Support or visit an Apple Authorized Service Provider to inquire about battery replacement options.
10.10. Why does my AirPod battery drain so fast?
- Answer: A fast-draining AirPod battery can be caused by several factors, including battery degradation, high volume levels, use of features like spatial audio, frequent use of Siri, and outdated firmware. Try reducing the volume, turning off unnecessary features, updating the firmware, and managing your charging habits to improve battery life.
Experiencing charging problems with your AirPods can be frustrating, but with the right knowledge and troubleshooting steps, you can often resolve the issue and get back to enjoying your wireless audio experience. Remember to regularly clean your AirPods and charging case, keep the firmware updated, and manage your charging habits to maximize battery health.
If you’ve tried everything and still can’t figure out why your right AirPod isn’t charging, don’t hesitate to ask for help from the experts. At WHY.EDU.VN, we connect you with specialists who can provide personalized solutions to your tech issues. Visit our website at WHY.EDU.VN or contact us at 101 Curiosity Lane, Answer Town, CA 90210, United States, or WhatsApp us at +1 (213) 555-0101. Get the answers you need quickly and accurately with why.edu.vn!