Experiencing an “SOS” signal on your iPhone can be concerning. Instead of the usual cellular bars, you might see “SOS” or “SOS Only” in the status bar. This indicates your iPhone is struggling to connect to your primary cellular network. While it’s reassuring to know that emergency calls are still possible, it’s crucial to understand why this happens and how to restore full cellular service to your device.
This article will delve into the reasons behind the “SOS” message on your iPhone and provide comprehensive steps to troubleshoot and resolve this issue, ensuring you regain reliable connectivity.
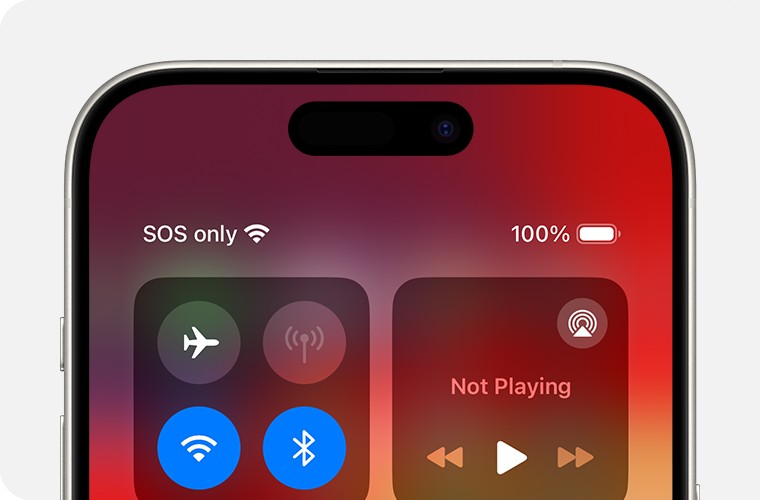
Decoding “SOS”: What Does It Really Mean?
When your iPhone displays “SOS” or “SOS Only,” it signifies that your device has lost connection to your usual cellular network but can still connect to any available carrier network in your vicinity for emergency calls. This functionality is particularly helpful in areas with weak signal coverage from your primary carrier but where other networks might be accessible. Think of it as your iPhone leveraging any available lifeline to ensure you can reach emergency services if needed.
It’s important to differentiate “SOS” from “No Service” or “Searching.” “No Service” or “Searching,” which might appear in the status bar of your iPhone or cellular iPad, means your device cannot connect to any cellular network, including for emergency calls, under normal circumstances. The “SOS” signal, therefore, represents a limited but vital level of connectivity.
Common Reasons Why Your iPhone Shows SOS
Several factors can trigger the “SOS” signal on your iPhone. Understanding these reasons is the first step towards effective troubleshooting:
- Weak Cellular Signal: The most frequent cause is simply being in an area with poor cellular coverage from your carrier. This could be due to geographical location, building structures, or network congestion.
- Network Outages: Your carrier might be experiencing temporary outages or maintenance in your area, leading to service disruption.
- Software Glitches: Occasionally, software bugs or glitches in iOS can interfere with cellular connectivity, causing your iPhone to display “SOS.”
- Carrier Settings Issues: Incorrect or outdated carrier settings can prevent your iPhone from properly connecting to the network.
- Account Problems: Issues with your carrier account, such as billing problems or account suspension, could also lead to loss of service.
- SIM Card Problems: A faulty, damaged, or improperly inserted SIM card can disrupt cellular connection.
- Airplane Mode Activated: Accidentally turning on Airplane Mode will immediately disconnect your iPhone from cellular networks.
- Hardware Malfunctions: In rare cases, hardware issues within your iPhone could be responsible for the inability to connect to cellular networks.
- Travel and Roaming Issues: When traveling internationally, incorrect roaming settings or lack of international roaming plan can result in “SOS” display.
Troubleshooting Steps to Reconnect Your iPhone to Cellular Service
Here’s a systematic approach to troubleshoot and resolve the “SOS” issue on your iPhone, starting with the simplest solutions:
1. Toggle Airplane Mode:
This is a quick and often effective first step. Turning Airplane Mode on and off can refresh your iPhone’s connection to the cellular network.
- Open Settings.
- Toggle Airplane Mode to the ON position. Wait for at least 15 seconds.
- Toggle Airplane Mode back to the OFF position.
- Check if your cellular service is restored.
2. Restart Your iPhone:
Restarting your iPhone can resolve minor software glitches that might be causing the “SOS” signal.
- For iPhones with Face ID: Press and hold the Side button and either volume button until the power-off slider appears. Drag the slider, then wait 30 seconds for your device to turn off. To turn it back on, press and hold the Side button until you see the Apple logo.
- For iPhones with a Home button: Press and hold the Side (or Top) button until the power-off slider appears. Drag the slider, then wait 30 seconds for your device to turn off. To turn it back on, press and hold the Side (or Top) button until you see the Apple logo.
3. Contact Your Cellular Carrier:
Issues related to your carrier account or network are common causes of “SOS.” Contacting your carrier is crucial to rule out these possibilities.
- Verify Account Status: Ensure your account is active and in good standing.
- Check Coverage and Outages: Confirm you are in an area with network coverage and if there are any reported outages in your region.
- Device and Plan Compatibility: Verify your device is not blocked from receiving services and is set up with the correct data plan.
- IMEI Registration: Inquire if local regulations require IMEI registration for iPhones purchased outside your current country.
4. Update Your iPhone Software:
Keeping your iPhone updated to the latest iOS version is essential for optimal performance and bug fixes.
- Go to Settings > General > Software Update.
- If an update is available, download and install it.
5. Check for Carrier Settings Update:
Carrier settings updates refine your iPhone’s ability to connect to your carrier’s network.
- Ensure your iPhone is connected to Wi-Fi.
- Go to Settings > General > About.
- If an update is available, you will see a prompt to update your carrier settings. Tap Update.
- To check your current carrier settings version, go to Settings > General > About and look next to Carrier.
6. Re-insert or Check Your SIM Card (for Physical SIM):
A loose or improperly placed SIM card can cause connection problems.
- Power off your iPhone.
- Use a SIM ejector tool or a paperclip to remove the SIM card tray.
- Remove and re-insert the SIM card, ensuring it is correctly placed in the tray.
- Reinsert the SIM card tray and power on your iPhone.
- If you suspect your SIM card is damaged, contact your carrier for a replacement.
7. Review Cellular Settings for Dual SIM iPhones:
If you have a Dual SIM iPhone, ensure both cellular lines are correctly configured.
- Go to Settings > Cellular.
- Tap on each cellular line to review its status.
- Ensure the line you intend to use is turned on.
- If a line is off, turn it back on and check for service.
- If you do not see a cellular line, contact your carrier to set up an eSIM or obtain a physical SIM card.
8. Data Roaming Settings (for International Travel):
If you are traveling internationally, ensure data roaming is enabled to connect to foreign networks.
- Go to Settings > Cellular or Mobile Data.
- Tap Cellular Data Options or Mobile Data Options.
- Turn on Data Roaming.
9. LTE/4G/5G Enablement:
For older iPhones potentially affected by 3G network shutdowns, ensure LTE or 4G is enabled in settings. Modern iPhones automatically use the best available network, but checking this setting can be helpful for older models.
- Go to Settings > Cellular > Cellular Data Options.
- Ensure Voice & Data is set to 4G, LTE, or 5G (Auto) or a similar option that includes 4G/LTE or newer.
When to Seek Professional Help
If you have exhausted all troubleshooting steps and your iPhone continues to display “SOS,” it might indicate a more complex issue, potentially a hardware problem. In such cases, it’s advisable to:
- Contact Apple Support: Apple Support can provide further diagnostics and guidance, including repair options if necessary.
- Visit an Authorized Service Provider: Take your iPhone to an authorized Apple service provider for professional inspection and repair.
By systematically following these steps, you can effectively diagnose and resolve most instances of the “SOS” signal on your iPhone, ensuring you stay connected when it matters most.