Experiencing issues with your iPhone not charging can be incredibly frustrating. If your iPhone battery is stubbornly refusing to charge, charging very slowly, or if you’re seeing a strange alert message, you’re not alone. This comprehensive guide will walk you through the common reasons why your iPhone might not be charging and provide step-by-step solutions to get you back up and running.
Basic Checks: Power Sources and Connections
Before diving into more complex troubleshooting, let’s start with the basics. The first step is to ensure your iPhone is properly connected to a power source. Here are the primary ways to charge your iPhone:
Wall Power Outlet
The most reliable way to charge your iPhone is using a wall outlet.
- Connect the USB cable that came with your iPhone to the device.
- Plug the USB cable into a USB power adapter. Make sure you are using an Apple-certified adapter for optimal charging.
- Plug the adapter into a working wall power outlet. Test the outlet with another device to ensure it’s providing power.
Charging icon displayed on iPhone lock screen indicating connection to power source.
Computer USB Port
You can also charge your iPhone by connecting it to a computer.
- Connect your iPhone to your computer using the USB cable.
- Plug the other end of the cable into a USB 2.0 or 3.0 port on a computer that is turned on and not in sleep mode. Avoid using USB ports on your keyboard as they might not provide enough power.
Powered Accessories
Another option is to use powered USB hubs, docking stations, or other Apple-certified accessories.
- Connect your iPhone to the accessory using the USB cable.
- Ensure the accessory is properly powered and Apple certified to guarantee compatibility and safe charging.
If you are attempting wireless charging with an iPhone 8 or later, verify that cable charging works first. If it does, then investigate potential wireless charging issues. Always use Apple-certified accessories from reputable brands for the best and safest charging experience.
When your iPhone is successfully charging, you’ll see a lightning bolt icon within the battery indicator in the status bar. Alternatively, a large battery icon will appear on the Lock Screen, visually confirming that charging has commenced.
Troubleshooting: My iPhone Still Won’t Charge
If your iPhone is still not charging after checking the basic connections, follow these troubleshooting steps, trying again after each step:
-
Restart Your iPhone: A simple restart can often resolve minor software glitches that might be preventing charging. Restart your iPhone or iPod touch.
-
Inspect the Charging Cable and Adapter: Carefully examine your charging cable and USB adapter for any signs of physical damage. Look for fraying, breakage, bent prongs, or corrosion. Damaged accessories can be hazardous and should not be used.
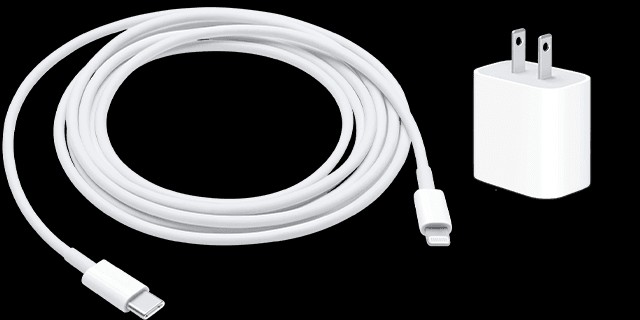 Image of a lightning to USB cable and a USB-C wall adapter showing no signs of damage
 -
Try Different Power Outlets and Connections: Use a wall power outlet you know is working. Ensure firm connections between your charging cable, USB wall adapter, and the wall outlet or AC power cable. You can also try a different wall outlet in another location to rule out outlet issues.
-
Clean the Charging Port: Debris, lint, or dirt can accumulate in the charging port on the bottom of your iPhone, preventing a proper connection. Carefully remove any visible debris from the charging port. You can use a non-metallic, anti-static brush or a can of compressed air to gently clean the port. After cleaning, firmly plug your charging cable back into your device.
-
Allow it to Charge for at Least 30 Minutes: Sometimes, if the battery is deeply depleted, it might take a little while to register a charge. Let your device charge for at least half an hour and check if there is any charging indication.
-
Force Restart Your iPhone: If your iPhone remains unresponsive and doesn’t power on or show a battery icon after charging for 30 minutes, try a force restart. The method varies depending on your iPhone model:
- iPhone 8 or later and iPhone SE (2nd generation and later): Quickly press and release the Volume Up button, then quickly press and release the Volume Down button. Press and hold the Side button until the Apple logo appears.
- iPhone 7, iPhone 7 Plus, and iPod touch (7th generation): Press and hold both the Side (or Top) button and the Volume Down button until the Apple logo appears.
- iPhone 6s or earlier, iPhone SE (1st generation), and iPod touch (6th generation) or earlier: Press and hold both the Side (or Top) button and the Home button until the Apple logo appears.
-
Charge for Another Half Hour: After force restarting, let your iPhone charge for another 30 minutes.
If, after trying all these steps, your iPhone still refuses to power on or charge, it might indicate a hardware issue requiring professional attention. In this case, you should seek professional service.
iPhone Stopped Charging at 80 Percent: Optimized Battery Charging
If your iPhone charges to 80% and then pauses, this is likely due to Apple’s Optimized Battery Charging feature. Introduced in iOS 13 and later, this intelligent feature aims to prolong battery lifespan by reducing the time your iPhone spends at full charge.
Your iPhone uses on-device machine learning to learn your charging habits. It predicts when you’ll unplug and use your device, and intelligently waits to complete charging past 80% until closer to that time. Optimized Battery Charging is typically active when your iPhone anticipates being connected to a charger for an extended period, like overnight.
Additionally, your iPhone may get slightly warm during charging. If the battery temperature rises excessively, software mechanisms might temporarily limit charging to 80% to protect the battery’s health. Charging will resume once the temperature decreases. Try moving your iPhone and charger to a cooler environment if you suspect overheating is the cause.
For iPhone 15 models and later, a customizable charge limit feature is available. This allows you to set a maximum charge level. If you want your iPhone to charge beyond 80%, you may need to adjust or disable this charge limit in your settings. Learn more about charge limit with iPhone 15 models and later.
“Accessory Not Supported or Certified” Alert
Seeing an “Accessory Not Supported or Certified” alert message when charging can stem from several reasons:
- Dirty or Damaged Charging Port: As mentioned earlier, a dirty or damaged charging port can interfere with proper accessory detection.
- Defective or Non-Certified Accessory: Your charging accessory might be faulty, damaged, or not officially Apple-certified (MFi certified). Non-certified accessories may not meet Apple’s quality and safety standards and can cause charging issues.
- Incompatible USB Charger: The USB charger you are using might not be designed to adequately charge devices like iPhones.
To troubleshoot this alert:
- Clean the Charging Port: Ensure the charging port is free of debris as described in the previous section.
- Restart Your iPhone: A restart can sometimes clear temporary software errors causing accessory detection issues. Restart your iPhone or iPod touch.
- Try a Different Cable and Charger: Test with a different USB cable and charger, ideally ones that are known to be working and Apple-certified.
- Update iOS: Ensure your iPhone is running the latest version of iOS. Software updates often include bug fixes and improved accessory compatibility.
Conclusion: Getting Your iPhone Charging Again
iPhone charging problems can be caused by a variety of factors, from simple connection issues to more complex hardware or software related causes. By systematically following these troubleshooting steps, you can often identify and resolve the issue yourself. Remember to always use certified accessories and keep your device’s charging port clean. If you’ve exhausted these steps and your iPhone still isn’t charging, don’t hesitate to contact Apple Support or an authorized service provider for further assistance.