Why Is Sos On My Phone? This can be alarming, but WHY.EDU.VN is here to provide you with clear explanations and effective solutions. Understanding what SOS, “SOS only,” No Service, or “Searching” means on your iPhone or iPad can help you take the right steps to restore your cellular connection and ensure you can make calls, especially during emergencies. We’ll cover everything from basic troubleshooting to more advanced solutions, ensuring your device is functioning optimally with carrier settings, network coverage, and emergency services.
1. Understanding SOS, SOS Only, No Service, and Searching
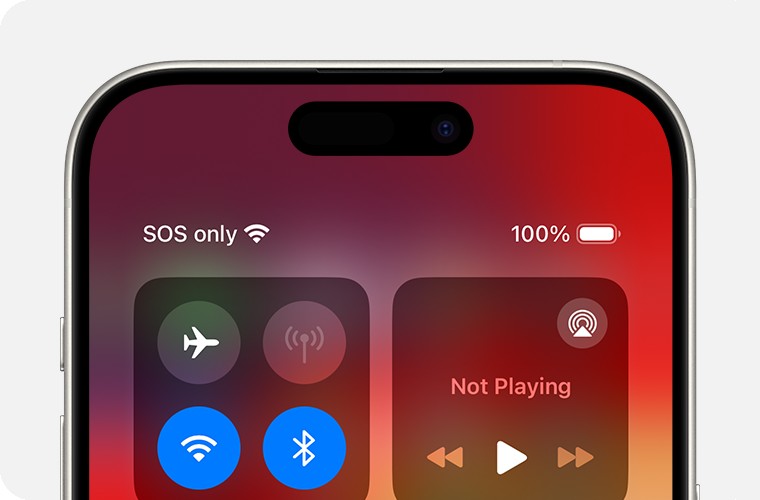
When your iPhone or iPad displays SOS, “SOS only,” No Service, or Searching in the status bar, it indicates different levels of connectivity issues. Understanding these states can help you troubleshoot the problem more effectively.
1.1. SOS or SOS Only
Seeing SOS or “SOS only” means your device has lost connection to your primary cellular network but can still make emergency calls through other available carrier networks. This feature is available in many countries, including Australia, Canada, and the United States. The device leverages any available cellular signal to connect to emergency services, even if it’s not your usual carrier.
1.2. No Service or Searching
When your iPhone or iPad displays No Service or Searching, it indicates that your device cannot connect to any cellular network. This means you cannot make regular calls, send text messages, or use cellular data. The device is actively searching for a signal but cannot find one. This could be due to various reasons, such as being in an area with poor coverage, a problem with your SIM card, or an issue with your device’s settings.
2. Common Causes of SOS, No Service, or Searching
Several factors can cause your iPhone or iPad to display SOS, No Service, or Searching. Identifying the root cause is crucial for effective troubleshooting.
2.1. Network Outages
One of the most common reasons for seeing SOS or No Service is a network outage in your area. Cellular networks can experience temporary disruptions due to maintenance, equipment failures, or natural disasters.
How to Check:
- Contact your carrier: Call your carrier’s customer support line or visit their website to check for reported outages in your area.
- Check social media: Monitor social media platforms like Twitter for reports of outages from other users in your area.
2.2. Poor Cellular Coverage
Being in an area with weak or no cellular coverage is another frequent cause. This is common in rural areas, basements, or buildings with thick walls.
How to Improve Coverage:
- Move to a different location: Try moving to an area with a clearer view of the sky, such as going outside or moving to a higher floor.
- Use Wi-Fi calling: If available, enable Wi-Fi calling in your device’s settings to make calls and send texts over a Wi-Fi network.
2.3. Airplane Mode
Accidentally enabling Airplane Mode can disconnect your device from cellular networks. Airplane Mode turns off all wireless communication, including cellular, Wi-Fi, and Bluetooth.
How to Disable Airplane Mode:
- Check Control Center: Swipe down from the top-right corner of your screen (or up from the bottom on older models) to access Control Center and ensure Airplane Mode is turned off.
- Check Settings: Go to Settings and verify that the Airplane Mode toggle is turned off.
2.4. SIM Card Issues
Problems with your SIM card can also cause connectivity issues. This includes a damaged SIM card, a SIM card that is not properly inserted, or a SIM card that is not activated.
How to Troubleshoot SIM Card Issues:
- Reinsert the SIM card: Turn off your device, remove the SIM card, and then reinsert it to ensure it is properly seated.
- Clean the SIM card: Use a soft, dry cloth to gently clean the SIM card contacts.
- Test with another device: If possible, try using the SIM card in another device to see if the issue persists.
- Contact your carrier: If the SIM card is damaged or not activated, contact your carrier for a replacement.
2.5. Software Issues
Software glitches or outdated software can sometimes interfere with your device’s ability to connect to cellular networks.
How to Address Software Issues:
- Restart your device: A simple restart can often resolve minor software glitches.
- Update your device: Ensure your iPhone or iPad is running the latest version of iOS or iPadOS.
- Reset network settings: Resetting network settings can resolve configuration issues that may be affecting connectivity.
2.6. Account Issues
Issues with your carrier account, such as an inactive account or a billing problem, can also prevent your device from connecting to cellular networks.
How to Resolve Account Issues:
- Contact your carrier: Call your carrier’s customer support line to verify that your account is active and in good standing.
- Check your bill: Ensure that your bill is paid and that there are no outstanding issues with your account.
3. Step-by-Step Troubleshooting Guide
If you’re seeing SOS, No Service, or Searching on your iPhone or iPad, follow these step-by-step troubleshooting instructions to resolve the issue.
3.1. Check Cellular Coverage
The first step is to ensure you are in an area with adequate cellular coverage.
Steps:
- Move to a different location: Go outside or move to a higher floor to see if the signal improves.
- Check signal strength: Look at the signal strength indicator in the status bar to see if you have any bars.
- Use a signal-finding app: There are apps available that can help you locate the nearest cellular tower.
3.2. Toggle Airplane Mode
Toggling Airplane Mode can sometimes force your device to reconnect to the cellular network.
Steps:
- Turn on Airplane Mode: Go to Settings and turn on Airplane Mode.
- Wait 15 seconds: Leave Airplane Mode on for at least 15 seconds.
- Turn off Airplane Mode: Turn off Airplane Mode and wait for your device to reconnect to the cellular network.
3.3. Restart Your iPhone or iPad
Restarting your device can often resolve minor software glitches that may be affecting connectivity.
Steps:
- Restart iPhone: Press and hold either volume button and the side button until the power-off slider appears. Drag the slider, then wait 30 seconds for your device to turn off. To turn your device back on, press and hold the side button until you see the Apple logo.
- Restart iPad: Press and hold the top button until the power-off slider appears. Drag the slider, then wait 30 seconds for your device to turn off. To turn your device back on, press and hold the top button until you see the Apple logo.
3.4. Check for Carrier Settings Update
Carrier settings updates can improve your device’s ability to connect to cellular networks.
Steps:
- Connect to Wi-Fi: Ensure your device is connected to a Wi-Fi network.
- Go to Settings: Tap General, then tap About.
- Check for update: If an update is available, you’ll see an option to update your carrier settings. Follow the prompts to install the update.
3.5. Update iOS or iPadOS
Updating your device to the latest version of iOS or iPadOS can resolve software issues that may be affecting connectivity.
Steps:
- Connect to Wi-Fi: Ensure your device is connected to a Wi-Fi network.
- Go to Settings: Tap General, then tap Software Update.
- Download and install: If an update is available, tap Download and Install. Follow the prompts to complete the update.
3.6. Reinsert SIM Card
Reinserting the SIM card can ensure it is properly seated and making good contact with the device.
Steps:
- Turn off your device: Power off your iPhone or iPad.
- Locate the SIM tray: Use a SIM eject tool or a paperclip to open the SIM tray.
- Remove the SIM card: Gently remove the SIM card from the tray.
- Reinsert the SIM card: Place the SIM card back into the tray, ensuring it is properly aligned.
- Close the SIM tray: Push the SIM tray back into the device until it clicks into place.
- Turn on your device: Power on your iPhone or iPad and wait for it to reconnect to the cellular network.
3.7. Reset Network Settings
Resetting network settings can resolve configuration issues that may be affecting connectivity.
Steps:
- Go to Settings: Tap General, then tap Transfer or Reset iPhone/iPad.
- Reset Network Settings: Tap Reset, then tap Reset Network Settings.
- Enter your passcode: If prompted, enter your passcode to confirm the reset.
- Reconnect to Wi-Fi: After the reset, you’ll need to reconnect to your Wi-Fi network.
3.8. Check Cellular Data Settings
Ensure that cellular data is enabled and that data roaming is turned on if you are traveling internationally.
Steps:
- Go to Settings: Tap Cellular or Cellular Data.
- Enable Cellular Data: Make sure the Cellular Data toggle is turned on.
- Check Data Roaming: If you are traveling internationally, tap Cellular Data Options and turn on Data Roaming.
3.9. Contact Your Carrier
If you’ve tried all the above steps and are still experiencing issues, contact your carrier for assistance.
Information to Provide:
- Your account information: Have your account number and other relevant information ready.
- Device information: Provide the make and model of your iPhone or iPad, as well as the IMEI number.
- Troubleshooting steps: Explain the steps you’ve already taken to troubleshoot the issue.
4. Dual SIM Troubleshooting
If you have an iPhone with Dual SIM, there are additional steps you can take to troubleshoot connectivity issues.
4.1. Check Cellular Lines
Ensure that both cellular lines are turned on and configured correctly.
Steps:
- Go to Settings: Tap Cellular.
- Check Cellular Lines: Verify that both cellular lines are turned on. If a line is off, turn it back on.
- Check Service: Check to see if you have service on both lines.
4.2. Set Default Line for Data
Make sure you have set a default line for cellular data.
Steps:
- Go to Settings: Tap Cellular, then tap Cellular Data.
- Select Default Line: Choose which line you want to use for cellular data.
4.3. Check SIM Card Status
If you don’t see one of your cellular lines, contact your carrier to set up an eSIM or insert a physical SIM card. If you’re using a physical SIM card, remove the SIM card and put it back in.
Steps:
- Turn off your device: Power off your iPhone.
- Remove and reinsert SIM cards: Remove both SIM cards and reinsert them, ensuring they are properly seated.
- Turn on your device: Power on your iPhone and check if both lines are now recognized.
5. Advanced Troubleshooting
If the basic troubleshooting steps don’t resolve the issue, here are some more advanced steps you can try.
5.1. Check APN Settings
APN (Access Point Name) settings are used to configure your device’s connection to the cellular network. Incorrect APN settings can cause connectivity issues.
Steps:
- Go to Settings: Tap Cellular, then tap Cellular Data Options.
- Check APN: Look for the APN setting. In most cases, these settings are automatically configured by your carrier.
- Enter APN settings: If necessary, enter the APN settings provided by your carrier. Contact your carrier’s customer support for the correct APN settings for your device and plan.
5.2. Restore Your iPhone or iPad
Restoring your device to factory settings can resolve more complex software issues that may be affecting connectivity.
Steps:
- Back up your device: Before restoring, back up your iPhone or iPad to iCloud or your computer.
- Go to Settings: Tap General, then tap Transfer or Reset iPhone/iPad.
- Erase All Content and Settings: Tap Erase All Content and Settings.
- Follow the prompts: Follow the prompts to complete the restoration process.
- Restore from backup: After the restoration, you can restore your device from the backup you created earlier.
5.3. DFU Mode Restore
DFU (Device Firmware Update) mode is a more advanced restore mode that can resolve more persistent software issues.
Steps:
- Connect to computer: Connect your iPhone or iPad to your computer.
- Open Finder or iTunes: Open Finder on macOS Catalina or later, or iTunes on older versions of macOS or Windows.
- Enter DFU mode: The steps to enter DFU mode vary depending on your device model. Search online for specific instructions for your device.
- Restore your device: Follow the prompts in Finder or iTunes to restore your device.
- Restore from backup: After the restoration, you can restore your device from the backup you created earlier.
Caution: DFU mode is an advanced troubleshooting step and should be used with caution. Incorrectly performing a DFU restore can cause data loss or damage to your device.
6. Preventing Future Connectivity Issues
Taking proactive steps can help prevent future connectivity issues on your iPhone or iPad.
6.1. Keep Your Device Updated
Regularly updating your device to the latest version of iOS or iPadOS can resolve software issues and improve connectivity.
Tips:
- Enable automatic updates: Go to Settings, tap General, then tap Software Update. Turn on Automatic Updates to ensure your device is always up to date.
- Check for updates regularly: Periodically check for updates manually to ensure you don’t miss any important updates.
6.2. Monitor Your Data Usage
Keeping track of your data usage can help you avoid exceeding your data limits and experiencing connectivity issues.
Tips:
- Use the built-in data usage monitor: Go to Settings, tap Cellular or Cellular Data, and review your data usage statistics.
- Set data usage alerts: Many carriers offer the option to set data usage alerts to notify you when you are approaching your data limit.
6.3. Use Wi-Fi Whenever Possible
Using Wi-Fi whenever possible can help reduce your reliance on cellular data and prevent connectivity issues.
Tips:
- Connect to Wi-Fi networks: Whenever you are in range of a Wi-Fi network, connect to it to save cellular data.
- Enable Wi-Fi Assist: Go to Settings, tap Cellular or Cellular Data, and turn on Wi-Fi Assist to automatically switch to cellular data when Wi-Fi connectivity is poor.
6.4. Be Mindful of Your Environment
Being aware of your environment can help you avoid areas with poor cellular coverage and prevent connectivity issues.
Tips:
- Avoid areas with poor coverage: Be aware of areas where you typically experience poor cellular coverage and try to avoid them if possible.
- Use a cellular signal booster: If you frequently experience poor cellular coverage at home or in your office, consider using a cellular signal booster to improve signal strength.
7. Understanding Emergency SOS
Emergency SOS is a feature on iPhone that allows you to quickly and easily call for help in an emergency situation.
7.1. How Emergency SOS Works
When you use Emergency SOS, your iPhone will call the local emergency number and share your location with emergency services.
Steps to Use Emergency SOS:
- Press and hold: Press and hold the side button and either volume button simultaneously.
- Slide the Emergency SOS slider: Drag the Emergency SOS slider to call emergency services.
- Automatic call: If you continue holding the buttons instead of dragging the slider, a countdown will begin, and your iPhone will automatically call emergency services when the countdown ends.
7.2. Setting Up Emergency Contacts
You can set up emergency contacts in the Health app on your iPhone. These contacts will be notified when you use Emergency SOS.
Steps to Set Up Emergency Contacts:
- Open the Health app: Tap the Health app icon on your iPhone.
- Tap your profile: Tap your profile picture in the top-right corner.
- Tap Medical ID: Tap Medical ID.
- Edit Emergency Contacts: Tap Edit, then scroll down to Emergency Contacts and add your contacts.
7.3. Location Sharing
When you use Emergency SOS, your iPhone will share your location with emergency services and your emergency contacts. This can help them find you more quickly in an emergency situation.
Important Considerations:
- Privacy: Be aware that sharing your location with emergency services and your emergency contacts can raise privacy concerns.
- Accuracy: The accuracy of your location depends on factors such as GPS signal strength and cellular coverage.
8. Addressing 3G Network Shutdown
The phasing out of 3G networks by major carriers can affect older devices that rely on 3G for connectivity.
8.1. Impact on Older Devices
If you have an older iPhone or iPad that only supports 3G networks, you may experience connectivity issues as 3G networks are phased out.
Affected Devices:
- iPhone 5s and earlier
- iPad 2 (Wi-Fi + Cellular) and earlier
8.2. Upgrading to a Newer Device
If you have an affected device, you may need to upgrade to a newer iPhone or iPad that supports 4G LTE or 5G networks.
Benefits of Upgrading:
- Improved connectivity: Newer devices support faster and more reliable network connections.
- Access to new features: Newer devices offer access to the latest features and capabilities of iOS or iPadOS.
- Continued support: Newer devices will continue to receive software updates and support from Apple.
8.3. Contacting Your Carrier
Contact your carrier to discuss your options for upgrading to a newer device that supports 4G LTE or 5G networks.
Possible Options:
- Upgrade program: Many carriers offer upgrade programs that allow you to upgrade to a newer device at a discounted price.
- Trade-in program: Some carriers offer trade-in programs that allow you to trade in your old device for credit towards a new device.
9. Wi-Fi Calling: An Alternative Solution
Wi-Fi Calling allows you to make and receive calls over a Wi-Fi network instead of using your cellular network. This can be a useful alternative in areas with poor cellular coverage.
9.1. Enabling Wi-Fi Calling
You can enable Wi-Fi Calling in your device’s settings.
Steps:
- Go to Settings: Tap Phone, then tap Wi-Fi Calling.
- Turn on Wi-Fi Calling: Turn on the Wi-Fi Calling toggle.
- Enter your address: You may be prompted to enter your address for emergency services.
9.2. Benefits of Wi-Fi Calling
Wi-Fi Calling offers several benefits, including:
- Improved call quality: Wi-Fi Calling can provide better call quality in areas with poor cellular coverage.
- Cost savings: Wi-Fi Calling can help you save on cellular data charges by using Wi-Fi instead of cellular data for calls.
- Convenience: Wi-Fi Calling allows you to make and receive calls from anywhere you have a Wi-Fi connection, even if you don’t have cellular coverage.
9.3. Limitations of Wi-Fi Calling
Wi-Fi Calling also has some limitations, including:
- Reliance on Wi-Fi: Wi-Fi Calling requires a stable Wi-Fi connection. If your Wi-Fi connection is poor or drops, you may experience call quality issues.
- Emergency calls: In some cases, emergency calls made over Wi-Fi may not be routed correctly. It’s important to ensure that your address is correctly configured for emergency services.
10. International Travel Considerations
If you’re traveling internationally, there are additional considerations to keep in mind to ensure your device stays connected.
10.1. Data Roaming
Data roaming allows you to use cellular data in foreign countries. However, data roaming charges can be expensive, so it’s important to check with your carrier before traveling.
Tips:
- Check roaming rates: Contact your carrier to check the data roaming rates for the countries you’ll be visiting.
- Purchase a travel plan: Consider purchasing a travel plan from your carrier that includes data roaming at a discounted rate.
- Use Wi-Fi: Whenever possible, use Wi-Fi to avoid data roaming charges.
10.2. Local SIM Card
Another option is to purchase a local SIM card in the country you’re visiting. This can be a more cost-effective way to use cellular data while traveling.
Tips:
- Research local carriers: Research local carriers in the country you’ll be visiting to find the best rates and plans.
- Purchase a SIM card: Purchase a local SIM card at the airport or a local store.
- Install the SIM card: Install the local SIM card in your iPhone or iPad.
10.3. International Calling
Making international calls can also be expensive, so it’s important to check with your carrier before traveling.
Tips:
- Check international calling rates: Contact your carrier to check the international calling rates for the countries you’ll be calling.
- Use a calling app: Consider using a calling app like WhatsApp or Skype to make calls over Wi-Fi.
FAQ: Common Questions About SOS, No Service, and Searching
Here are some frequently asked questions about SOS, No Service, and Searching on iPhones and iPads.
- Why does my phone say SOS only?
- SOS only means your phone has lost connection to your primary cellular network but can still make emergency calls through other available carrier networks.
- How do I fix No Service on my iPhone?
- Try toggling Airplane Mode, restarting your device, checking for carrier settings updates, updating iOS, reinserting your SIM card, and resetting network settings.
- What does Searching mean on my iPhone?
- Searching means your device is actively looking for a cellular network but cannot find one. This could be due to poor coverage, SIM card issues, or software glitches.
- Why does my iPhone say No SIM?
- No SIM means your device is not detecting a SIM card. Try reinserting the SIM card or contacting your carrier for a replacement.
- How do I update my carrier settings?
- Go to Settings > General > About. If an update is available, you’ll see an option to update your carrier settings.
- What is Wi-Fi Calling and how do I use it?
- Wi-Fi Calling allows you to make and receive calls over a Wi-Fi network. You can enable it in Settings > Phone > Wi-Fi Calling.
- How do I reset my network settings on iPhone?
- Go to Settings > General > Transfer or Reset iPhone/iPad > Reset > Reset Network Settings.
- Why is my cellular data not working?
- Check that cellular data is enabled in Settings > Cellular or Cellular Data. Also, ensure you haven’t exceeded your data limit.
- What should I do if I’m traveling internationally and have No Service?
- Check that data roaming is enabled in Settings > Cellular > Cellular Data Options. Consider purchasing a local SIM card or a travel plan from your carrier.
- How does Emergency SOS work on iPhone?
- Press and hold the side button and either volume button to activate Emergency SOS. Your iPhone will call emergency services and share your location with them and your emergency contacts.
Conclusion
Experiencing SOS, “SOS only,” No Service, or Searching on your iPhone or iPad can be frustrating, but with the right knowledge and troubleshooting steps, you can often resolve the issue and restore your device’s connectivity. From checking cellular coverage and toggling Airplane Mode to updating your device and contacting your carrier, there are several steps you can take to diagnose and fix the problem. Remember to also consider advanced troubleshooting options like resetting network settings or restoring your device if necessary.
If you’re still facing difficulties or have more complex questions, don’t hesitate to seek expert advice. At WHY.EDU.VN, we’re dedicated to providing accurate and reliable answers to all your tech-related questions. Visit our website at WHY.EDU.VN or contact us at 101 Curiosity Lane, Answer Town, CA 90210, United States, or via WhatsApp at +1 (213) 555-0101 to get personalized assistance and explore a wealth of information. Let why.edu.vn be your trusted resource for all your queries and concerns.