Why Is My Sourdough So Dense, a common question for bakers, often stems from issues with the starter, fermentation, or technique. At WHY.EDU.VN, we understand the nuances of sourdough baking and offer comprehensive guidance to achieve that perfect airy loaf. Mastering these sourdough secrets ensures a delightful baking experience, avoiding common pitfalls and leading to consistent, delicious results.
1. Understanding the Fundamentals of Sourdough Density
Sourdough baking is as much an art as it is a science. Understanding the fundamental processes that influence the final texture of your loaf is the first step in troubleshooting density issues. The density of sourdough is primarily determined by the fermentation process and the strength of the gluten network. The fermentation relies on a healthy starter, the heart of any good sourdough, filled with wild yeasts and bacteria. These microorganisms produce gases that leaven the dough. Gluten, formed from the proteins in wheat flour, provides the structure to trap these gases, resulting in an airy crumb. When either of these processes falters, the bread can become dense. Let’s delve deeper into these core aspects to unlock the secrets of successful sourdough.
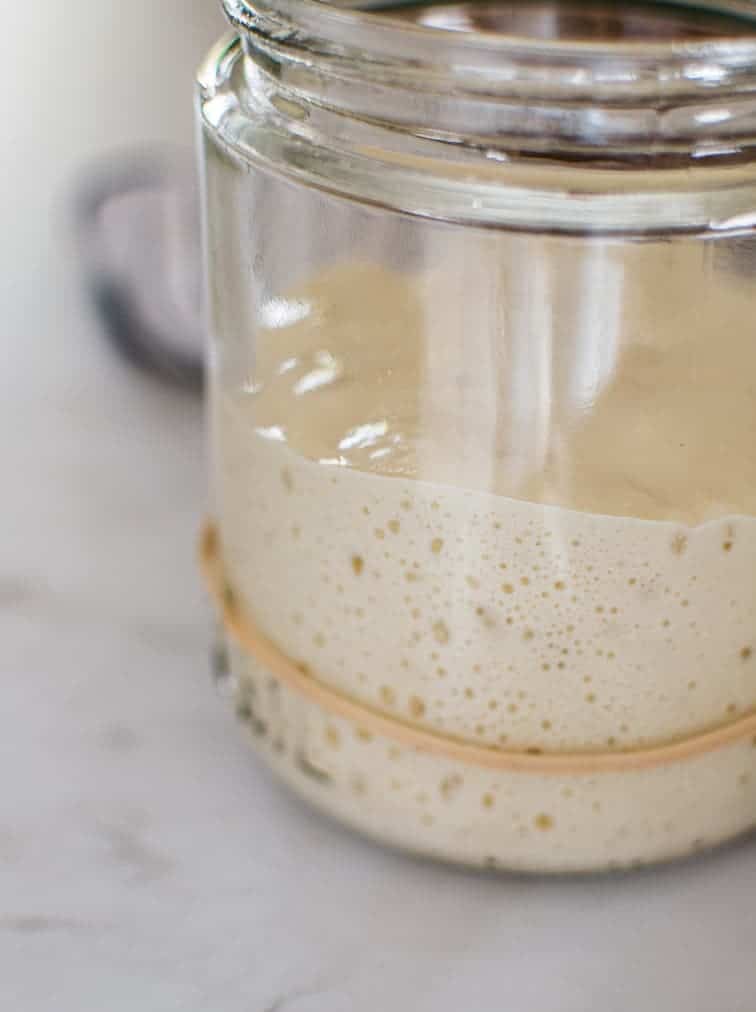
1.1 The Role of the Sourdough Starter
The sourdough starter is a living culture of wild yeasts and bacteria that are responsible for leavening the dough. A vibrant starter is crucial for a light and airy loaf.
- Yeast Activity: The yeast produces carbon dioxide, which causes the dough to rise.
- Bacterial Activity: Bacteria, primarily lactic acid bacteria (LAB), contribute to the sour flavor and also produce gases.
- Symbiotic Relationship: The yeast and bacteria coexist in a symbiotic relationship, each benefiting from the other’s activity.
1.2 Gluten Development: The Structural Backbone
Gluten is the protein network that provides the structure for the dough. Proper gluten development is essential to trap the gases produced during fermentation.
- Hydration: Adequate water is needed to hydrate the flour, allowing gluten to form.
- Mixing and Kneading: Mixing or kneading aligns the gluten strands, strengthening the network.
- Resting Time: Allowing the dough to rest (autolyse) further develops the gluten.
1.3 Fermentation: The Heart of the Rise
Fermentation is the process by which yeasts and bacteria consume sugars in the flour and produce carbon dioxide and other byproducts.
- Bulk Fermentation: The first rise, occurring after mixing, where the dough increases in volume.
- Proofing: The final rise after shaping, before baking.
- Temperature: Fermentation rate is heavily influenced by temperature.
2. Diagnosing the Dense Dough: Common Causes
Several factors can contribute to a dense sourdough loaf. Identifying the root cause is essential for correcting the issue in future bakes.
2.1 Inactive or Weak Starter
A starter that isn’t sufficiently active is a primary culprit behind dense sourdough.
- Underfed Starter: A starter needs regular feedings to maintain its strength.
- Incorrect Ratios: Using incorrect ratios of flour and water can weaken the starter.
- Temperature Fluctuations: Extreme temperatures can inhibit yeast and bacterial activity.
- Age of Starter: Newly established starters may not have the strength to leaven bread properly.
- Contamination: Though rare, contamination with unwanted microorganisms can disrupt the starter’s balance.
To revitalize an inactive starter:
- Consistent Feedings: Feed the starter at regular intervals (e.g., every 12-24 hours).
- Optimal Ratios: Use a ratio of 1:1:1 (starter:flour:water) or 1:2:2 for increased feeding power.
- Warm Environment: Keep the starter in a warm place (around 70-75°F or 21-24°C) to encourage activity.
- Observe and Adjust: Monitor the starter’s rise and fall; adjust feeding schedules as needed.
2.2 Insufficient Bulk Fermentation
Bulk fermentation is crucial for developing flavor and volume in the dough.
- Too Short Fermentation: Not allowing enough time for the dough to rise sufficiently.
- Low Temperature: Cool temperatures slow down fermentation.
- Incorrect Dough Hydration: Too little or too much water can affect fermentation.
To ensure proper bulk fermentation:
- Time and Temperature: Monitor the dough’s rise, aiming for about a 50-100% increase in volume. Adjust timing based on room temperature.
- Stretch and Folds: Perform stretch and folds during bulk fermentation to strengthen the gluten and redistribute gases.
- Observe the Dough: Look for signs of fermentation such as bubbles and a slightly domed shape.
2.3 Over-Proofing
While under-proofing is a common problem, over-proofing can also lead to dense bread.
- Too Long Fermentation: Allowing the dough to ferment for too long, causing the gluten structure to weaken.
- High Temperature: Warm temperatures accelerate fermentation, making it easier to over-proof.
To avoid over-proofing:
- Watch the Dough, Not the Clock: Monitor the dough’s volume and texture rather than strictly adhering to a timeline.
- Poke Test: Gently poke the dough with a wet finger. If the indentation slowly fills back, it’s ready to bake. If it collapses, it’s over-proofed.
- Adjust Timing: Reduce fermentation time in warmer environments and increase it in cooler ones.
2.4 Improper Gluten Development
Gluten provides the structure that traps gases and gives bread its rise.
- Insufficient Mixing: Not mixing or kneading the dough enough to develop gluten.
- Incorrect Flour Type: Using flour with low protein content (low gluten potential).
- Lack of Autolyse: Skipping the autolyse step, which hydrates the flour and aids gluten development.
- Over-Mixing: Can cause gluten breakdown.
To improve gluten development:
- Autolyse: Allow the flour and water to sit for 20-60 minutes before adding the starter and salt.
- Kneading Techniques: Use effective kneading techniques, such as the stretch and fold method or traditional kneading.
- High-Protein Flour: Use bread flour with a protein content of 11-13%.
2.5 Hydration Issues
The amount of water in your dough can significantly impact its texture.
- Too Little Water: Results in a stiff dough that doesn’t ferment properly.
- Too Much Water: Can lead to a weak, sticky dough that collapses during baking.
To manage hydration:
- Accurate Measurements: Use a kitchen scale for precise measurements.
- Adjust as Needed: Adjust the amount of water based on the flour’s absorbency.
- Observe Dough Consistency: The dough should be smooth and elastic, not too dry or overly sticky.
2.6 Shaping Problems
The way you shape your dough can affect its ability to rise properly in the oven.
- Degassing Too Much: Pressing out too much gas during shaping.
- Insufficient Surface Tension: Not creating enough surface tension for the dough to hold its shape.
- Incorrect Technique: Mishandling the dough during shaping.
To improve shaping:
- Gentle Handling: Handle the dough gently to avoid degassing.
- Create Tension: Use a bench scraper to create surface tension by pulling the dough taut.
- Practice: Practice different shaping techniques to find what works best.
2.7 Baking Issues
Even if all previous steps are perfect, improper baking can still result in dense bread.
- Oven Temperature: Incorrect oven temperature affects the rise and crust formation.
- Lack of Steam: Steam is crucial for oven spring and a good crust.
- Baking Time: Underbaking can lead to a gummy texture.
To improve baking:
- Preheat Thoroughly: Preheat the oven and baking vessel (Dutch oven or baking stone) thoroughly.
- Create Steam: Use a Dutch oven or add steam to the oven by placing a tray of hot water on the bottom rack.
- Check for Doneness: The bread should have an internal temperature of around 205-210°F (96-99°C).
3. Troubleshooting Guide: Step-by-Step Solutions
Addressing density in sourdough requires a systematic approach. Here’s a troubleshooting guide to help identify and resolve common issues.
Step 1: Evaluate Your Starter
- Activity: Is your starter doubling within 4-8 hours after feeding?
- Yes: Proceed to Step 2.
- No: Revitalize the starter with consistent feedings and optimal conditions.
- Consistency: Does it have a pleasant, slightly sour smell?
- Yes: Proceed to Step 2.
- No: Discard and restart or try to rehabilitate with small, frequent feedings.
Step 2: Assess Bulk Fermentation
- Time: Are you allowing sufficient time for bulk fermentation (usually 4-12 hours)?
- Yes: Proceed to Step 3.
- No: Extend the fermentation time, monitoring the dough’s progress.
- Temperature: Is the dough kept at a consistent, warm temperature (70-75°F or 21-24°C)?
- Yes: Proceed to Step 3.
- No: Adjust the environment to maintain the optimal temperature.
Step 3: Check Gluten Development
- Mixing: Are you mixing or kneading the dough adequately?
- Yes: Proceed to Step 4.
- No: Improve mixing or kneading techniques.
- Autolyse: Are you using an autolyse step?
- Yes: Proceed to Step 4.
- No: Incorporate an autolyse step to improve gluten development.
Step 4: Verify Hydration
- Ratio: Are you using the correct hydration level (typically 70-80%)?
- Yes: Proceed to Step 5.
- No: Adjust the water content as needed.
- Consistency: Does the dough feel smooth and elastic?
- Yes: Proceed to Step 5.
- No: Adjust the hydration and continue mixing until the desired consistency is achieved.
Step 5: Perfect Shaping
- Technique: Are you shaping the dough gently without degassing it too much?
- Yes: Proceed to Step 6.
- No: Refine shaping techniques to maintain gas and create surface tension.
- Tension: Are you creating enough surface tension during shaping?
- Yes: Proceed to Step 6.
- No: Focus on creating a tight, smooth surface during shaping.
Step 6: Optimize Baking
- Temperature: Is your oven properly preheated, and is the temperature accurate?
- Yes: Success!
- No: Calibrate your oven and preheat thoroughly.
- Steam: Are you creating enough steam during the initial baking period?
- Yes: Success!
- No: Use a Dutch oven or add steam to the oven.
- Baking Time: Are you baking the bread long enough to achieve an internal temperature of 205-210°F (96-99°C)?
- Yes: Success!
- No: Extend baking time until the bread is fully cooked.
4. Advanced Techniques for Enhanced Sourdough
For bakers looking to elevate their sourdough game, advanced techniques can significantly improve the texture and flavor of the bread.
4.1 Levain Management
Using a levain, a portion of the starter used specifically for a particular bake, allows for greater control over flavor and fermentation.
- Building the Levain: Mix a small amount of starter with fresh flour and water several hours before baking.
- Optimal Usage: Use the levain at its peak activity for the best results.
- Flavor Control: Adjust the levain’s fermentation time and temperature to influence the bread’s flavor profile.
4.2 Flour Blends
Experimenting with different types of flour can add complexity and improve the bread’s texture.
- Whole Wheat Flour: Adds a nutty flavor and increases hydration.
- Rye Flour: Contributes to a tangy flavor and a slightly denser crumb.
- Spelt Flour: Offers a mild, nutty flavor and a soft texture.
4.3 Cold Fermentation (Retardation)
Slowing down the fermentation process in the refrigerator can enhance flavor and improve dough handling.
- Overnight Proofing: Shaping the dough and proofing it in the refrigerator overnight.
- Flavor Development: Cold fermentation allows for a more complex flavor profile to develop.
- Improved Scoring: Cold dough is easier to score before baking.
5. Case Studies: Real-Life Examples
Let’s examine some real-life scenarios to illustrate how troubleshooting can address common sourdough density issues.
Case Study 1: The Underfed Starter
Problem: A baker consistently produced dense loaves despite following the recipe meticulously.
Diagnosis: The baker’s starter was fed infrequently and did not double reliably.
Solution: The baker began feeding the starter twice daily, ensuring it doubled within 4-6 hours before use. The resulting loaves were significantly lighter and airier.
Case Study 2: The Cold Kitchen
Problem: A baker in a cold climate struggled to achieve proper bulk fermentation.
Diagnosis: The kitchen temperature was too low, slowing down yeast activity.
Solution: The baker placed the dough in a proofing box to maintain a consistent, warm temperature. This allowed for proper fermentation, resulting in a well-risen loaf.
Case Study 3: The Over-Mixed Dough
Problem: A baker noticed that their dough was dense and tough, despite a good rise.
Diagnosis: The dough was being over-mixed, leading to gluten breakdown.
Solution: The baker reduced the mixing time and incorporated gentle stretch and folds during bulk fermentation. The resulting bread had a more open crumb and a tender texture.
6. Tips and Tricks from Expert Bakers
Here are some additional tips and tricks from experienced sourdough bakers to help you achieve that perfect loaf.
- Use a Dough Thermometer: Monitor the internal temperature of your dough to ensure it reaches the desired level during bulk fermentation.
- Observe the Dough: Pay attention to the dough’s texture, volume, and smell throughout the fermentation process.
- Keep a Baking Journal: Record your recipes, techniques, and results to identify patterns and make improvements.
- Join a Baking Community: Connect with other bakers online or in person to share tips, ask questions, and learn from each other.
7. Common Myths About Sourdough Density
Let’s dispel some common myths surrounding sourdough density to provide clarity and direction.
Myth 1: More Starter Means More Rise
Reality: Using too much starter can lead to over-acidification and a breakdown of gluten, resulting in a dense loaf. The key is to use a balanced amount of active starter.
Myth 2: Kneading Is Always Necessary
Reality: While kneading is important for gluten development, over-kneading can damage the gluten structure. Gentle techniques like stretch and folds can be just as effective.
Myth 3: Sourdough Should Always Taste Sour
Reality: The sourness of sourdough can be controlled by adjusting fermentation time and temperature. Shorter, warmer fermentations result in a milder flavor, while longer, cooler fermentations produce a more pronounced sour taste.
8. Essential Tools for Sourdough Success
Having the right tools can make a significant difference in your sourdough baking journey. Here’s a list of essential tools to help you achieve success.
- Kitchen Scale: Accurate measurements are crucial for consistent results.
- Dough Thermometer: Monitoring the internal temperature of your dough.
- Banneton Basket: For shaping and proofing the dough.
- Dutch Oven: For baking with steam and achieving a good crust.
- Bench Scraper: For handling and shaping the dough.
- Lame: For scoring the dough before baking.
9. Addressing Extreme Cases: When to Seek Help
Sometimes, despite your best efforts, sourdough density issues persist. Here’s when it might be time to seek help.
- Persistent Starter Problems: If your starter consistently fails to activate, consider seeking advice from experienced bakers or sourdough experts.
- Recurring Dough Issues: If you consistently encounter the same dough problems, such as stickiness or lack of rise, consult online forums or local baking communities for guidance.
- Complex Flavor Issues: If you’re struggling with off-flavors or imbalances, consider attending a sourdough workshop or seeking one-on-one instruction from a professional baker.
10. Call to Action: Get Expert Help at WHY.EDU.VN
Still asking, why is my sourdough so dense? Don’t let dense sourdough discourage you. Achieving the perfect loaf is a journey, and WHY.EDU.VN is here to guide you every step of the way. Our expert-backed resources and community support provide the knowledge and assistance you need to conquer sourdough challenges. Visit WHY.EDU.VN today to ask your questions and discover the secrets to consistently baking light, airy, and delicious sourdough. Our team of experienced bakers and knowledgeable experts is ready to provide personalized solutions and expert advice. Join our community and unlock the secrets to sourdough success. Contact us at 101 Curiosity Lane, Answer Town, CA 90210, United States. Whatsapp: +1 (213) 555-0101. Website: why.edu.vn. Let us help you turn your baking dreams into reality.
FAQ: Troubleshooting Sourdough Density
1. Why is my sourdough dense and gummy even after baking for a long time?
This usually indicates under-proofing or insufficient gluten development. Ensure your starter is active, allow for adequate bulk fermentation, and improve your mixing or kneading techniques.
2. How can I tell if my sourdough has bulked enough?
Look for a 50-100% increase in volume, a slightly domed shape, and visible bubbles. Perform the poke test: if the indentation slowly fills back, it’s ready for shaping.
3. Can I still bake sourdough without a Dutch oven?
Yes, you can use a preheated baking stone or oven tray and create steam by placing a tray of hot water on the bottom rack of the oven.
4. Why does my sourdough have a thick crust and seem undercooked inside?
This is often due to under-proofing or baking at too high a temperature. Reduce the oven temperature and ensure proper fermentation.
5. My sourdough is too sloppy and wet to shape. What should I do?
This can be caused by over-fermentation or too much hydration. Reduce the bulk fermentation time or decrease the amount of water in the recipe.
6. How can I increase the hydration in my sourdough without making it too difficult to handle?
Gradually increase the hydration level and use techniques like autolyse and stretch and folds to strengthen the gluten.
7. What type of flour is best for sourdough?
Bread flour with a protein content of 11-13% is ideal. Experiment with different flours like whole wheat or rye for added flavor and complexity.
8. Why does my sourdough taste too sour?
This can be due to over-fermentation or using too much starter. Reduce the fermentation time or the amount of starter in the recipe.
9. How do I fix a starter that won’t double?
Feed the starter consistently at regular intervals, use optimal ratios of flour and water, and keep it in a warm environment to encourage activity.
10. Is it better to under-proof or over-proof sourdough?
Neither is ideal, but under-proofing is generally easier to correct. Aim for proper proofing by monitoring the dough’s volume and texture rather than strictly adhering to a timeline.