Is my signal light blinking fast a question many drivers face. At WHY.EDU.VN, we provide answers, offering solutions to this common car issue. We explore the reasons behind rapid blinking, offering insights and practical steps to resolve it, ensuring safer driving. Understand the underlying causes, potential fixes, and related topics like bulb failure, wiring issues, and flasher relay problems.
Table of Contents
1. Understanding Turn Signal Systems
- 1.1. Basic Components of a Turn Signal System
- 1.2. How Turn Signals Work
- 1.3. The Role of the Flasher Relay
2. Common Causes of Fast Blinking Signal Lights
- 2.1. Burned-Out Bulb
- 2.2. Incorrect Bulb Type
- 2.3. Corrosion and Wiring Issues
- 2.4. Grounding Problems
- 2.5. Faulty Flasher Relay
- 2.6. LED Turn Signal Conversion Issues
3. Diagnosing the Fast Blinking Signal Light
- 3.1. Visual Inspection of Bulbs
- 3.2. Checking the Bulb Socket
- 3.3. Testing the Flasher Relay
- 3.4. Examining Wiring and Connections
- 3.5. Using a Multimeter for Electrical Testing
4. Step-by-Step Guide to Fixing Fast Blinking Signal Lights
- 4.1. Replacing a Burned-Out Bulb
- 4.2. Cleaning Corroded Contacts
- 4.3. Repairing Damaged Wiring
- 4.4. Replacing the Flasher Relay
- 4.5. Adding Resistors for LED Conversions
5. Advanced Troubleshooting Techniques
- 5.1. Using a Scan Tool for Error Codes
- 5.2. Checking the Vehicle’s Ground Points
- 5.3. Diagnosing Issues with Combination Switches
- 5.4. Addressing Problems in Trailer Wiring
- 6.1. Regular Bulb Inspections
- 6.2. Maintaining Clean Electrical Connections
- 6.3. Using Dielectric Grease
- 6.4. Avoiding Overloading Circuits
- 6.5. Upgrading to Quality Components
7. Understanding Load Resistors for LED Turn Signals
- 7.1. Why Load Resistors Are Necessary
- 7.2. Choosing the Right Load Resistor
- 7.3. Installing Load Resistors Safely
- 8.1. Working with Electrical Systems
- 8.2. Disconnecting the Battery
- 8.3. Using Proper Tools
- 8.4. Protecting Yourself
9. When to Seek Professional Help
10. Legal and Safety Standards
- 10.1. DOT Regulations for Turn Signals
- 10.2. Importance of Functional Turn Signals
- 10.3. Vehicle Inspection Requirements
11. Exploring Advanced Vehicle Electrical Systems
12. Impact of Aftermarket Lighting on Vehicle Electronics
13. Environmental Considerations for Automotive Lighting
14. Future Trends in Automotive Lighting Technology
15. Turn Signal Synchronization: Enhancing Road Safety
- 15.1. The Concept of Turn Signal Coordination
- 15.2. How Synchronization Improves Driver Awareness
- 15.3. Challenges in Implementing Coordinated Systems
16. The Psychology Behind Automotive Lighting and Communication
- 16.1. How Lighting Affects Driver Perception
- 16.2. Color and Intensity in Signal Communication
- 16.3. The Role of Intuitive Design in Lighting Systems
17. Case Studies: Unique Turn Signal Problems and Solutions
- 17.1. Restoring Classic Car Lighting Systems
- 17.2. Solving Intermittent Signal Failures in Modern Vehicles
- 17.3. Adapting Turn Signals for Off-Road Use
18. DIY vs. Professional Automotive Lighting Modifications
- 18.1. Evaluating Your Skill Level and Resources
- 18.2. Understanding the Risks and Benefits of DIY Projects
- 18.3. Choosing a Reputable Automotive Lighting Technician
19. Maintenance Tips for Long-Lasting Automotive Lighting
- 19.1. Regular Cleaning of Light Housings
- 19.2. Checking for Moisture and Condensation
- 19.3. Protecting Lights from Physical Damage
20. FAQs: Troubleshooting Common Turn Signal Issues
21. Conclusion: Ensuring Safe and Reliable Turn Signals
1. Understanding Turn Signal Systems
To effectively address the issue of a fast-blinking signal light, it’s essential to understand the basic components and functionality of your vehicle’s turn signal system. This knowledge helps in diagnosing the problem accurately and implementing the right solutions.
1.1. Basic Components of a Turn Signal System
A standard turn signal system includes several key components:
- Turn Signal Bulbs: These are the lights that blink to indicate your intention to turn.
- Flasher Relay: This device controls the on-off blinking of the turn signal lights.
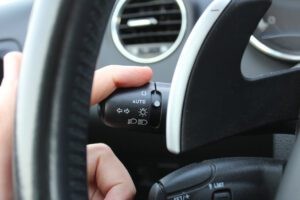
- Turn Signal Switch: Located on the steering column, this switch activates the turn signals.
- Wiring: Connects all the components, carrying electrical signals.
- Fuse: Protects the circuit from overloads.
1.2. How Turn Signals Work
When you activate the turn signal switch, it completes an electrical circuit that includes the flasher relay and the turn signal bulbs. The flasher relay interrupts the current at regular intervals, causing the lights to blink. This system is designed to operate at a specific resistance, which is affected by the condition of the bulbs and wiring.
1.3. The Role of the Flasher Relay
The flasher relay is a crucial component that controls the blinking frequency of the turn signals. It is designed to blink at a specific rate, usually between 60 and 120 blinks per minute. When the resistance in the circuit changes (such as when a bulb burns out), the flasher relay detects this change and causes the remaining lights to blink faster. This is a safety feature to alert the driver to a problem with the system.
2. Common Causes of Fast Blinking Signal Lights
A rapid flashing turn signal, or hyper flash, is a common indicator of an issue within the turn signal system. Several factors can cause this, and identifying the correct cause is crucial for effective repair.
2.1. Burned-Out Bulb
The most frequent cause of a fast-blinking turn signal is a burned-out bulb. When a bulb fails, it increases the resistance in the circuit, causing the flasher relay to blink faster as a warning.
2.2. Incorrect Bulb Type
Using the wrong type of bulb can also cause hyper flashing. Bulbs have different resistance levels, and using a bulb with a significantly different resistance can disrupt the circuit’s balance.
2.3. Corrosion and Wiring Issues
Corrosion on bulb sockets or damaged wiring can increase resistance in the circuit. This can occur due to exposure to moisture, salt, or physical damage. Inspecting the wiring for frays, breaks, or corrosion is essential for diagnosing this issue.
2.4. Grounding Problems
A poor ground connection can also lead to a fast-blinking signal. Grounding issues can occur when the metal contact points are rusty, dirty, or loose, preventing proper electrical flow.
2.5. Faulty Flasher Relay
Although less common, a failing flasher relay can cause the turn signals to blink rapidly. The relay itself may be defective due to age, wear, or electrical damage.
2.6. LED Turn Signal Conversion Issues
Switching to LED turn signal bulbs without adding load resistors can cause hyper flashing. LEDs consume significantly less power than traditional incandescent bulbs, altering the circuit’s resistance.
3. Diagnosing the Fast Blinking Signal Light
Effective diagnosis is crucial to fixing a fast-blinking turn signal. By following a systematic approach, you can pinpoint the exact cause and implement the necessary repairs.
3.1. Visual Inspection of Bulbs
Start by visually inspecting all turn signal bulbs. Look for bulbs that are not lighting up, have a dark or cloudy appearance, or have a broken filament. Check both the front and rear turn signals, as well as any side marker lights that function as turn signals.
3.2. Checking the Bulb Socket
Inspect the bulb socket for corrosion, rust, or damage. Clean the socket with a wire brush and electrical contact cleaner to ensure a good connection. If the socket is damaged beyond repair, it may need to be replaced.
3.3. Testing the Flasher Relay
To test the flasher relay, you can swap it with a known good relay or use a multimeter to check its continuity. Refer to your vehicle’s service manual for the location and testing procedure for the flasher relay.
3.4. Examining Wiring and Connections
Check the wiring connected to the turn signal lights and flasher relay. Look for any signs of damage, such as cuts, frays, or corrosion. Ensure that all connections are secure and free from corrosion.
3.5. Using a Multimeter for Electrical Testing
A multimeter can be used to measure voltage and resistance in the turn signal circuit. This can help identify issues such as low voltage, high resistance, or a short circuit. Refer to your vehicle’s wiring diagram and service manual for specific testing points and procedures.
4. Step-by-Step Guide to Fixing Fast Blinking Signal Lights
Once you’ve diagnosed the cause of the fast-blinking turn signal, you can proceed with the necessary repairs. Here’s a step-by-step guide to help you through the process.
4.1. Replacing a Burned-Out Bulb
- Locate the Bulb: Identify the burned-out bulb by visual inspection.
- Access the Bulb: Depending on your vehicle, you may need to remove a lens cover or access the bulb from inside the trunk or engine compartment.
- Remove the Old Bulb: Twist and pull the bulb out of the socket.
- Install the New Bulb: Insert the new bulb into the socket and twist to lock it in place.
- Test the Signal: Turn on the turn signal to ensure the new bulb is working correctly.
4.2. Cleaning Corroded Contacts
- Disconnect the Battery: Disconnect the negative battery terminal to prevent electrical shock.
- Access the Socket: Remove the bulb from the socket.
- Clean the Contacts: Use a wire brush or electrical contact cleaner to clean any corrosion from the contacts inside the socket.
- Reassemble and Test: Reinstall the bulb and test the turn signal.
4.3. Repairing Damaged Wiring
- Inspect the Wiring: Identify any damaged sections of wiring.
- Disconnect the Battery: Disconnect the negative battery terminal.
- Repair the Wiring: Cut out the damaged section and splice in a new piece of wire using crimp connectors or solder.
- Insulate the Repair: Wrap the repaired section with electrical tape or use heat shrink tubing to insulate the connection.
- Reassemble and Test: Reconnect the battery and test the turn signal.
4.4. Replacing the Flasher Relay
- Locate the Relay: Refer to your vehicle’s service manual to find the location of the flasher relay.
- Remove the Old Relay: Pull the old relay out of its socket.
- Install the New Relay: Plug the new relay into the socket.
- Test the Signal: Turn on the turn signal to ensure the new relay is working correctly.
4.5. Adding Resistors for LED Conversions
- Determine Resistor Requirements: Calculate the appropriate resistance needed for your LED turn signals.
- Install the Resistors: Connect the resistors in parallel with the LED bulbs. You can use wire connectors or solder to make the connections.
- Mount the Resistors: Secure the resistors to a metal surface to dissipate heat.
- Test the Signal: Turn on the turn signal to ensure the LEDs are flashing at the correct rate.
5. Advanced Troubleshooting Techniques
If the basic fixes don’t solve the fast-blinking issue, it may be necessary to employ more advanced troubleshooting techniques. These methods require a deeper understanding of automotive electrical systems and specialized tools.
5.1. Using a Scan Tool for Error Codes
A scan tool can read error codes stored in your vehicle’s computer, which can provide valuable clues about the cause of the problem. Some scan tools can specifically identify issues with the turn signal circuit.
5.2. Checking the Vehicle’s Ground Points
Ensure that all ground connections in the vehicle are clean and secure. Grounding issues can cause a variety of electrical problems, including fast-blinking turn signals. Check the ground points on the chassis, engine, and body for corrosion or looseness.
5.3. Diagnosing Issues with Combination Switches
The combination switch, which controls the turn signals, headlights, and windshield wipers, can sometimes be the source of the problem. Use a multimeter to test the continuity of the switch in different positions. If the switch is faulty, it may need to be replaced.
5.4. Addressing Problems in Trailer Wiring
If you frequently tow a trailer, the wiring for the trailer lights can sometimes interfere with the vehicle’s turn signal system. Inspect the trailer wiring for shorts, corrosion, or damage. Disconnecting the trailer wiring can help determine if it is the source of the problem.
6. Preventing Future Issues
Preventing turn signal problems is easier and more cost-effective than dealing with repairs. Regular maintenance and careful practices can significantly reduce the likelihood of encountering issues.
6.1. Regular Bulb Inspections
Make it a habit to regularly inspect your turn signal bulbs. Check them monthly to ensure they are functioning correctly and replace any that are dim or nearing the end of their lifespan.
6.2. Maintaining Clean Electrical Connections
Keep all electrical connections clean and free from corrosion. Use a wire brush and electrical contact cleaner to clean the connections periodically.
6.3. Using Dielectric Grease
Apply dielectric grease to electrical connections to prevent corrosion and moisture from entering the connection. This can help prolong the life of the connections and prevent future problems.
6.4. Avoiding Overloading Circuits
Avoid overloading the turn signal circuit by adding too many accessories or using bulbs with higher wattage than recommended. Overloading the circuit can damage the flasher relay and other components.
6.5. Upgrading to Quality Components
When replacing bulbs or other turn signal components, opt for high-quality parts from reputable brands. Quality components are more durable and less likely to fail prematurely.
7. Understanding Load Resistors for LED Turn Signals
When converting to LED turn signals, load resistors are often necessary to prevent hyper flashing. Understanding why they are needed and how to install them correctly is crucial for a successful conversion.
7.1. Why Load Resistors Are Necessary
LED bulbs consume significantly less power than traditional incandescent bulbs. This lower power consumption can cause the vehicle’s computer to think that a bulb has burned out, triggering the hyper flash. Load resistors mimic the power draw of incandescent bulbs, preventing this issue.
7.2. Choosing the Right Load Resistor
The appropriate resistance for the load resistor depends on the specific LED bulbs and the vehicle’s electrical system. Consult with the LED bulb manufacturer or an automotive electrical specialist to determine the correct resistance value.
7.3. Installing Load Resistors Safely
- Connect the Resistor: Connect the load resistor in parallel with the LED bulb.
- Secure the Resistor: Mount the resistor to a metal surface to dissipate heat.
- Insulate the Connections: Use heat shrink tubing or electrical tape to insulate the connections.
- Test the Signal: Turn on the turn signal to ensure the LEDs are flashing at the correct rate.
8. Safety Precautions
Working on automotive electrical systems can be dangerous if proper safety precautions are not followed. Always take the necessary steps to protect yourself and prevent damage to your vehicle.
8.1. Working with Electrical Systems
- Disconnect the Battery: Always disconnect the negative battery terminal before working on electrical components.
- Use Proper Tools: Use insulated tools to prevent electrical shock.
- Follow Instructions: Refer to your vehicle’s service manual for specific instructions and safety precautions.
8.2. Disconnecting the Battery
- Locate the Battery: Find the battery in your vehicle.
- Loosen the Nut: Use a wrench to loosen the nut on the negative battery terminal.
- Remove the Cable: Carefully remove the cable from the terminal.
- Secure the Cable: Tuck the cable away from the terminal to prevent accidental contact.
8.3. Using Proper Tools
- Insulated Tools: Use insulated screwdrivers, pliers, and wire strippers.
- Multimeter: Use a multimeter to test voltage and resistance.
- Wire Connectors: Use high-quality wire connectors for splicing wires.
- Electrical Tape: Use electrical tape or heat shrink tubing to insulate connections.
8.4. Protecting Yourself
- Wear Safety Glasses: Protect your eyes from debris and chemicals.
- Wear Gloves: Wear gloves to protect your hands from dirt, grease, and electrical shock.
- Work in a Well-Ventilated Area: Avoid working in enclosed spaces where fumes can accumulate.
9. When to Seek Professional Help
While many turn signal issues can be resolved with DIY repairs, some situations require the expertise of a professional automotive technician. Knowing when to seek help can save you time, money, and potential safety risks.
9.1. Complex Electrical Issues
If you are dealing with complex electrical issues, such as intermittent problems, short circuits, or wiring harness damage, it is best to seek professional help. These issues can be difficult to diagnose and repair without specialized tools and knowledge.
9.2. Lack of Experience
If you are not comfortable working on electrical systems or lack the necessary experience, it is best to leave the repairs to a professional. Incorrect repairs can damage your vehicle and create safety hazards.
9.3. Safety Concerns
If you are concerned about your safety while working on the electrical system, seek professional help. Electrical shocks and other hazards can be dangerous and should be avoided.
If you need assistance, contact the experts at WHY.EDU.VN. You can visit us at 101 Curiosity Lane, Answer Town, CA 90210, United States or reach us via Whatsapp at +1 (213) 555-0101. We’re a comprehensive resource for answering your questions.
10. Legal and Safety Standards
Ensuring your vehicle’s turn signals meet legal and safety standards is crucial for safe driving. Understanding these standards helps you maintain your vehicle in compliance and avoid potential legal issues.
10.1. DOT Regulations for Turn Signals
The Department of Transportation (DOT) sets standards for vehicle lighting, including turn signals. These regulations specify the required brightness, color, and placement of turn signals to ensure they are visible and effective.
10.2. Importance of Functional Turn Signals
Functional turn signals are essential for communicating your intentions to other drivers. They help prevent accidents by indicating when you plan to turn, change lanes, or merge into traffic.
10.3. Vehicle Inspection Requirements
Many states require vehicles to pass safety inspections, which include checking the functionality of turn signals. Failing a safety inspection due to faulty turn signals can result in fines and the inability to legally operate your vehicle.
11. Exploring Advanced Vehicle Electrical Systems
Modern vehicles incorporate advanced electrical systems that enhance functionality and efficiency. Understanding these systems can provide insights into how turn signals interact with other vehicle components.
11.1. CAN Bus Systems
The Controller Area Network (CAN) bus is a communication system that allows various electronic control units (ECUs) in a vehicle to communicate with each other. Turn signal activation can be transmitted via the CAN bus to control other systems, such as adaptive headlights or stability control.
11.2. Solid-State Relays
Solid-state relays (SSRs) are electronic switches that replace traditional mechanical relays. SSRs offer faster switching speeds, longer lifespan, and greater reliability. Some modern vehicles use SSRs for turn signal control.
11.3. Adaptive Lighting Systems
Adaptive lighting systems adjust the headlights based on driving conditions, such as speed, steering angle, and weather. Turn signal activation can trigger these systems to enhance visibility when turning or changing lanes.
12. Impact of Aftermarket Lighting on Vehicle Electronics
Installing aftermarket lighting, such as custom turn signals, can impact your vehicle’s electrical system. It’s essential to understand these potential impacts to avoid problems.
12.1. Compatibility Issues
Aftermarket lighting may not be fully compatible with your vehicle’s electrical system. This can lead to issues such as hyper flashing, error codes, or even damage to the ECU.
12.2. Voiding Warranties
Installing aftermarket lighting can void your vehicle’s warranty if it causes damage to the electrical system. Check with your vehicle manufacturer or dealer before installing any aftermarket components.
12.3. Potential for Damage
Incorrectly installed aftermarket lighting can damage your vehicle’s electrical system, leading to costly repairs. Always follow the manufacturer’s instructions and consult with a professional if needed.
13. Environmental Considerations for Automotive Lighting
Automotive lighting has environmental implications, from energy consumption to the disposal of bulbs. Understanding these considerations can help you make more sustainable choices.
13.1. LED Efficiency
LED bulbs are significantly more energy-efficient than traditional incandescent bulbs. They consume less power and last longer, reducing the overall environmental impact.
13.2. Reducing Energy Consumption
By using energy-efficient lighting and properly maintaining your vehicle’s electrical system, you can reduce your carbon footprint and save money on fuel.
13.3. Proper Disposal of Bulbs
Some automotive bulbs contain hazardous materials, such as mercury. Dispose of these bulbs properly by taking them to a recycling center or hazardous waste collection facility.
14. Future Trends in Automotive Lighting Technology
Automotive lighting technology is constantly evolving, with new innovations improving safety, efficiency, and aesthetics.
14.1. OLED Lighting
Organic Light Emitting Diodes (OLEDs) offer thin, flexible lighting solutions with excellent color rendering. OLEDs are being used in taillights and interior lighting.
14.2. Laser Headlights
Laser headlights provide intense, long-range illumination. They are more energy-efficient than traditional headlights and offer superior visibility.
14.3. Smart Lighting Systems
Smart lighting systems use sensors and algorithms to adjust the headlights based on driving conditions. These systems can improve safety and reduce glare for other drivers.
15. Turn Signal Synchronization: Enhancing Road Safety
Advancements in automotive technology are now exploring the potential of turn signal synchronization to enhance road safety and driver communication.
15.1. The Concept of Turn Signal Coordination
Turn signal coordination involves the idea that vehicles could communicate their signaling intentions to each other, creating a more predictable and safer driving environment.
15.2. How Synchronization Improves Driver Awareness
By knowing the intentions of nearby vehicles, drivers can make more informed decisions, reducing the risk of accidents caused by sudden lane changes or turns.
15.3. Challenges in Implementing Coordinated Systems
Implementing a turn signal synchronization system involves overcoming challenges such as standardization across different vehicle manufacturers and ensuring the reliability of communication systems.
16. The Psychology Behind Automotive Lighting and Communication
The effectiveness of turn signals goes beyond their technical specifications; it is deeply rooted in how drivers perceive and react to lighting cues.
16.1. How Lighting Affects Driver Perception
The brightness, color, and pattern of lighting can significantly influence how quickly and accurately drivers perceive signals. Properly designed lighting can enhance reaction times and reduce errors.
16.2. Color and Intensity in Signal Communication
Different colors and intensities convey different meanings. For example, amber is universally recognized as a warning signal, while the intensity of the light can indicate urgency.
16.3. The Role of Intuitive Design in Lighting Systems
Intuitive design ensures that lighting systems are easy to understand and use, minimizing confusion and enhancing safety. This includes the placement, size, and shape of lights.
17. Case Studies: Unique Turn Signal Problems and Solutions
Examining real-world scenarios where turn signal systems presented unique challenges can offer valuable insights and practical solutions.
17.1. Restoring Classic Car Lighting Systems
Restoring the lighting systems of classic cars often requires sourcing rare parts, adapting modern components, and troubleshooting outdated wiring systems.
17.2. Solving Intermittent Signal Failures in Modern Vehicles
Intermittent signal failures in modern vehicles can be particularly challenging due to the complexity of electronic systems. Diagnosing these issues often requires advanced diagnostic tools and techniques.
17.3. Adapting Turn Signals for Off-Road Use
Adapting turn signals for off-road use involves ensuring they are durable, visible, and compliant with local regulations. This may include using LED lights, reinforcing wiring, and adding protective covers.
18. DIY vs. Professional Automotive Lighting Modifications
Deciding whether to modify your vehicle’s lighting system yourself or hire a professional depends on your skills, resources, and the complexity of the project.
18.1. Evaluating Your Skill Level and Resources
Assess your experience with automotive electrical systems, the tools you have available, and the time you can dedicate to the project.
18.2. Understanding the Risks and Benefits of DIY Projects
DIY projects can save money and provide a sense of accomplishment, but they also carry the risk of damaging your vehicle or creating safety hazards if not done correctly.
18.3. Choosing a Reputable Automotive Lighting Technician
If you decide to hire a professional, research and choose a reputable technician with experience in automotive lighting modifications.
19. Maintenance Tips for Long-Lasting Automotive Lighting
Proper maintenance can significantly extend the lifespan of your vehicle’s lighting system and ensure reliable performance.
19.1. Regular Cleaning of Light Housings
Keep light housings clean to ensure maximum brightness and visibility. Use a mild soap and water solution to remove dirt and grime.
19.2. Checking for Moisture and Condensation
Inspect light housings for moisture and condensation, which can cause corrosion and damage to the bulbs and electrical connections.
19.3. Protecting Lights from Physical Damage
Protect lights from physical damage by using protective covers or guards, especially in off-road or harsh environments.
20. FAQs: Troubleshooting Common Turn Signal Issues
Here are some frequently asked questions to help you troubleshoot common turn signal problems:
- Why is my turn signal blinking fast on only one side? This usually indicates a burned-out bulb on that side.
- Can a bad ground cause my turn signals to blink fast? Yes, a poor ground connection can increase resistance and cause hyper flashing.
- Do LED turn signals always require load resistors? Not always, but often they do, especially in older vehicles.
- How do I know if my flasher relay is bad? A faulty flasher relay may cause erratic blinking or no blinking at all.
- Is it safe to drive with a fast-blinking turn signal? While it may be legal, it’s safer to address the issue promptly to ensure clear communication with other drivers.
- Can I use a higher wattage bulb to fix hyper flashing? No, using a higher wattage bulb can overload the circuit and cause damage.
- What is dielectric grease and why should I use it? Dielectric grease is a non-conductive lubricant that prevents corrosion on electrical connections.
- Can aftermarket alarm systems affect turn signals? Yes, improperly installed alarm systems can sometimes interfere with turn signal operation.
- Why are my turn signals not working at all? This could be due to a blown fuse, a faulty flasher relay, or a wiring problem.
- How can I find the correct replacement bulb for my vehicle? Consult your vehicle’s owner’s manual or use an online bulb lookup tool.
21. Conclusion: Ensuring Safe and Reliable Turn Signals
Maintaining functional turn signals is essential for safe driving. Whether you choose to perform DIY repairs or seek professional help, addressing turn signal issues promptly can prevent accidents and ensure clear communication on the road. Remember to prioritize safety, follow best practices, and stay informed about the latest automotive lighting technologies.
At WHY.EDU.VN, we’re committed to providing you with the knowledge and resources you need to keep your vehicle in top condition. If you have further questions or need expert advice, visit us at 101 Curiosity Lane, Answer Town, CA 90210, United States, contact us via Whatsapp at +1 (213) 555-0101, or explore our website at why.edu.vn for more information. Let us help you stay safe and informed on the road.