A leaky shower head can be a persistent nuisance, wasting water and driving up your utility bills. Understanding the reasons behind a dripping shower head and knowing how to fix it can save you money and frustration. This guide will delve into the common causes of shower head leaks and provide a step-by-step approach to resolving the issue.
Common Causes of a Leaky Shower Head
Several factors can contribute to a leaking shower head. Identifying the root cause is crucial for effective repair. Here are some of the most prevalent culprits:
Worn-Out Washers or O-Rings
The rubber washers and O-rings inside your shower head create a watertight seal. Over time, these components can deteriorate due to wear and tear, leading to leaks. This is often the simplest fix for a dripping shower head. Replacing these inexpensive parts can often solve the problem.
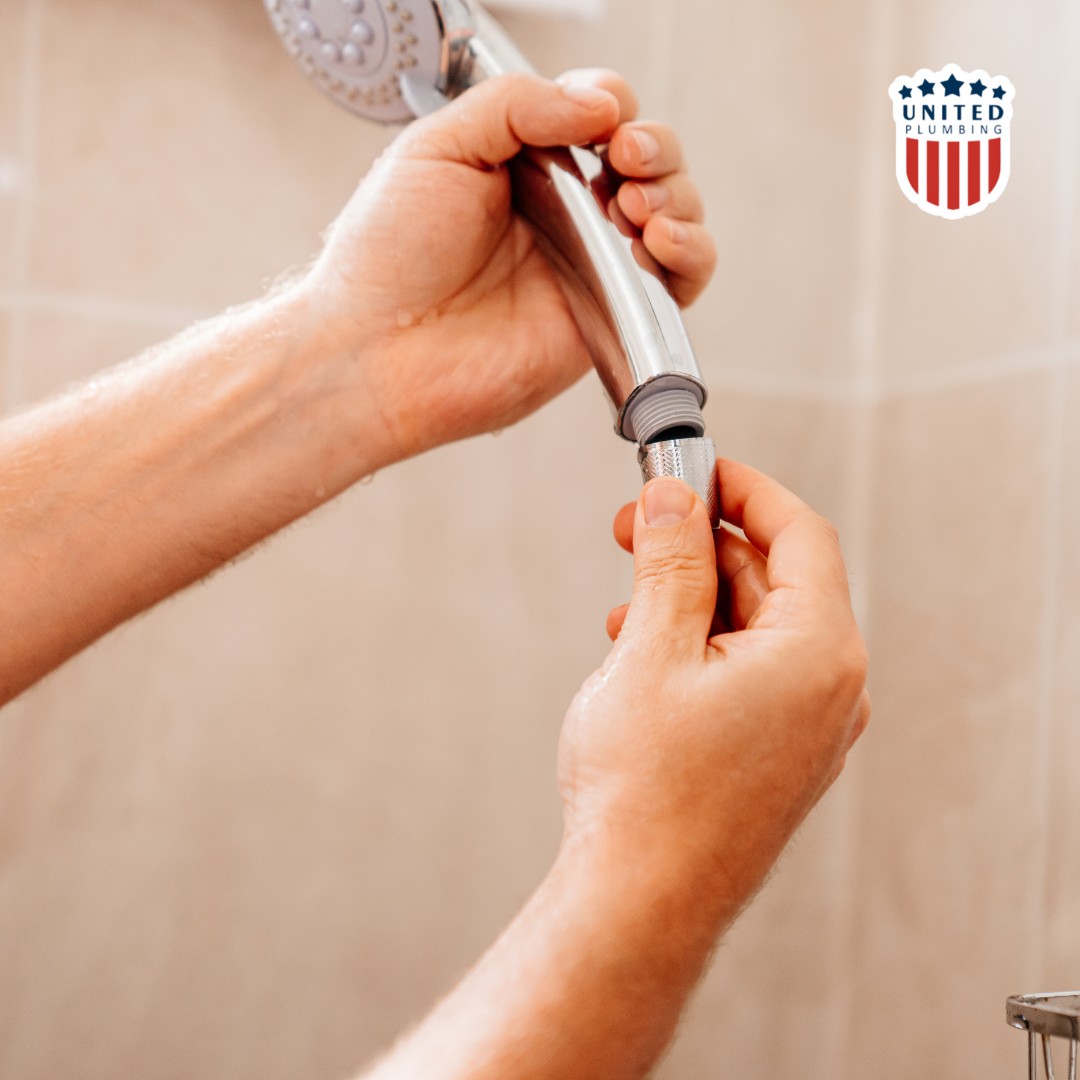 worn out o-ring
Mineral Buildup
Hard water contains minerals that can accumulate inside the shower head, obstructing the flow of water and causing uneven pressure. This buildup can also lead to leaks. Regular cleaning with a vinegar solution can often dissolve these deposits and restore proper function.
Faulty Cartridge
If your shower head continues to drip even after addressing washers and mineral buildup, the problem may lie within the faucet cartridge. This internal component controls the flow of water, and a faulty cartridge can result in a persistent leak, especially a dripping shower head even when the water is off.
How to Fix a Leaking Shower Head: A Step-by-Step Guide
Fixing a leaky shower head is often a manageable DIY project. Follow these steps to troubleshoot and repair the issue:
1. Turn Off the Water Supply
Before starting any repair, locate the water shut-off valve for your shower and turn it off completely. This will prevent further leaks and potential water damage.
2. Disassemble the Shower Head
Carefully unscrew the shower head from the shower arm. If it’s stuck, use an adjustable wrench, placing a towel over the fixture to avoid scratches.
3. Inspect and Clean Components
Examine the shower head for mineral deposits, particularly around the nozzles and connectors. Soak the shower head in a solution of equal parts water and white vinegar for at least an hour. After soaking, scrub away any remaining deposits with an old toothbrush.
4. Replace Worn-Out Parts
-
Washers and O-Rings: If you find cracked or worn washers and O-rings, replace them with new ones of the same size and type. These are readily available at most hardware stores.
-
Cartridge: If you suspect a faulty cartridge, consult your faucet’s manual for specific instructions on removal and replacement. This process may be more complex and require specialized tools.
5. Reassemble the Shower Head
Once you’ve replaced any necessary parts, reassemble the shower head, ensuring all components are securely in place. Apply plumber’s tape to the threads of the shower arm before screwing the shower head back on to create a tighter seal.
6. Test for Leaks
Turn the water supply back on slowly and check for any leaks. If the dripping persists, you may need to re-evaluate the repair or consult a professional plumber.
Conclusion
A leaky shower head is a common household problem that can often be resolved with simple DIY solutions. By understanding the common causes and following the steps outlined in this guide, you can fix your leaky shower head, conserve water, and save money on your utility bills. If the problem persists after troubleshooting, contacting a qualified plumber is always recommended.