Seeing “SOS only” on your iPhone can be alarming. It means your phone has lost connection to your usual cellular network and can only be used for emergency calls. While the ability to make SOS calls is a crucial safety feature, it’s essential to understand why your iPhone is in SOS mode and how to restore full cellular service.
This article will guide you through the meaning of “SOS only,” the potential reasons behind it, and comprehensive troubleshooting steps to get your iPhone back online. We aim to provide you with a clear understanding of the situation and empower you to resolve it effectively.
Understanding “SOS Only,” “No Service,” and “Searching” on Your iPhone
When you look at the status bar of your iPhone, you might see different indicators related to cellular service, including “SOS only,” “No Service,” or “Searching.” It’s important to understand what each of these means:
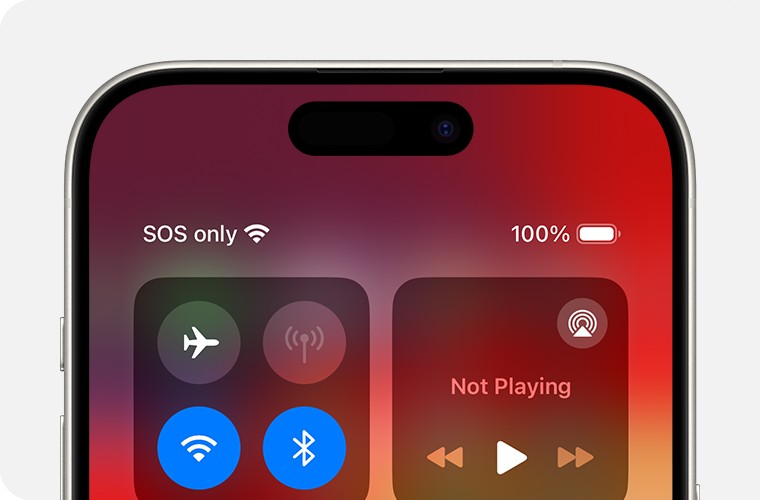
- SOS Only: This indicator, or simply “SOS,” signifies that your iPhone is disconnected from your regular cellular network but can still make emergency calls. This is a relatively new feature that allows you to connect to any available carrier network in the area for emergency services, even if you are not a customer of that specific carrier. This feature is currently available in countries like Australia, Canada, and the United States.
- No Service: When you see “No Service,” it means your iPhone is completely disconnected from a cellular network. You won’t be able to make or receive regular calls, send texts, or use cellular data. Even emergency calls might be unavailable in this situation depending on the underlying issue.
- Searching: “Searching” indicates that your iPhone is actively trying to find a cellular signal. This can happen when you move to a new area or when there’s a temporary network issue. If “Searching” persists for a long time, it suggests a problem preventing your phone from connecting.
Common Reasons Why Your iPhone Shows “SOS Only”
Several factors can cause your iPhone to display “SOS only.” Identifying the potential cause is the first step towards fixing the problem. Here are some common reasons:
- Software Glitches: Temporary software bugs or glitches within iOS can sometimes disrupt the cellular connection and lead to SOS mode.
- Carrier Issues or Outages: Problems with your mobile carrier’s network, such as outages, maintenance, or network congestion in your area, can cause your iPhone to lose signal and display “SOS only.”
- Account Problems: Issues with your carrier account, such as suspension due to billing problems or inactivity, can also result in service disruption.
- SIM Card Problems: A faulty, damaged, or improperly inserted SIM card can prevent your iPhone from connecting to the cellular network. For eSIM users, software glitches could also affect eSIM connectivity.
- Location and Network Coverage: Being in an area with poor or no cellular coverage is a primary reason for seeing “SOS only.” This is especially true in remote areas, underground locations, or buildings with thick walls.
- Airplane Mode: Accidentally enabling Airplane Mode will instantly disconnect your iPhone from cellular networks, Wi-Fi, and Bluetooth, causing it to display “SOS only” or “No Service.”
- Outdated iOS or Carrier Settings: Running an outdated version of iOS or having outdated carrier settings can sometimes lead to connectivity issues.
Troubleshooting Steps to Fix “SOS Only” on Your iPhone
Here are detailed troubleshooting steps you can take to try and resolve the “SOS only” issue and restore normal cellular service on your iPhone:
Quick and Easy Fixes
Often, the “SOS only” issue is temporary and can be resolved with a simple quick fix:
-
Toggle Airplane Mode:
- Open the Control Center by swiping down from the top-right corner of your screen (or swiping up from the bottom on older iPhones).
- Tap the Airplane icon to turn Airplane Mode on. Wait for at least 15 seconds.
- Tap the Airplane icon again to turn Airplane Mode off. This can refresh your iPhone’s connection to the cellular network.
-
Restart Your iPhone:
- For iPhones with Face ID: Press and hold the Side button and either Volume button until the power-off slider appears. Drag the slider, then wait 30 seconds for your device to turn off. To turn it back on, press and hold the Side button until you see the Apple logo.
- For iPhones with a Home button: Press and hold the Side (or Top) button until the power-off slider appears. Drag the slider, then wait 30 seconds for your device to turn off. To turn it back on, press and hold the Side (or Top) button until you see the Apple logo.
Restarting your iPhone can resolve minor software glitches that might be causing the “SOS only” problem.
Contact Your Mobile Carrier
If the quick fixes don’t work, the issue might be related to your mobile carrier or your account. Contact your carrier to:
- Verify Account Status: Ensure your account is active and in good standing, and that there are no billing issues or suspensions.
- Check Network Coverage and Outages: Confirm that you are in an area with cellular network coverage and inquire about any reported outages or maintenance work in your area. Carrier websites or customer service can provide outage maps and information.
- Device Block or Barring: Ask if your device is blocked or barred from receiving cellular services. This is uncommon but can happen in specific situations.
- Data Plan and IMEI Registration: Confirm that your device is set up with the correct data plan. In some regions, local governments may require IMEI registration for iPhones purchased outside the country. Your carrier can advise on this.
Remember that only your wireless carrier has access to your account details and can manage your service.
Software and Settings Solutions
Outdated software or incorrect settings can also lead to “SOS only.” Here’s how to address these:
-
Update iOS:
- Go to Settings > General > Software Update.
- If an update is available, download and install it. Keeping your iPhone’s software up to date ensures you have the latest bug fixes and improvements, which can resolve connectivity issues.
-
Check for Carrier Settings Update:
- Make sure your iPhone is connected to Wi-Fi.
- Go to Settings > General > About.
- Wait for a few seconds. If a carrier settings update is available, a pop-up will appear with an Update option. Tap Update.
- To check your current carrier settings version, go to Settings > General > About and look next to Carrier.
Carrier settings updates improve your iPhone’s ability to connect to your carrier’s network and are essential for optimal performance.
-
Check Cellular Settings (Dual SIM iPhones):
- If you have an iPhone with Dual SIM: Go to Settings > Cellular.
- Tap on the cellular plan you want to check.
- Ensure that the cellular line is turned on. If it’s off, toggle it back on.
- If you don’t see your cellular plan listed, you may need to contact your carrier to set up an eSIM or insert a physical SIM card properly.
-
Enable Data Roaming (When Traveling Internationally):
- If you are traveling internationally, data roaming needs to be enabled to use cellular services outside your home network.
- Go to Settings > Cellular or Mobile Data > Cellular Data Options or Mobile Data Options.
- Turn on Data Roaming.
-
Enable LTE/4G (For Older Devices):
- For older iPhones (iPhone 6 and later, but relevant if you’re in an area still phasing out 3G), ensure LTE is enabled.
- Go to Settings > Cellular > Cellular Data Options (or Mobile Data Options) > Voice & Data.
- Select LTE or 4G. While 5G is now standard, ensuring LTE is enabled is important for compatibility in various network environments.
SIM Card Issues
If you suspect a problem with your SIM card:
-
Re-insert SIM Card (Physical SIM):
- Power off your iPhone.
- Use a SIM ejector tool or a paperclip to remove the SIM card tray.
- Remove the SIM card and inspect it for any damage.
- Reinsert the SIM card firmly into the tray and push the tray back into the iPhone until it clicks into place.
- Power on your iPhone and check for service.
-
Get a New SIM Card:
- If your SIM card appears damaged, doesn’t fit properly, or if you’ve transferred a SIM from an old device, contact your carrier for a new SIM card. For eSIM users, contact your carrier for eSIM setup assistance if you suspect an eSIM issue.
3G Network Sunset and Older Devices
If you are using a very old iPhone (iPhone 5s, iPhone 5c, or earlier) and see “No Service,” it might be related to the phasing out of 3G networks in many regions. Carriers are shutting down 3G networks to free up bandwidth for faster 4G LTE and 5G networks.
If you have an older device, contact your carrier to discuss your upgrade options as older iPhones may not be compatible with modern network infrastructure. iPhones 6 and newer are generally compatible with 4G LTE and are not affected by 3G shutdowns in the same way.
Still Seeing “SOS Only”? Get Help
If you have tried all the troubleshooting steps above and your iPhone still displays “SOS only,” it’s recommended to:
- Contact your mobile carrier: They can provide specific diagnostics, account-related support, and network troubleshooting.
- Visit an Apple Store or Authorized Service Provider: If you suspect a hardware issue with your iPhone, Apple technicians can diagnose the problem and offer repair or replacement options.
By systematically following these steps, you should be able to identify and resolve most “SOS only” issues on your iPhone and restore your cellular connection.