Experiencing an “SOS,” “SOS only,” “No Service,” or “Searching” message on your iPhone can be incredibly frustrating, especially when you need to make a call or access the internet. If you’re seeing “SOS” on your iPhone, it means your device has lost connection to your primary cellular network but can still make emergency calls through other available networks. Conversely, “No Service” or “Searching” indicates a complete loss of cellular network connectivity. Understanding why your phone is showing SOS is the first step to resolving the issue and regaining full service. This guide will walk you through the common causes and effective troubleshooting steps to get your iPhone back online.
Understanding SOS and Cellular Service Issues on Your iPhone
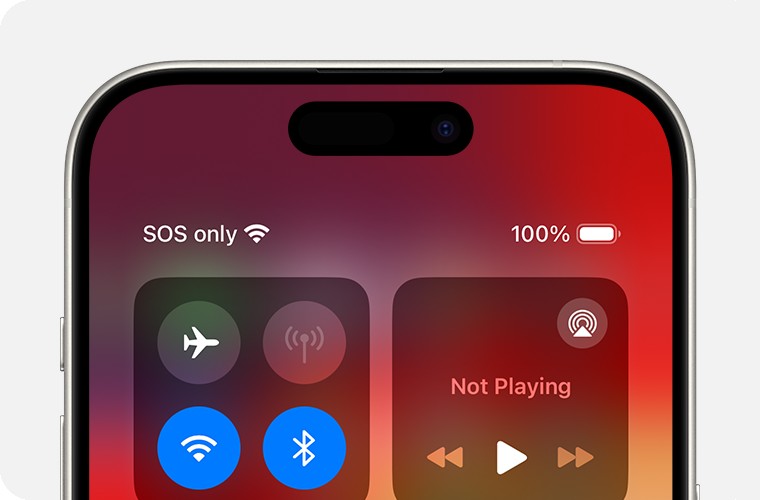
Before diving into solutions, it’s crucial to differentiate between the messages your iPhone might display. “SOS” or “SOS Only” is a feature that allows you to make emergency calls even when your phone isn’t connected to your usual carrier network. This is available in regions like Australia, Canada, and the United States. However, it also signifies that you lack regular cellular service for calls, texts, and data. “No Service” or “Searching,” on the other hand, indicates a more profound disconnection from any cellular network, meaning even emergency calls might be unavailable in certain situations.
It’s important to note that on iPhone models with iOS 18 and later, Apple provides a diagnostic tool within the Apple Support app. Downloading and running these diagnostics can offer valuable insights into the underlying cause of your cellular service problem. This can be a helpful first step in identifying whether the issue is software-related, hardware-related, or network-related.
Quick Fixes to Reconnect to Cellular Network
Often, a temporary glitch can cause your iPhone to lose cellular connection. Trying these quick fixes can help re-establish a connection:
Toggle Airplane Mode
Airplane Mode is a simple yet effective way to reset your iPhone’s network connections.
- Open Settings app.
- Turn on Airplane Mode. Wait for at least 15 seconds.
- Turn off Airplane Mode.
This action disconnects and reconnects your iPhone to cellular and Wi-Fi networks, often resolving temporary connectivity hiccups.
Restart Your iPhone
Restarting your iPhone is another fundamental troubleshooting step that can resolve various software-related issues, including network connectivity problems.
- For iPhones with Face ID: Press and hold the side button and either volume button until the power-off slider appears. Drag the slider, then wait 30 seconds for your device to turn off. To turn it back on, press and hold the side button until you see the Apple logo.
- For iPhones with a Home button: Press and hold the side (or top) button until the power-off slider appears. Drag the slider, then wait 30 seconds for your device to turn off. To turn it back on, press and hold the side (or top) button until you see the Apple logo.
Restarting clears temporary files and processes that might be interfering with your iPhone’s ability to connect to a cellular network.
Investigating Carrier and Account Related Issues
If quick fixes don’t resolve the “SOS” or “No Service” issue, the problem might lie with your cellular carrier or your account.
Contact Your Carrier to Verify Account Status and Network Coverage
Your cellular carrier is your direct point of contact to investigate account-specific and network-related issues. Reach out to their customer support to:
- Confirm your account is active and in good standing. Suspended or deactivated accounts will naturally lose cellular service.
- Inquire about network coverage in your area. You might be in a location with poor or no cellular coverage. Use your carrier’s coverage map (usually available on their website) to verify.
- Ask about any reported outages in your area. Network outages are temporary disruptions in your carrier’s service that can affect many users in a specific region.
- Ensure your device is not blocked or barred from receiving cellular services. In rare cases, devices can be blocked due to various reasons.
- Confirm you have the correct data plan and settings. An incorrect data plan or misconfigured settings can sometimes lead to service issues.
- Inquire about IMEI registration requirements. If you purchased your iPhone outside your current country, local regulations might require IMEI registration for cellular service.
Only your wireless carrier has access to your account details and network status, making them essential in diagnosing these types of problems.
Software and Settings Checks for Cellular Connectivity
Outdated software or incorrect settings can also contribute to cellular service problems.
Update Your iPhone to the Latest iOS Version
Keeping your iPhone’s software up to date is crucial for optimal performance and bug fixes.
- Open Settings app.
- Tap General.
- Tap Software Update.
- If an update is available, tap Download and Install.
Software updates often include improvements to cellular connectivity and can resolve bugs that might be causing your iPhone to display “SOS” or “No Service.”
Check for Carrier Settings Updates
Carrier settings updates are small files released by your carrier and Apple to improve cellular network compatibility and performance.
- Ensure your iPhone is connected to Wi-Fi.
- Open Settings app.
- Tap General.
- Tap About.
- Wait for a few seconds. If a carrier settings update is available, a pop-up will appear with an Update option. Tap Update.
Keeping your carrier settings updated ensures your iPhone is using the most optimized configuration for your carrier’s network.
Dual SIM Settings Configuration
If you are using an iPhone with Dual SIM capability, incorrect settings can lead to one or both lines losing service.
- Open Settings app.
- Tap Cellular.
- Check if both cellular lines are turned on.
- Tap on each cellular line individually to review its settings and ensure it is enabled.
- If a cellular line is off, turn it back on.
Additionally, if you use a physical SIM card, try removing it and re-inserting it. Ensure the SIM card is properly placed in the SIM tray. Damaged or improperly fitted SIM cards can cause connectivity issues. If you suspect your SIM card is damaged, contact your carrier for a replacement.
International Travel and Data Roaming
Traveling internationally can often trigger “SOS” or “No Service” messages if your data roaming settings are not correctly configured.
- Open Settings app.
- Tap Cellular or Cellular Data.
- Tap Cellular Data Options.
- Turn on Data Roaming.
Data roaming allows your iPhone to connect to cellular networks outside of your carrier’s coverage area. Be aware of potential roaming charges from your carrier when using data roaming. Check your carrier’s international roaming plan details before enabling this feature.
3G Network Sunsetting and LTE/5G Preference
In some regions, carriers are phasing out older 3G networks. If you are using an older iPhone model that primarily relies on 3G, you might experience “No Service” in areas where 3G is no longer supported.
-
For iPhone 6 or later and iPad (3rd generation) or later:
- Update your iPhone or iPad to the latest iOS or iPadOS version.
- Open Settings app.
- Tap Cellular.
- For iPhone, tap Cellular Data Options, then turn on Enable LTE.
- For iPad, turn on LTE.
Preferring LTE (and 5G if your device supports it) ensures you are connecting to the most modern and widely supported cellular networks. iPhones 6 and later and iPads (3rd generation) and later are compatible with LTE networks. iPhones and iPads that support 5G are not affected by 3G network shutdowns.
When to Seek Professional Help
If you have exhausted all troubleshooting steps and your iPhone is still showing “SOS” or “No Service,” there might be a hardware issue with your device. In such cases, it’s best to:
- Contact Apple Support: Apple Support can provide further diagnostics and repair options, especially if your iPhone is still under warranty or covered by AppleCare+.
- Visit an Authorized Apple Service Provider: Authorized service providers have certified technicians who can diagnose and repair hardware issues with your iPhone.
By systematically following these troubleshooting steps, you should be able to identify and resolve the reason why your phone is showing SOS and restore your cellular service. Remember to start with the quick fixes and progressively move towards more in-depth investigations of your carrier, settings, and device hardware.