Experiencing an “SOS,” “SOS only,” “No Service,” or “Searching” message on your iPhone or iPad can be concerning and disruptive. These status indicators signal that your device is struggling to maintain a connection to your cellular network, limiting your ability to make regular calls, send texts, or use mobile data. While “SOS” and “SOS only” modes still allow for emergency calls, understanding why your phone is in this state and how to restore full service is crucial.
This guide will walk you through the common reasons your iPhone or iPad might display “SOS,” “No Service,” or “Searching,” and provide comprehensive troubleshooting steps to help you reconnect to your cellular network. We’ll cover everything from quick fixes to more in-depth checks, ensuring you can get back online as quickly as possible.
Understanding SOS, No Service, and Searching
Before diving into solutions, let’s clarify what each status indicator means:
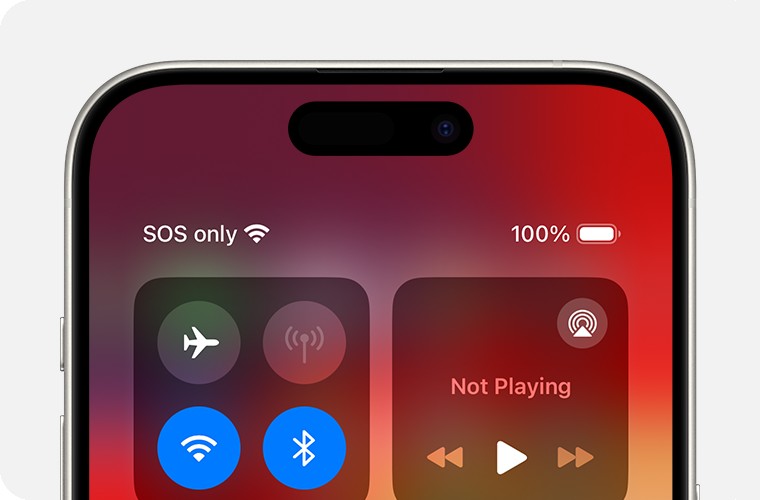
- SOS or SOS only: This indicates that your iPhone is not connected to your usual cellular network but can still make emergency calls through other available carrier networks in your region. This feature is currently available in Australia, Canada, and the United States and is a vital safety net.
- No Service: This means your iPhone or iPad cannot connect to any cellular network, including for emergency calls. You will not be able to make or receive calls, send texts, or use mobile data.
- Searching: Your device is actively trying to find and connect to a cellular network. This status can be temporary, but if it persists, it indicates a problem.
Common Reasons for SOS or No Service
Several factors can cause your iPhone to display “SOS,” “No Service,” or “Searching.” Understanding these reasons can help you pinpoint the problem and apply the correct solution:
- Network Outage: The most common reason is a temporary outage or maintenance work on your carrier’s network in your area.
- Weak Signal: Being in areas with poor cellular coverage, such as basements, rural locations, or areas with building interference, can lead to signal loss.
- Airplane Mode: Accidentally enabling Airplane Mode completely disconnects your device from cellular and Wi-Fi networks.
- Software Glitches: Temporary software bugs or glitches in iOS or iPadOS can sometimes disrupt network connectivity.
- Carrier Settings Issues: Outdated or incorrect carrier settings can prevent your device from connecting to the network.
- Account Problems: Issues with your carrier account, such as suspension due to billing problems or an inactive account, can block service.
- SIM Card Problems: A damaged, improperly inserted, or outdated SIM card can cause connection issues.
- Hardware Issues: In rare cases, hardware malfunctions in your iPhone or iPad can affect cellular connectivity.
- International Roaming Issues: Incorrect roaming settings when traveling abroad can lead to service disruptions.
- 3G Network Shutdown: In some regions, older 3G networks are being phased out, which can affect older devices that rely on 3G.
Troubleshooting Steps to Reconnect Your iPhone to Cellular Network
Follow these troubleshooting steps in order to try and restore cellular service to your iPhone or iPad. Start with the simplest solutions first and progress to more advanced steps if needed.
1. Toggle Airplane Mode On and Off
This is a quick and often effective first step to refresh your device’s connection to the cellular network.
- Open Settings on your iPhone or iPad.
- Toggle Airplane Mode to the ON position. Wait for at least 15-20 seconds.
- Toggle Airplane Mode back to the OFF position.
This action forces your device to disconnect and then reconnect to the cellular network, often resolving temporary connectivity glitches.
2. Restart Your iPhone or iPad
Restarting your device is another simple yet powerful troubleshooting step that can resolve various software-related issues, including network connectivity problems.
- For iPhones with Face ID: Press and hold the Side button and either volume button until the power-off slider appears. Drag the slider, then wait 30 seconds for your device to turn off. To turn it back on, press and hold the Side button until you see the Apple logo.
- For iPhones with a Home button: Press and hold the Side (or Top) button until the power-off slider appears. Drag the slider, then wait 30 seconds for your device to turn off. To turn it back on, press and hold the Side (or Top) button until you see the Apple logo.
- For iPads without a Home button: Press and hold either volume button and the top button until the power-off slider appears. Drag the slider, then wait 30 seconds for your device to turn off. To turn it back on, press and hold the top button until you see the Apple logo.
- For iPads with a Home button: Press and hold the top button until the power-off slider appears. Drag the slider, then wait 30 seconds for your device to turn off. To turn it back on, press and hold the top button until you see the Apple logo.
3. Check for Carrier Network Outages
Before proceeding with more complex troubleshooting, check if there’s a known network outage in your area. You can usually do this by:
- Checking your carrier’s website or social media: Many carriers post outage information on their official channels.
- Using a third-party outage detection website: Services like DownDetector can show reported outages in your area.
- Contacting your carrier’s customer support: They can confirm if there are any outages affecting your service.
If there is an outage, the issue is likely temporary, and service should be restored once the network is back online.
4. Contact Your Carrier
If there are no reported outages, contacting your carrier is the next crucial step. They can help you verify several potential account-related issues:
- Account Status: Ensure your account is active and in good standing, and that your service hasn’t been suspended for billing reasons.
- Coverage Area: Confirm that you are in an area with cellular network coverage. They can also inform you of any localized outages not publicly reported.
- Device Blocking: Check if your device is blocked or barred from receiving cellular services. This is rare but can happen in cases of reported theft or unpaid bills.
- Data Plan Setup: Verify that your device is correctly set up with the right data plan and that there are no issues with your plan configuration.
- IMEI Registration (International Purchases): Inquire if your local government requires IMEI registration for iPhones purchased outside your country or region. This is sometimes a requirement for service activation.
Your wireless carrier has direct access to your account details and network information, making them essential in diagnosing and resolving service-related issues.
5. Update Your iPhone or iPad Software
Keeping your iPhone or iPad updated to the latest version of iOS or iPadOS is crucial for optimal performance and bug fixes, including those related to network connectivity.
- Open Settings app.
- Tap General.
- Tap Software Update.
- If an update is available, tap Download and Install.
Software updates often include patches for known issues that can affect cellular connectivity.
6. Check for a Carrier Settings Update
Carrier settings updates are small files released by your carrier and Apple that improve cellular network connectivity, performance, and support for new features.
- Make sure your device is connected to Wi-Fi.
- Open Settings app.
- Tap General.
- Tap About.
- Wait for a few seconds. If an update is available, you will see a pop-up with an Update option next to Carrier. Tap Update.
It’s recommended to check for carrier settings updates regularly, especially after iOS updates or when experiencing network issues.
7. For Dual SIM iPhones: Check Cellular Line Settings
If you have an iPhone with Dual SIM capability, ensure both your cellular lines are properly configured and active.
- Open Settings app.
- Tap Cellular.
- Check if both your cellular lines are listed.
- Tap on each cellular line to review its settings:
- Ensure the line is Turn On. If it’s off, toggle it to turn it back on.
- Verify that the correct line is selected for Cellular Data and Default Voice Line if needed.
If you don’t see one of your cellular lines, you may need to contact your carrier to set up an eSIM or ensure your physical SIM card is correctly inserted. Try removing and re-inserting your physical SIM card as well.
8. Check Data Roaming Settings (International Travel)
If you are traveling internationally, ensure data roaming is enabled to use cellular services outside your home network.
- Open Settings app.
- Tap Cellular or Mobile Data.
- Tap Cellular Data Options or Mobile Data Options.
- Toggle Data Roaming to the ON position.
Be aware of potential roaming charges when using data roaming internationally. Check with your carrier about international plans or roaming packages to avoid unexpected costs.
9. For Older Devices: Check LTE/4G Settings (and 3G Shutdowns)
If you are using an older iPhone or iPad, especially models like iPhone 5s, iPhone 5c, or earlier, or iPad 2 (Wi-Fi + Cellular) or earlier, and see “No Service,” it could be related to the phasing out of older 3G networks in some areas.
For iPhone 6 or later and iPad (3rd generation) or later:
- Update to the latest iOS or iPadOS version.
- Go to Settings > Cellular > Cellular Data Options (or Mobile Data Options).
- Ensure Enable LTE or 4G is turned on for iPhone, or LTE is turned on for iPad.
If you continue to experience “No Service” on a very old device, contact your carrier to discuss your options, as the device might not be compatible with newer network technologies.
When to Seek Professional Help
If you have tried all the troubleshooting steps above and your iPhone or iPad still displays “SOS,” “No Service,” or “Searching,” there might be a hardware issue with your device. In this case, it’s best to:
- Contact Apple Support: Schedule an appointment at an Apple Store or contact Apple Support online or by phone to diagnose potential hardware problems.
- Visit an Authorized Service Provider: Find an Apple Authorized Service Provider for professional diagnostics and repair services.
Conclusion
Seeing “SOS,” “No Service,” or “Searching” on your iPhone can be frustrating, but in most cases, the issue can be resolved with simple troubleshooting steps. By understanding the reasons behind these status indicators and systematically following the solutions outlined in this guide, you can effectively diagnose and fix the problem, restoring full cellular service to your device and ensuring you stay connected.
