Microphone issues can be incredibly frustrating, especially when you need to attend a virtual meeting, record audio, or chat with friends online. Whether you’re using a dedicated microphone, a headset mic, or the built-in microphone on your webcam, encountering problems is not uncommon. If you’re asking “Why Is My Microphone Not Working?”, this guide is designed to walk you through a series of troubleshooting steps to identify and resolve the issue, ensuring you can get back to clear communication.
Granting App Permissions to Access Your Microphone
One of the most common reasons your microphone might not be functioning, particularly after a Windows update, is due to app permission settings. Windows 10 and Windows 11 prioritize user privacy, which means you need to explicitly allow applications to access your microphone. Here’s how to check and adjust these settings:
For Windows 11:
- Click on the Start menu and select Settings.
- Navigate to Privacy & Security and then click on Microphone.
- Ensure that Microphone access is toggled On.
- Verify that Let apps access your microphone is also turned On.
- Scroll down to review the list of apps and toggle on the access for specific apps you want to use with your microphone. Note that desktop applications might not be listed here.
- To enable microphone access for desktop apps, make sure Let desktop apps access your microphone is enabled. You cannot disable microphone access for individual desktop apps, it’s an all-or-nothing setting.
For Windows 10:
- Click on the Start menu and go to Settings.
- Select Privacy and then choose Microphone from the left sidebar.
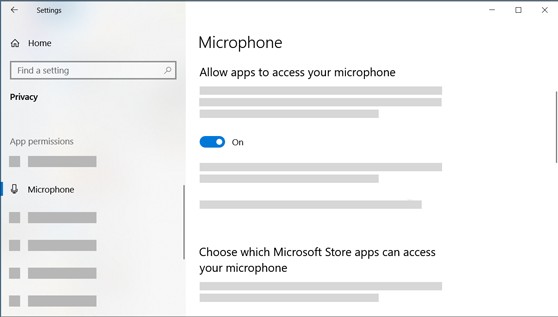
- Click the Change button and turn on Allow apps to access your microphone.
- Under Choose which Microsoft Store apps can access your microphone, you can enable or disable microphone access for individual apps from the Microsoft Store.
- To allow desktop applications (non-Microsoft Store apps) to use your microphone, ensure that the switch under Allow desktop apps to access your microphone is set to On.
If you are using a webcam with an integrated microphone, you might also need to check and grant camera permissions in the Camera settings section, located right above the Microphone settings in both Windows 10 and 11 Privacy settings.
Troubleshooting When Others Can’t Hear You
If your microphone is seemingly working, but others are unable to hear you during calls or recordings, consider these solutions:
-
Mute Button Check: If you are using a headset, physically check for a mute button on the headset or its cable. Ensure it is not activated accidentally.
-
Physical Connection Verification: Make sure your microphone or headset is securely plugged into the correct port on your computer. For USB microphones, try a different USB port. For traditional 3.5mm jacks, ensure you are using the microphone input port (usually pink).
-
Bluetooth Pairing and Connection: If you are using a wireless Bluetooth headset or microphone, confirm that it is properly paired and connected to your computer. You might need to re-pair the device. Refer to your device’s manual or the guide on Pair a Bluetooth device in Windows for detailed instructions.
-
Set as Default Recording Device: Your operating system needs to know which microphone to use as the primary input. Here’s how to set your microphone as the default recording device in Windows 10 and 11:
For Windows 11:
- Go to Start > Settings > System > Sound.
- In the Input section, look for Choose a device for speaking or recording.
- Select your desired microphone from the dropdown list.
- To test if Windows is detecting sound, speak into your microphone. The Volume indicator should show a blue bar moving as you speak.
For Windows 10:
- Go to Start > Settings > System > Sound.
- Under Input, find Choose your input device and select your microphone from the dropdown menu.
- To test, speak into your microphone and check the Test your microphone section to see if Windows is registering your voice.
-
Run the Recording Audio Troubleshooter: Windows includes built-in troubleshooters that can automatically diagnose and fix common audio problems. To use the Recording Audio troubleshooter:
For Windows 11:
- Go to Settings > System > Troubleshoot > Other troubleshooters.
- Find Recording Audio in the list and click Run.
For Windows 10:
- Go to Settings > Update & Security > Troubleshoot > Additional troubleshooters.
- Select Recording Audio and click Run the troubleshooter.
When Windows Doesn’t Detect Your Microphone
If you’ve tried the above steps and Windows still isn’t detecting your microphone at all, even as an available input device, the issue might be with your audio drivers. Reinstalling these drivers can often resolve detection problems:
- Open Device Manager: Right-click on the Start button and select Device Manager.
- Expand Sound, video and game controllers: Double-click to expand this section.
- Uninstall Audio Drivers: Look for your audio devices in the list. This might be listed under a specific brand name (like Realtek, Conexant, or your microphone/headset brand) or as “High Definition Audio Device.” Right-click on the audio device and choose Uninstall device.
- Delete Driver Software: In the uninstall confirmation dialog, make sure to check the box that says Delete the driver software for this device and then click Uninstall. Repeat this process for any other listed audio devices if you are unsure which one is causing the problem.
- Restart Your Computer: After uninstalling the drivers, restart your computer. Windows will attempt to automatically reinstall the audio drivers upon reboot.
- Scan for Hardware Changes (If Necessary): If Windows doesn’t automatically reinstall the drivers after restarting, go back to Device Manager, right-click on Sound, video and game controllers, and select Scan for hardware changes. This will prompt Windows to look for and reinstall any missing drivers.
- Update Drivers: If the issue persists, or to ensure you have the latest drivers, go back to Device Manager, expand Sound, video and game controllers, right-click on your audio driver, and select Update driver. You can choose to search automatically for updated drivers, or manually download the latest drivers from your motherboard or sound card manufacturer’s website.
Addressing Low Microphone Volume or No Sound
If your microphone is detected and selected, but the volume is too low, or it seems like it’s not picking up any sound, try these adjustments:
-
Correct Microphone Positioning: Ensure your microphone is correctly positioned. For headset microphones, make sure the microphone boom is close to your mouth. For desktop microphones, ensure it’s facing you and not obstructed.
-
Increase Microphone Volume in Settings: Adjust the input volume settings in Windows:
For Windows 11:
- Go to Start > Settings > System > Sound.
- Under Input, select your microphone to view its properties.
- Look for Input volume and adjust the slider to increase the microphone volume. Observe the blue bar as you speak; it should react to your voice.
- If there is no reaction, click Start test under Test your microphone to further diagnose issues.
For Windows 10:
- Go to Start > Settings > System > Sound.
- Under Input, select your microphone under Choose your input device, and then click Device Properties.
- In the Microphone Properties window, navigate to the Levels tab.
- Adjust the Microphone slider to increase the volume. You can also try adjusting the Microphone Boost slider to further amplify the signal, but be cautious as too much boost can introduce noise. Click OK to save changes.
- Test your microphone again in the Test your microphone section to check if the volume is now adequate.
App-Specific Microphone Issues: Example with Skype
Sometimes, microphone problems are specific to certain applications. For example, if others cannot hear you only in Skype calls, you need to check the microphone settings within the Skype application itself.
- Open Skype Settings: If Skype is not running, open it. In Skype, usually located at the top left or right corner, click on More (often represented by three dots) and then select Settings.
- Navigate to Audio & Video Settings: In the Settings menu, find and click on Audio & Video.
- Check Microphone Selection: Under the Microphone section, ensure that your desired microphone or headset is selected from the dropdown menu. If it’s set to “Default Communication Device” and you’ve correctly set the default device in Windows, this should work. However, explicitly selecting your microphone can sometimes resolve issues.
- Check Speaker Selection: While you’re in the Audio & Video settings, also verify that the correct speakers or headset are selected under the Speakers section.
These steps cover the most common reasons why your microphone might not be working. By systematically going through these troubleshooting steps, you should be able to diagnose and fix the issue, ensuring your microphone is functioning correctly for all your communication and recording needs. If you continue to experience problems after trying these solutions, it might indicate a hardware issue with your microphone itself, and you may need to consider testing it on another device or contacting technical support.