Why Is My Iphone On Sos Only? If you’re seeing “SOS” or “SOS only” on your iPhone’s status bar, it indicates that your device can only make emergency calls because it’s not connected to your regular cellular network. But don’t panic! This comprehensive guide from WHY.EDU.VN will walk you through a series of troubleshooting steps to help you reconnect and regain full cellular service. We’ll explore everything from simple fixes like restarting your phone to more complex solutions involving carrier settings and SIM card issues. You’ll gain actionable advice for iphone network issues and signal connectivity.
1. Understanding SOS Only Mode on Your iPhone
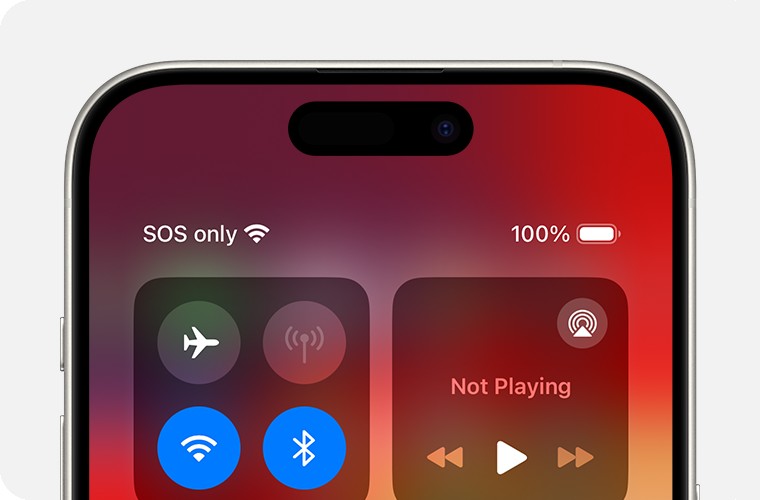
1.1. What Does “SOS Only” Mean?
When your iPhone displays “SOS” or “SOS Only” in the status bar, it signifies that while your phone can’t connect to your usual cellular network for regular calls, texts, and data, it can still make emergency calls. This feature is designed to allow you to contact emergency services even when your carrier’s network is unavailable. The iPhone can connect to other available networks to make those emergency calls. This feature is crucial for safety and is available in several countries, including Australia, Canada, and the United States. Understanding this distinction is the first step in troubleshooting. This means help is still available when the cellular network connection is limited.
1.2. Why Is My iPhone Showing SOS Only? Common Causes
There are several reasons why your iPhone might be stuck in SOS mode. Here are some of the most common:
- No Cellular Coverage: You’re in an area with no service from your carrier.
- Network Outage: Your carrier is experiencing a service outage in your area.
- SIM Card Issues: Your SIM card is damaged, improperly inserted, or not activated.
- Account Problems: Your account with your carrier has been suspended or has an unpaid balance.
- Software Glitches: A software bug or glitch is preventing your phone from connecting to the network.
- Hardware Problems: There may be physical damage to your iPhone’s cellular antenna or other components.
- Airplane Mode: Airplane mode has been accidentally enabled.
- Outdated Software: Your phone’s operating system needs to be updated to the latest version.
Identifying the potential cause helps you narrow down the troubleshooting steps.
1.3. The Difference Between “SOS Only,” “No Service,” and “Searching”
It’s essential to differentiate between “SOS Only,” “No Service,” and “Searching” on your iPhone, as they indicate different connectivity statuses:
- SOS Only: As mentioned, your iPhone can only make emergency calls. It can connect to other available cellular networks but not your own carrier’s.
- No Service: Your iPhone cannot connect to any cellular network, including emergency services. There is absolutely no cellular connection available.
- Searching: Your iPhone is actively trying to find a cellular network signal. This can happen when you move from one area to another or when there’s temporary network congestion.
2. Quick Fixes: Simple Solutions to Try First
Before diving into more complex troubleshooting, try these quick and easy fixes:
2.1. Toggle Airplane Mode On and Off
This is often the first and simplest solution. Airplane Mode disables all wireless connections, including cellular. Turning it off can force your iPhone to reconnect to the network. Here’s how:
- Open Control Center by swiping down from the top-right corner of your screen (or swiping up from the bottom on older iPhones).
- Tap the Airplane Mode icon (it looks like an airplane) to turn it on. Wait 15-30 seconds.
- Tap the Airplane Mode icon again to turn it off.
- Wait a few moments for your iPhone to reconnect to the cellular network.
2.2. Restart Your iPhone
Restarting your iPhone can resolve minor software glitches that might be interfering with the cellular connection. The method for restarting varies depending on your iPhone model:
- iPhone 8 and later: Press and quickly release the Volume Up button, then press and quickly release the Volume Down button. Press and hold the Side button until you see the Apple logo.
- iPhone 7 and 7 Plus: Press and hold both the Side button and the Volume Down button until you see the Apple logo.
- iPhone 6s and earlier: Press and hold both the Home button and the Side button until you see the Apple logo.
2.3. Check Your Physical Location
Sometimes, the issue is simply your location. If you’re in a building with thick walls, a basement, or a rural area with weak coverage, you might not have a strong enough signal.
- Move to an Open Area: Go outside or move to a location with a clearer view of the sky.
- Check Coverage Maps: Use your carrier’s website or app to check the coverage map for your area. This can tell you if there are known coverage issues.
These simple solutions often resolve the issue quickly.
3. Network Settings: Reconnecting to Your Carrier
If the quick fixes don’t work, the problem might be related to your iPhone’s network settings. Here’s how to troubleshoot:
3.1. Manually Select Your Carrier
Sometimes, your iPhone might not automatically connect to your carrier, especially if you’ve recently traveled or switched SIM cards. Manually selecting your carrier can force a connection.
- Go to Settings > Cellular > Network Selection.
- Turn off Automatic.
- Your iPhone will search for available networks. Select your carrier from the list.
- If prompted, enter your carrier’s PIN.
- After successful connection, turn Automatic back on.
3.2. Reset Network Settings
Resetting your network settings can resolve issues caused by corrupted or incorrect network configurations. This will erase all saved Wi-Fi passwords, cellular settings, and VPN configurations, so make sure you have them handy.
- Go to Settings > General > Transfer or Reset iPhone > Reset.
- Tap Reset Network Settings.
- Enter your passcode if prompted.
- Your iPhone will restart. After it restarts, you’ll need to reconnect to your Wi-Fi networks and reconfigure any VPN settings.
3.3. Update Carrier Settings
Carrier settings updates are small files that your carrier releases to improve network connectivity and performance. It’s essential to keep your carrier settings up to date.
- Make sure your iPhone is connected to Wi-Fi.
- Go to Settings > General > About.
- If an update is available, you’ll see a prompt to update your carrier settings. Tap Update.
- To see the version of carrier settings on your device, go to Settings > General > About and look next to Carrier.
3.4. Verify Data Roaming is Enabled (If Traveling)
If you’re traveling internationally, make sure data roaming is enabled.
- Go to Settings > Cellular > Cellular Data Options.
- Turn on Data Roaming.
- If you have Dual SIM, go to Settings > Cellular, tap the number you want to modify, then tap Cellular Data Options and turn on Data Roaming.
4. SIM Card Troubleshooting: Checking and Reseating
Your SIM card is essential for connecting to your carrier’s network. Here’s how to troubleshoot SIM card issues:
4.1. Inspect Your SIM Card for Damage
Remove the SIM card and inspect it for any signs of damage, such as scratches, cracks, or bending. If the SIM card is damaged, contact your carrier for a replacement.
4.2. Remove and Reinsert Your SIM Card
Sometimes, simply reseating the SIM card can resolve connectivity issues.
- Use a SIM ejector tool or a paperclip to open the SIM tray.
- Remove the SIM card.
- Inspect the SIM card and the SIM tray for any debris or damage.
- Reinsert the SIM card, making sure it’s properly aligned.
- Close the SIM tray. Make sure it’s fully closed.
- Restart your iPhone.
4.3. Test With Another SIM Card (If Possible)
If you have access to another SIM card (from a different phone or carrier), try inserting it into your iPhone. If your iPhone connects to the network with the other SIM card, the problem is likely with your original SIM card. Contact your carrier for a replacement.
4.4. Contact Your Carrier for a New SIM Card
If your SIM card is damaged, doesn’t fit in the SIM tray, or you transferred your physical SIM card from another device, ask your carrier for a new SIM card. The old sim card may not be compatible with your new phone or your carrier’s network.
5. Software Updates: Ensuring Compatibility
Keeping your iPhone’s software up to date is crucial for optimal performance and compatibility with cellular networks.
5.1. Update to the Latest Version of iOS
Software updates often include bug fixes and improvements that can resolve connectivity issues.
- Make sure your iPhone is connected to Wi-Fi.
- Go to Settings > General > Software Update.
- If an update is available, tap Download and Install.
- Follow the on-screen instructions to complete the update.
5.2. Check for iOS Beta Profiles
If you’re running a beta version of iOS, it might contain bugs that are causing connectivity issues. Consider removing the beta profile and reverting to the latest public version of iOS.
- Go to Settings > General > VPN & Device Management.
- Tap the iOS Beta Software Profile.
- Tap Remove Profile.
- Restart your iPhone.
6. Dual SIM Settings: Managing Your Cellular Plans
If you have an iPhone with Dual SIM capability, make sure your settings are configured correctly.
6.1. Verify Both Cellular Plans Are Enabled
- Go to Settings > Cellular.
- Make sure both cellular plans are turned on. If a cellular line is off, turn it back on. Then, check to see if you have service.
6.2. Check the Preferred SIM for Cellular Data
- Go to Settings > Cellular > Cellular Data.
- Select the SIM card you want to use for cellular data.
6.3. Configure Data Roaming for Each SIM (If Traveling)
- Go to Settings > Cellular.
- Tap the number you want to modify, then tap Cellular Data Options.
- Turn on Data Roaming. Repeat for each SIM.
7. Carrier-Specific Issues: Contacting Your Provider
Sometimes, the problem lies with your carrier. Here’s how to troubleshoot:
7.1. Contact Your Carrier to Verify Account Status
Make sure your account is active and in good standing. Contact your carrier to:
- Verify that your account is active and in good standing.
- Make sure that you’re in an area with cellular network coverage and there are no outages in your area.
- Check that your device isn’t blocked or barred from receiving cellular services and is set up with the right data plan.
- Ask if your local government requires IMEI registration to use an iPhone that you originally purchased outside your country or region.
7.2. Inquire About Network Outages in Your Area
Your carrier might be experiencing a service outage in your area. Check their website or social media channels for updates, or call customer support.
7.3. Ensure Your IMEI Is Registered (If Applicable)
Some countries require you to register your iPhone’s IMEI (International Mobile Equipment Identity) with the local authorities. Contact your carrier to see if this applies to you.
8. Advanced Troubleshooting: When Nothing Else Works
If you’ve tried all the above steps and your iPhone is still stuck in SOS mode, here are some more advanced troubleshooting options:
8.1. Check for Hardware Damage
Inspect your iPhone for any signs of physical damage, such as dents, cracks, or water damage. If you suspect hardware damage, take your iPhone to an authorized Apple service provider for repair.
8.2. Restore Your iPhone to Factory Settings
This will erase all data on your iPhone, so make sure you have a backup.
- Go to Settings > General > Transfer or Reset iPhone > Erase All Content and Settings.
- Follow the on-screen instructions to complete the reset.
- After the reset, set up your iPhone as new and see if the issue is resolved.
8.3. DFU Restore (Last Resort)
DFU (Device Firmware Update) mode is the deepest restore you can perform on an iPhone. It completely erases the firmware and reloads it. This should only be attempted as a last resort. Follow the instructions carefully. It is recommended to have an expert perform this task.
- Connect your iPhone to your computer.
- Open iTunes (or Finder on macOS Catalina and later).
- Put your iPhone into DFU mode. The steps vary depending on your iPhone model.
- iPhone 8 and later: Press and quickly release the Volume Up button, then press and quickly release the Volume Down button. Press and hold the Side button until the screen goes black. Then, press and hold both the Side button and the Volume Down button for 5 seconds. After 5 seconds, release the Side button but continue holding the Volume Down button until iTunes (or Finder) detects your iPhone in recovery mode.
- iPhone 7 and 7 Plus: Press and hold both the Side button and the Volume Down button until the screen goes black. Then, continue holding both buttons for 5 seconds. After 5 seconds, release the Side button but continue holding the Volume Down button until iTunes (or Finder) detects your iPhone in recovery mode.
- iPhone 6s and earlier: Press and hold both the Home button and the Side button until the screen goes black. Then, continue holding both buttons for 5 seconds. After 5 seconds, release the Side button but continue holding the Home button until iTunes (or Finder) detects your iPhone in recovery mode.
- iTunes (or Finder) will prompt you to restore your iPhone. Follow the on-screen instructions.
9. When to Seek Professional Help: Apple Support and Authorized Service Providers
If you’ve exhausted all troubleshooting steps and your iPhone is still stuck in SOS mode, it’s time to seek professional help.
9.1. Contact Apple Support
Apple Support can provide additional troubleshooting assistance and help you determine if your iPhone needs repair.
9.2. Find an Authorized Apple Service Provider
An authorized service provider can diagnose and repair hardware issues with your iPhone.
9.3. Check Your Warranty Status
If your iPhone is still under warranty, you might be eligible for free repair or replacement.
10. Emergency SOS via Satellite: A New Feature
Newer iPhone models (iPhone 14 and later) offer Emergency SOS via satellite, which allows you to connect to emergency services even when you’re outside of cellular and Wi-Fi coverage.
10.1. How Emergency SOS via Satellite Works
When you’re in an area with no cellular or Wi-Fi coverage, your iPhone will try to connect to a satellite to send an emergency message to Apple, who will then relay it to emergency services.
10.2. Requirements for Using Emergency SOS via Satellite
- You must be in an area with a clear view of the sky.
- You must be using an iPhone 14 or later.
- You must have iOS 16.1 or later installed.
- The feature is currently available in the US, Canada, the UK, France, Germany, Ireland, and Australia.
10.3. Limitations of Emergency SOS via Satellite
- Satellite connectivity is slower than cellular or Wi-Fi.
- The service might not be available in all locations.
- The service is designed for emergencies only.
11. Preventing Future SOS Only Issues: Best Practices
Here are some tips to help prevent your iPhone from getting stuck in SOS mode in the future:
11.1. Keep Your iPhone Software Up to Date
Regularly update your iPhone to the latest version of iOS to ensure you have the latest bug fixes and improvements.
11.2. Maintain a Healthy Battery
A low battery can sometimes interfere with cellular connectivity. Keep your iPhone charged and avoid letting it drain completely.
11.3. Be Mindful of Your Location
Be aware of areas with weak or no cellular coverage and plan accordingly.
11.4. Regularly Check Your SIM Card
Inspect your SIM card periodically for damage and make sure it’s properly seated in the SIM tray.
12. Exploring Other Potential Causes: A Deeper Dive
Let’s explore some less common but still possible reasons your iPhone might be displaying “SOS Only”:
12.1. Outdated 3G Network Compatibility
Older iPhone models (iPhone 5s, iPhone 5c, or earlier) may have issues as carriers phase out 3G networks. If you have an older iPhone, contact your carrier to discuss your options or consider upgrading to a newer device.
12.2. VPN Interference
A VPN (Virtual Private Network) can sometimes interfere with cellular connectivity. Try disabling your VPN to see if it resolves the issue.
12.3. Incorrect Date and Time Settings
Incorrect date and time settings can sometimes cause connectivity problems. Make sure your iPhone’s date and time are set correctly.
- Go to Settings > General > Date & Time.
- Turn on Set Automatically.
12.4. Network Congestion
In densely populated areas or during major events, network congestion can cause connectivity issues. Try again later when the network is less congested.
13. Understanding Radio Frequencies and Cellular Signals
Gaining a basic understanding of radio frequencies and cellular signals can help you better understand why your iPhone might be experiencing connectivity issues.
13.1. What Are Radio Frequencies?
Radio frequencies are electromagnetic waves used to transmit data wirelessly. Cellular networks use specific radio frequencies to communicate with your iPhone.
13.2. How Cellular Signals Work
When your iPhone connects to a cellular network, it sends and receives radio signals to communicate with cell towers. The strength and quality of these signals determine the quality of your cellular connection.
13.3. Factors Affecting Signal Strength
Several factors can affect signal strength, including:
- Distance from cell tower: The farther you are from a cell tower, the weaker the signal.
- Obstructions: Buildings, trees, and other obstacles can block or weaken cellular signals.
- Weather: Heavy rain or snow can sometimes interfere with cellular signals.
- Network congestion: Too many users on the network can cause congestion and reduce signal strength.
14. Global Perspectives: International Regulations and Compatibility
If you purchased your iPhone in one country and are using it in another, there might be compatibility issues due to different cellular frequencies and regulations.
14.1. Different Cellular Frequencies Around the World
Different countries use different cellular frequencies. Your iPhone might not be compatible with all frequencies used in a particular country.
14.2. IMEI Registration Requirements in Some Countries
Some countries require you to register your iPhone’s IMEI with the local authorities to ensure it complies with local regulations.
14.3. Unlocking Your iPhone for International Use
If you want to use your iPhone with a different carrier internationally, you might need to unlock it. Contact your carrier to see if your iPhone is eligible for unlocking.
15. The Future of Cellular Connectivity: 5G and Beyond
5G is the latest generation of cellular technology, offering faster speeds and lower latency. However, 5G availability varies depending on your location and carrier.
15.1. Benefits of 5G
- Faster download and upload speeds
- Lower latency (reduced lag)
- Increased network capacity
15.2. 5G Availability and Compatibility
5G is not yet available in all areas. Check with your carrier to see if 5G is available in your area and if your iPhone is compatible with their 5G network.
15.3. The Transition from 4G to 5G
As 5G becomes more widespread, carriers are gradually phasing out older 4G networks. This transition might affect connectivity for older iPhones that don’t support 5G.
16. Advanced Diagnostics: Using Apple Support App
On iPhone models running iOS 18, you can download the latest version of the Apple Support app to run additional diagnostics that may help determine the source of your device’s issue.
17. FAQ: Answering Your Burning Questions About SOS Only Mode
Here are some frequently asked questions about SOS Only mode on iPhones:
Q1: What does SOS Only mean on my iPhone?
A1: It means your iPhone can only make emergency calls because it’s not connected to your regular cellular network but can connect to other available networks for emergency services.
Q2: Why is my iPhone suddenly showing SOS Only?
A2: Common reasons include no cellular coverage, network outages, SIM card issues, account problems, software glitches, or hardware problems.
Q3: How do I get my iPhone out of SOS Only mode?
A3: Try toggling Airplane Mode, restarting your iPhone, checking your location, manually selecting your carrier, or resetting network settings.
Q4: Will resetting network settings delete my data?
A4: No, it won’t delete your photos, apps, or documents. It will erase saved Wi-Fi passwords, cellular settings, and VPN configurations.
Q5: Is it possible for a SIM card to cause my iPhone to display SOS Only?
A5: Yes, a damaged, improperly inserted, or inactive SIM card can prevent your iPhone from connecting to the network.
Q6: What do I do if my carrier says there are no outages in my area, but my iPhone is still on SOS Only?
A6: Troubleshoot your iPhone’s settings, check your SIM card, update your software, and consider contacting Apple Support for further assistance.
Q7: How do I know if my iPhone is unlocked for international use?
A7: Contact your carrier to verify your iPhone’s unlock status.
Q8: How does Emergency SOS via satellite work?
A8: When you’re outside of cellular and Wi-Fi coverage, your iPhone will try to connect to a satellite to send an emergency message to Apple, who will then relay it to emergency services.
Q9: Can I use Emergency SOS via satellite anywhere in the world?
A9: No, the feature is currently available in the US, Canada, the UK, France, Germany, Ireland, and Australia.
Q10: How do I contact Apple Support?
A10: You can contact Apple Support through their website, by phone, or by visiting an Apple Store.
18. Need More Answers? Ask the Experts at WHY.EDU.VN
Experiencing persistent “SOS Only” issues on your iPhone can be frustrating, but with a systematic approach to troubleshooting, you can often resolve the problem and restore full cellular service. From quick fixes like toggling Airplane Mode to more advanced solutions like restoring your iPhone to factory settings, this guide has covered a wide range of potential solutions.
Remember, if you’ve tried everything and are still struggling, don’t hesitate to seek professional help from Apple Support or an authorized service provider. They have the expertise and tools to diagnose and repair any hardware or software issues that might be causing the problem.
At WHY.EDU.VN, we understand that technology can be complex, and finding reliable answers can be challenging. That’s why we’re dedicated to providing clear, accurate, and expert-backed information to help you navigate the digital world with confidence.
Do you have more questions about your iPhone, cellular connectivity, or anything else tech-related? Visit WHY.EDU.VN today and ask our team of experts. We’re here to provide the answers you need, when you need them. Whether you’re troubleshooting a specific issue or simply curious about how things work, we’re your trusted source for reliable information.
Contact us:
- Address: 101 Curiosity Lane, Answer Town, CA 90210, United States
- WhatsApp: +1 (213) 555-0101
- Website: WHY.EDU.VN
Let why.edu.vn be your guide to a world of knowledge and solutions.