Experiencing your iPhone not charging can be frustrating, especially when you’re about to head out or need to rely on your device. It’s a common issue many users face, and thankfully, in most cases, it’s solvable at home without needing to rush to a repair shop. This guide will walk you through the common reasons why your iPhone might not be charging and provide step-by-step troubleshooting methods to get you back up and running.
Common Reasons Why Your iPhone Isn’t Charging
Before diving into solutions, understanding the potential causes can help you pinpoint the problem faster. Here are some typical culprits behind iPhone charging issues:
Problem with Charging Cable and Adapter
The most frequent reason for charging problems lies within your charging accessories. Cables can fray, wires can break internally from constant bending, and adapters can malfunction. Damage, even if not immediately visible, can hinder the power flow to your iPhone.
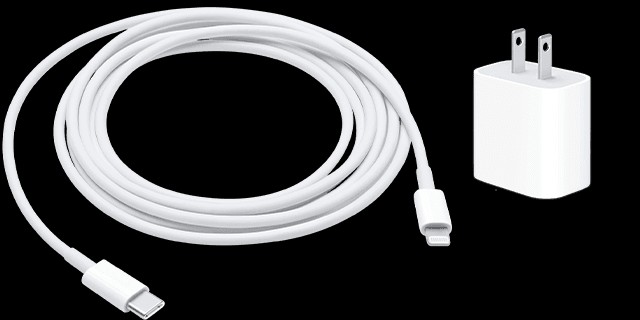 Image of a lightning to USB cable and a USB-C wall adapter
Alt text: Close-up of Apple Lightning to USB-C cable and USB-C power adapter, highlighting common iPhone charging accessories.
Dirty or Damaged Charging Port
Pocket lint, dust, and debris can accumulate in your iPhone’s charging port over time, preventing a solid connection between the cable and the internal connectors. Similarly, physical damage to the port, although less common, can also disrupt charging.
Software Glitches and Restarting
Sometimes, temporary software glitches can interfere with the charging process. A simple restart can often resolve these minor software hiccups and restore normal charging functionality.
Battery Health and Temperature
iPhone batteries, like all batteries, degrade over time. While battery health impacts overall battery life, extreme temperatures can also temporarily stop or slow down charging as a safety measure to protect the battery’s lifespan. iPhones use optimized battery charging features to manage battery aging.
Issues with Power Source
The problem might not be with your iPhone or accessories, but the power source itself. A faulty wall outlet, a computer USB port that isn’t powered, or a malfunctioning power bank can all prevent your iPhone from charging.
Troubleshooting Steps: How to Fix iPhone Not Charging
Now that we’ve covered the potential reasons, let’s move on to the solutions. Try these steps one by one, checking if your iPhone starts charging after each attempt.
Check Your Charging Cable and Adapter
Carefully inspect your charging cable and USB adapter for any visible signs of damage. Look for fraying, bent prongs, or cracks. If you have a spare Apple-certified cable and adapter, try using those to see if the problem is with your original accessories. Using damaged accessories is not recommended.
Inspect the Charging Port
Use a small, non-metallic tool like a toothpick or a SIM card ejector to gently remove any lint or debris from your iPhone’s charging port. Be careful not to damage the pins inside. After cleaning, try plugging in your charging cable firmly.
Try a Different Power Source
Test different power sources. Plug your adapter into a different wall outlet to rule out a faulty outlet. If you usually charge via a computer, try a wall outlet instead, or vice versa. Ensure that if you are using a computer, it is powered on and not in sleep mode, and use a USB port directly on the computer, not on a keyboard.
Restart Your iPhone
A simple restart can often fix temporary software glitches.
- For most iPhones: Press and hold either volume button and the side button until the power-off slider appears. Drag the slider, then wait 30 seconds for your device to turn off. To turn it back on, press and hold the side button until you see the Apple logo.
Force Restart
If a regular restart doesn’t work, try a force restart. The method varies slightly depending on your iPhone model:
- iPhone 8 or later and iPhone SE (2nd generation and later): Press and quickly release the volume up button. Press and quickly release the volume down button. Press and hold the side button until the Apple logo appears.
- iPhone 7 and iPhone 7 Plus: Press and hold both the side button and the volume down button until the Apple logo appears.
- iPhone 6s or earlier, iPhone SE (1st generation): Press and hold both the side button and the Home button until the Apple logo appears.
Check for Optimized Battery Charging & Charge Limit (iPhone 15)
If your iPhone stops charging at 80%, especially if you are using iOS 13 or later, it might be due to Optimized Battery Charging. This feature is designed to prolong battery health. It learns your charging habits and may delay charging past 80% until it predicts you’ll need your phone. This is normal behavior.
For iPhone 15 models and later, check if you have set a charge limit. You can adjust this in Settings > Battery > Battery Health & Charging > Charging Optimization.
Alt text: iPhone lock screen displaying a large battery icon with a lightning bolt indicating charging status.
Addressing “Accessory Not Supported” Alert
If you see an “Accessory Not Supported” or “Accessory Not Certified” alert, it could indicate a problem with your accessory, a dirty charging port, or a software issue. Follow these steps:
- Clean your charging port as described earlier.
- Restart your iPhone.
- Try a different Apple-certified USB cable and charger.
- Ensure your iPhone is updated to the latest iOS version.
When to Seek Professional Help
If you’ve tried all these troubleshooting steps and your iPhone still isn’t charging, it might indicate a more serious hardware problem. In such cases, it’s best to contact Apple Support or visit an authorized service provider for professional diagnosis and repair.
Conclusion
iPhone charging issues can be caused by a variety of factors, from simple cable problems to more complex hardware malfunctions. By systematically following these troubleshooting steps, you can often identify and resolve the issue yourself, saving time and potential repair costs. Remember to always use Apple-certified accessories for optimal performance and to protect your device’s battery health.