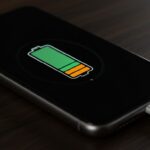
Why Is Iphone In Sos Mode? This is a common question among iPhone users, and at WHY.EDU.VN, we aim to provide a comprehensive answer and guide you through effective troubleshooting steps to restore your iPhone’s normal functionality. We will explore potential causes, from network issues to hardware problems, and offer actionable solutions. Let’s delve into reasons for SOS mode, emergency calls, and cellular network connectivity.
1. Understanding SOS Mode on Your iPhone
SOS mode on your iPhone indicates that it cannot connect to your regular cellular network but can still make emergency calls. This feature is designed to ensure you can contact emergency services even when a standard cellular connection is unavailable. Understanding the nuances of SOS mode is the first step toward resolving the underlying issue. Let’s break down what SOS mode means and when it appears.
1.1. What Does SOS Mode Mean?
SOS mode is a safety feature that allows your iPhone to connect to any available cellular network to make emergency calls, even if it’s not your primary carrier. When your iPhone displays “SOS” or “SOS only” in the status bar, it signifies that while your device can’t access your usual network, it can still contact emergency services via other networks. This is crucial for situations where you need immediate assistance.
1.2. When Does SOS Mode Appear?
SOS mode typically appears when your iPhone cannot establish a stable connection with your cellular carrier’s network. Several factors can trigger this:
- No Cellular Coverage: You might be in an area with no signal from your carrier.
- Network Outage: Your carrier might be experiencing a local or widespread outage.
- SIM Card Issues: Problems with your SIM card can prevent your phone from connecting.
- Software Glitches: Temporary software bugs can sometimes cause connectivity issues.
- Airplane Mode: If Airplane Mode is accidentally enabled, it will cut off cellular connections.
- Hardware Issues: In rare cases, SOS mode can indicate a hardware problem affecting cellular connectivity.
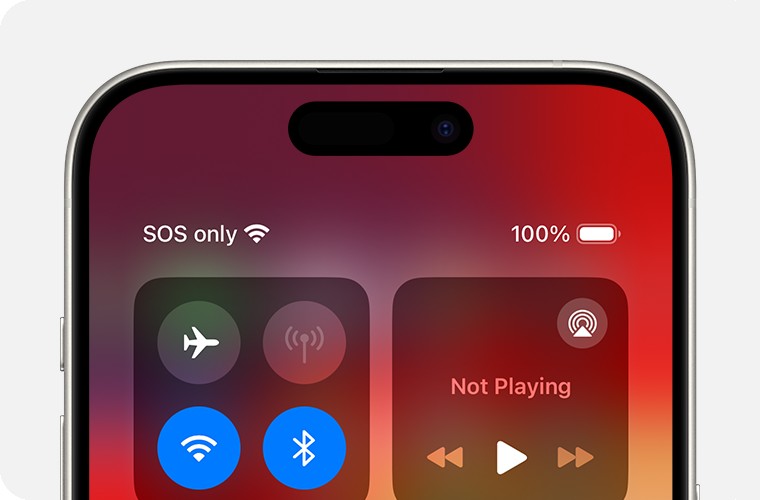 Top part of iPhone screen showing
1.3. Differences Between SOS, No Service, and Searching
It’s essential to distinguish between SOS, No Service, and Searching indicators on your iPhone.
- SOS/SOS Only: Indicates that your iPhone can make emergency calls via any available network.
- No Service: Means your iPhone cannot connect to any cellular network, preventing all calls, including emergency ones (except via Wi-Fi Calling, if enabled).
- Searching: Shows that your iPhone is actively trying to find a cellular network. This can be a temporary state before eventually displaying SOS or No Service.
1.4. How to Use Emergency SOS
In an emergency, using the Emergency SOS feature can quickly connect you with help. Here’s how:
- Press and Hold: Simultaneously press and hold the side button and either volume button until the Emergency SOS slider appears.
- Slide to Call: Drag the Emergency SOS slider to immediately call emergency services. Alternatively, continuing to hold the buttons will initiate a countdown, and then automatically call emergency services.
- Share Location: After calling, your iPhone sends your location to emergency contacts unless you choose to cancel. The phone will send alerts for a period of time when your location changes.
2. Common Causes of iPhone SOS Mode
Several factors can cause your iPhone to display SOS mode. Identifying the root cause is crucial for effective troubleshooting. Let’s explore the most common reasons your iPhone might be stuck in SOS mode.
2.1. Network Issues
Network-related problems are among the most frequent causes of SOS mode. These issues can range from temporary outages to more persistent connectivity problems.
- Cellular Outages: A widespread outage in your area can prevent your iPhone from connecting to the network. Carriers often have maintenance periods or unexpected disruptions.
- Weak Signal Strength: Being in an area with poor cellular coverage can lead to SOS mode. This is common in rural areas, basements, or buildings with thick walls.
- Carrier-Specific Problems: Sometimes, the issue lies with your carrier’s infrastructure or services. Contacting your carrier can provide insights into any known issues.
2.2. SIM Card Problems
The SIM card is essential for your iPhone to connect to the cellular network. Problems with the SIM card can lead to SOS mode.
- Damaged SIM Card: Physical damage to the SIM card can prevent it from functioning correctly.
- Misplaced SIM Card: If the SIM card isn’t properly seated in the tray, it might not connect.
- Inactive SIM Card: If your account isn’t active or the SIM card hasn’t been activated, it won’t connect to the network.
- Outdated SIM Card: SIM cards can become outdated, especially with changes in network technology.
2.3. Software Glitches
Software issues can sometimes disrupt your iPhone’s ability to connect to the cellular network, resulting in SOS mode.
- iOS Bugs: Occasionally, bugs in the iOS software can cause connectivity problems.
- Outdated Software: Running an outdated version of iOS can lead to compatibility issues with the cellular network.
- Incorrect Network Settings: Incorrect or corrupted network settings can prevent your iPhone from connecting.
2.4. Airplane Mode
Airplane Mode disables all wireless connections, including cellular. If Airplane Mode is accidentally turned on, it will cause your iPhone to display SOS mode.
- Accidental Activation: Airplane Mode can be easily activated from the Control Center, leading to unintended disconnection.
- Forgotten Setting: Sometimes, users forget they’ve enabled Airplane Mode, causing confusion when they see SOS mode.
2.5. Hardware Issues
Although less common, hardware problems can also be responsible for your iPhone being stuck in SOS mode.
- Antenna Problems: The iPhone’s antennas are responsible for cellular connectivity. Damage to these antennas can prevent your phone from connecting.
- Baseband Chip Issues: The baseband chip manages cellular communications. Malfunctions in this chip can lead to SOS mode.
- Water Damage: Exposure to water can damage internal components, affecting cellular connectivity.
3. Troubleshooting Steps for iPhone SOS Mode
When your iPhone is in SOS mode, systematically troubleshooting can help identify and resolve the issue. Here are several steps you can take to restore your iPhone’s cellular connectivity.
3.1. Check Basic Settings
Start with the most straightforward solutions, as these are often the quickest and easiest to implement.
- Disable and Enable Airplane Mode: Turning Airplane Mode on and off can reset the cellular connection.
- Open the Control Center by swiping down from the top-right corner of the screen (or swiping up from the bottom on older models).
- Tap the Airplane Mode icon to turn it on. Wait 15-20 seconds, then tap it again to turn it off.
- Restart Your iPhone: Restarting your iPhone can resolve temporary software glitches.
- Press and hold either volume button and the side button until the power-off slider appears.
- Drag the slider to turn your iPhone off.
- After about 30 seconds, press and hold the side button again until you see the Apple logo.
3.2. Inspect SIM Card
The SIM card is crucial for cellular connectivity. Ensure it’s properly inserted and undamaged.
- Remove and Reinsert SIM Card:
- Use a SIM ejector tool (or a paperclip) to open the SIM tray.
- Remove the SIM card and inspect it for any damage.
- Reinsert the SIM card, ensuring it’s correctly aligned in the tray.
- Push the SIM tray back into the iPhone until it clicks into place.
- Clean SIM Card: Gently clean the SIM card with a soft, dry cloth to remove any dirt or debris that might be interfering with the connection.
- Try a Different SIM Card (if available): If possible, try using a different SIM card in your iPhone to see if the problem is with the SIM card or the phone.
3.3. Update iOS
Keeping your iPhone’s software up to date is essential for optimal performance and compatibility.
- Check for Software Updates:
- Open the Settings app.
- Tap General, then tap Software Update.
- If an update is available, tap Download and Install.
- Ensure Automatic Updates are Enabled: To ensure you always have the latest software, turn on Automatic Updates in Settings > General > Software Update > Automatic Updates.
3.4. Check Carrier Settings
Carrier settings updates ensure your iPhone is optimized for your carrier’s network.
- Manually Check for Carrier Settings Update:
- Make sure your iPhone is connected to Wi-Fi.
- Open the Settings app.
- Tap General, then tap About.
- If an update is available, you’ll see a prompt to update your carrier settings.
- View Current Carrier Settings Version: To see the version of carrier settings on your device, go to Settings > General > About and look next to Carrier.
3.5. Reset Network Settings
Resetting network settings can resolve issues caused by corrupted or incorrect configurations.
- How to Reset Network Settings:
- Open the Settings app.
- Tap General, then tap Transfer or Reset iPhone.
- Tap Reset, then tap Reset Network Settings.
- Enter your passcode if prompted.
- Note: This will reset Wi-Fi passwords, cellular settings, and VPN configurations, so you’ll need to re-enter them.
3.6. Check Cellular Settings
Ensure your cellular settings are correctly configured for your carrier and region.
- Verify Cellular Data is Enabled:
- Open the Settings app.
- Tap Cellular.
- Make sure the Cellular Data toggle is turned on.
- Check Data Roaming Settings (if traveling):
- Open the Settings app.
- Tap Cellular, then tap Cellular Data Options.
- Ensure Data Roaming is turned on if you’re traveling internationally.
- Enable LTE:
- Open the Settings app.
- Tap Cellular, then tap Cellular Data Options.
- Tap Voice & Data and select LTE.
3.7. Contact Your Carrier
If the above steps don’t resolve the issue, contacting your carrier is the next logical step.
- Reasons to Contact Your Carrier:
- To verify your account is active and in good standing.
- To inquire about any network outages in your area.
- To check if your device is blocked or barred from receiving cellular services.
- To ensure your data plan is correctly set up.
- Information to Provide Your Carrier: Be prepared to provide your account information, iPhone model, and a detailed description of the issue.
3.8. Restore Your iPhone
As a last resort, restoring your iPhone to factory settings can resolve persistent software issues.
- Back Up Your iPhone: Before restoring, back up your iPhone to iCloud or your computer to avoid losing data.
- How to Restore Your iPhone:
- Open the Settings app.
- Tap General, then tap Transfer or Reset iPhone.
- Tap Erase All Content and Settings.
- Follow the on-screen instructions to complete the process.
- Note: This will erase all data on your iPhone, so make sure you have a backup.
3.9. Check for Hardware Damage
Inspect your iPhone for any signs of physical damage, such as cracks, dents, or water damage.
- Physical Inspection: Look closely at the iPhone’s exterior for any visible damage.
- Water Damage Indicators: Check the SIM tray and charging port for water damage indicators (small stickers that turn red when exposed to moisture).
- Professional Repair: If you suspect hardware damage, take your iPhone to an authorized service center for repair.
4. Advanced Troubleshooting Techniques
If the basic troubleshooting steps don’t resolve the SOS mode issue, consider these advanced techniques.
4.1. DFU Restore
A DFU (Device Firmware Update) restore is a more thorough method of restoring your iPhone, which can resolve deeper software issues.
- How to Perform a DFU Restore: The process varies slightly depending on your iPhone model. Refer to Apple’s support documentation for detailed instructions specific to your device.
- Note: A DFU restore will erase all data on your iPhone, so ensure you have a backup.
4.2. Check IMEI Registration
In some countries, local regulations require IMEI (International Mobile Equipment Identity) registration to use a mobile phone.
- What is IMEI Registration? Some countries require you to register your iPhone’s IMEI with the local government to prevent theft and ensure compliance with local regulations.
- How to Check IMEI Registration: Contact your local telecommunications authority to check if your iPhone’s IMEI is registered.
4.3. Use Apple Support App
The Apple Support app offers diagnostic tools and support resources that can help identify and resolve issues with your iPhone.
- Download the Apple Support App: You can download the Apple Support app from the App Store.
- Run Diagnostics: Use the app to run diagnostics on your iPhone to identify potential hardware or software issues.
5. Preventing iPhone SOS Mode Issues
Prevention is always better than cure. Here are some tips to help prevent your iPhone from getting stuck in SOS mode.
5.1. Maintain Software Updates
Regularly updating your iPhone’s software ensures you have the latest bug fixes and improvements.
- Enable Automatic Updates: Go to Settings > General > Software Update > Automatic Updates and turn on both Download iOS Updates and Install iOS Updates.
5.2. Handle SIM Card with Care
Properly handling your SIM card can prevent damage and connectivity issues.
- Avoid Physical Damage: Be careful when inserting and removing the SIM card to avoid bending or scratching it.
- Keep SIM Tray Clean: Keep the SIM tray free from dust and debris.
5.3. Monitor Cellular Coverage
Be aware of your surroundings and potential areas with weak cellular coverage.
- Use Wi-Fi Calling: When in areas with poor cellular coverage, use Wi-Fi Calling to make and receive calls over a Wi-Fi network.
- Adjust Travel Plans: If you know you’ll be in an area with limited cellular coverage, plan accordingly or consider alternative communication methods.
5.4. Protect Your iPhone from Damage
Protecting your iPhone from physical damage can prevent hardware issues that lead to SOS mode.
- Use a Protective Case: A sturdy case can protect your iPhone from drops and impacts.
- Avoid Water Exposure: Keep your iPhone away from water and humid environments.
5.5. Regularly Check Carrier Settings
Periodically check for carrier settings updates to ensure your iPhone is optimized for your carrier’s network.
- Enable Notifications: Some carriers send notifications when a new carrier settings update is available.
- Manually Check: Regularly check for updates in Settings > General > About.
6. Understanding Emergency SOS and Its Features
Emergency SOS is a critical feature on iPhones designed to help users quickly contact emergency services in urgent situations. This feature not only initiates a call to local emergency responders but also offers additional functionalities such as sending your location to emergency contacts. Let’s explore this feature in detail.
6.1. How Emergency SOS Works
Emergency SOS allows you to quickly and discreetly call for help. When activated, it automatically calls local emergency services and shares your current location with your emergency contacts. This feature can be activated in a few different ways, depending on your iPhone model and settings.
- Activating Emergency SOS:
- On iPhone 8 or later: Press and hold the side button and either volume button until the Emergency SOS slider appears. Drag the slider to call emergency services. If you continue holding the buttons instead of dragging the slider, a countdown will begin, followed by an automatic call to emergency services.
- On iPhone 7 or earlier: Rapidly press the side (or top) button five times. The Emergency SOS slider will appear. Drag the slider to call emergency services.
- Automatic Location Sharing: After the call ends, your iPhone sends a text message to your emergency contacts with your current location. It continues to send updates if your location changes over a period of time.
6.2. Setting Up Emergency Contacts
Setting up emergency contacts is crucial for the Emergency SOS feature to work effectively. These contacts will receive your location and updates in case of an emergency.
- How to Add Emergency Contacts:
- Open the Health app on your iPhone.
- Tap your profile picture in the top right corner.
- Tap Medical ID.
- Tap Edit in the top right corner.
- Scroll down to Emergency Contacts and tap Add Emergency Contact.
- Select a contact and specify their relationship to you.
- Tap Done to save your changes.
- Importance of Updating Contacts: Regularly review and update your emergency contacts to ensure the information is current.
6.3. Customizing Emergency SOS Settings
You can customize certain aspects of the Emergency SOS feature to better suit your needs.
- Auto Call: In Settings > Emergency SOS, you can enable or disable the Auto Call feature. When enabled, continuing to hold the side button and volume button will automatically call emergency services after a countdown.
- Call with Side Button: You can also enable or disable the Call with Side Button feature, which initiates Emergency SOS when you rapidly press the side button five times.
- Countdown Sound: Choose whether or not your iPhone plays a loud sound during the countdown before calling emergency services.
6.4. Legal and Safety Considerations
While Emergency SOS is a valuable tool, it’s essential to use it responsibly and be aware of the potential implications.
- Misuse: Avoid accidentally activating Emergency SOS, as this can tie up emergency services unnecessarily.
- False Alarms: Be aware that activating Emergency SOS will contact emergency services, so only use it in genuine emergency situations.
- Privacy: Understand that your location will be shared with emergency contacts and emergency services when you use Emergency SOS.
7. Exploring WHY.EDU.VN for More Answers
WHY.EDU.VN is your go-to resource for finding accurate and comprehensive answers to all your questions. We strive to provide expert knowledge and reliable information across various topics. If you’re still curious or have more questions, here’s how WHY.EDU.VN can help.
7.1. How WHY.EDU.VN Can Help
WHY.EDU.VN offers a wealth of information, expert insights, and practical solutions to address your queries. Our platform is designed to provide clear, concise, and reliable answers to help you understand complex topics.
- Extensive Knowledge Base: Access a vast library of articles, guides, and FAQs covering a wide range of subjects.
- Expert Answers: Get answers from industry professionals, researchers, and subject matter experts.
- User-Friendly Interface: Easily navigate the site to find the information you need quickly and efficiently.
7.2. Submitting Your Questions
If you can’t find the answer you’re looking for, you can submit your question to our community of experts and other users.
- How to Ask a Question:
- Visit WHY.EDU.VN and navigate to the “Ask a Question” section.
- Provide a clear and detailed description of your question.
- Specify the category or topic that best fits your question.
- Submit your question and wait for our experts to provide an answer.
- Benefits of Asking Questions:
- Get personalized answers tailored to your specific needs.
- Connect with experts and other users who can offer valuable insights.
- Contribute to the knowledge base by sharing your questions and answers.
7.3. Browsing Existing Q&A
Before submitting a question, browse our existing Q&A to see if your question has already been answered.
- How to Search for Answers:
- Use the search bar on WHY.EDU.VN to enter keywords related to your question.
- Browse through the search results to find relevant articles and Q&A threads.
- Filter the results by category, topic, or date to narrow down your search.
- Benefits of Browsing Q&A:
- Find answers to common questions quickly and easily.
- Discover new information and insights related to your area of interest.
- Learn from the experiences and knowledge of other users.
7.4. Connecting with Experts
WHY.EDU.VN connects you with experts in various fields who can provide in-depth answers and insights.
- How to Find Experts:
- Browse through our directory of experts on WHY.EDU.VN.
- Search for experts based on their area of expertise, qualifications, and experience.
- Read their profiles and view their contributions to the community.
- Benefits of Connecting with Experts:
- Get access to specialized knowledge and expertise.
- Receive personalized advice and guidance.
- Network with professionals in your field of interest.
8. iPhone SOS Mode: FAQs
Q1: Why does my iPhone say SOS only?
Your iPhone displays “SOS only” when it can’t connect to your usual cellular network but can still make emergency calls via other available networks.
Q2: How do I get my iPhone out of SOS mode?
Try restarting your iPhone, toggling Airplane Mode, checking your SIM card, updating iOS, or resetting network settings. If the problem persists, contact your carrier.
Q3: Will I be charged for using Emergency SOS?
Emergency calls are typically free, but standard charges may apply for sending your location to emergency contacts via text message.
Q4: Does SOS mode work internationally?
Yes, SOS mode works internationally, allowing you to make emergency calls even when roaming on a foreign network.
Q5: How do I turn off Emergency SOS on my iPhone?
You can disable the Auto Call feature in Settings > Emergency SOS to prevent accidental calls to emergency services.
Q6: What should I do if my iPhone is stuck in SOS mode after trying all the troubleshooting steps?
Contact Apple Support or visit an authorized service center for further assistance.
Q7: Can a damaged SIM card cause SOS mode?
Yes, a damaged or improperly inserted SIM card can prevent your iPhone from connecting to the cellular network, resulting in SOS mode.
Q8: Is it possible to make regular calls in SOS mode?
No, in SOS mode, you can only make emergency calls. Regular calls require a connection to your cellular carrier’s network.
Q9: How often should I check for carrier settings updates?
Check for carrier settings updates regularly, especially after updating iOS or switching carriers.
Q10: What does it mean if my iPhone constantly switches between SOS and No Service?
This indicates an unstable cellular connection, possibly due to weak signal strength or intermittent network issues.
Experiencing iPhone SOS mode can be frustrating, but understanding the potential causes and troubleshooting steps can help you resolve the issue. Remember to leverage the resources available at WHY.EDU.VN for more in-depth answers and expert assistance. If you’re still facing difficulties, don’t hesitate to contact your carrier or Apple Support for further assistance. For more detailed assistance and to explore a wealth of knowledge, don’t hesitate to visit why.edu.vn. Our team of experts is ready to answer your questions and provide the support you need. Contact us at 101 Curiosity Lane, Answer Town, CA 90210, United States. Whatsapp: +1 (213) 555-0101.