Preview is a versatile built-in app on macOS for viewing and editing images and PDFs. However, users occasionally encounter issues with the cropping tool. This guide explores common reasons why you might be unable to crop in Preview and provides effective solutions to get you back on track.
Common Reasons for Cropping Issues in Preview
Several factors can contribute to cropping problems in Preview:
- Markup Toolbar: The crop tool might be grayed out if the Markup Toolbar isn’t enabled. This toolbar houses essential editing functions, including selection and cropping tools.
- File Corruption: A corrupted image or PDF file can prevent Preview from functioning correctly, including cropping.
- Software Glitches: Temporary bugs or glitches within the Preview app can interfere with its features.
- System Errors: Underlying issues within macOS can sometimes impact the performance of applications like Preview.
- Unselected Area: You must select the area you wish to crop before the “Crop” option becomes active.
Solutions to Fix Cropping Problems in Preview
Here are five solutions to address cropping issues in Preview:
1. Enable the Markup Toolbar
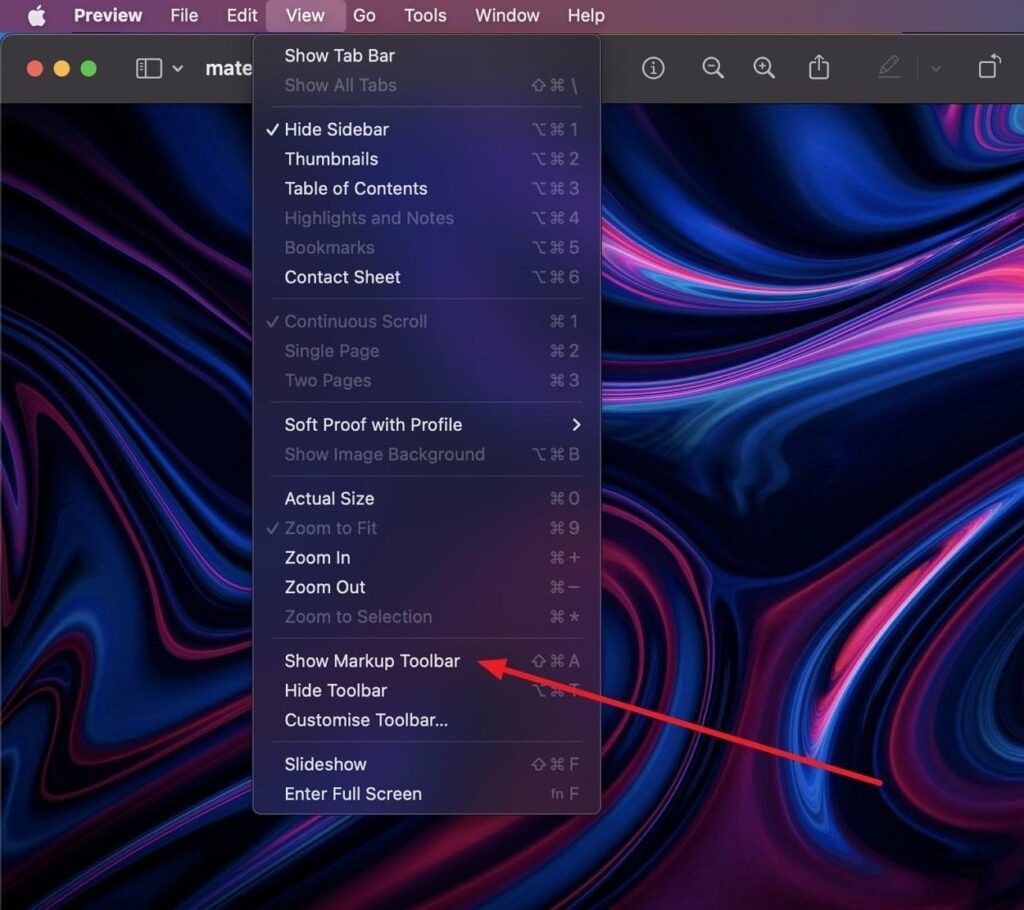
Ensure the Markup Toolbar is visible. Click the “Show Markup Toolbar” icon (it looks like a toolbox) in the Preview window’s toolbar. Alternatively, go to View > Show Markup Toolbar in the menu bar. Once enabled, you should see various selection tools (rectangular, elliptical, lasso) to define the area you want to crop.
2. Restart the Preview App
Force-quitting and restarting Preview can resolve temporary glitches. Press Command + Option + Escape, select Preview, and click “Force Quit.” Then, relaunch Preview from the Applications folder or Dock.
3. Repair Corrupted Files
If you suspect file corruption, try repairing the image or PDF using online repair tools or dedicated software designed for file recovery. Search online for “PDF repair” or “image repair” to find suitable options.
4. Restart Your Mac
A system restart can resolve underlying system errors affecting Preview. Click the Apple logo in the top-left corner of the screen and select “Restart.”
5. Update macOS
Outdated macOS versions can lead to compatibility issues. Ensure your system is up-to-date. Go to System Settings > General > Software Update and click “Update Now” if an update is available.
How to Crop in Preview: A Quick Guide
- Open the File: Open the image or PDF in Preview.
- Select the Area: Use the Rectangular Selection tool (or other selection tools) from the Markup Toolbar to define the area you want to keep.
- Crop: Click the “Crop” button in the Markup Toolbar, or go to Tools > Crop in the menu bar.
Conclusion
Inability to crop in Preview can be frustrating, but the solutions outlined above often resolve the issue. By ensuring the Markup Toolbar is active, addressing potential file corruption, and keeping your software updated, you can effectively utilize Preview’s cropping capabilities for your image and PDF editing needs.

