It’s a frustrating moment when you reach for your AirPods, ready to immerse yourself in music or take an important call, only to find that your right AirPod isn’t working. You’re not alone. Many users experience this issue, and thankfully, there are several troubleshooting steps you can take to get your right AirPod functioning again.
Common Reasons Why Your Right AirPod Might Not Work
Before diving into solutions, understanding potential causes can be helpful. A right AirPod might fail to work due to a variety of reasons, ranging from simple fixes to more complex issues:
- Battery Depletion: The most straightforward reason is that your right AirPod simply ran out of battery. AirPods charge independently, so one might deplete faster than the other.
- Connection Issues: Bluetooth glitches or pairing problems can sometimes cause one AirPod to disconnect or fail to register properly with your device.
- Software Glitches: Occasional software bugs on your iPhone, iPad, or even within the AirPods’ firmware can lead to temporary malfunctions.
- Debris or Earwax Buildup: Blockages in the speaker mesh of your AirPod due to earwax or debris can significantly reduce or completely eliminate sound output.
- Audio Balance Settings: Incorrect audio balance settings on your device might inadvertently be sending all audio to the left AirPod, making it seem like the right one is broken.
Simple Fixes to Try First
Luckily, many “right AirPod not working” problems can be resolved with quick and easy steps. Start with these basic troubleshooting methods:
Check the Charging Case and Charging Status
The charging case is crucial for both powering and resetting your AirPods. Here’s how to use it to troubleshoot:
- Ensure the Case is Charged: Connect your charging case to a power source to ensure it’s adequately charged. A depleted case might not properly charge your AirPods.
- Charge AirPods for 30 Seconds: Place both AirPods back into the charging case. Leave the lid open and let them charge for at least 30 seconds. This can sometimes resolve minor charging or connection glitches.
- Check Charging Status on Your Device: Open the charging case near your iPhone or iPad. A status screen should appear, showing the charge level of both AirPods and the case. Verify that the right AirPod is actually charging. If you see no charging indicator for the right AirPod, there might be a charging contact issue.
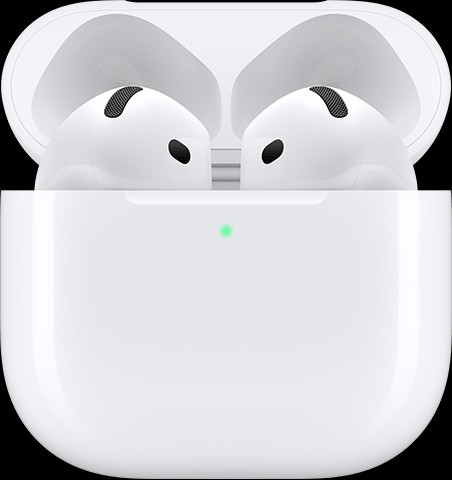 AirPods 4 in charging case with lid open
Test the Right AirPod in Isolation
Isolate the problematic AirPod to confirm if the issue is truly with the right AirPod itself:
- Place the Right AirPod In Your Ear: Remove the left AirPod from your ear and keep it out of the case for now.
- Close the Charging Case: With only the right AirPod outside and the left AirPod inside, close the lid of the charging case.
- Play Audio: Play music, a podcast, or any audio on your connected device.
- Listen for Sound: Check if you can hear audio from the right AirPod.
If the right AirPod now works, it’s possible there was a temporary connection issue between both AirPods. Place both AirPods back in the case, charge for another 30 seconds, and then test both together again.
Reset Your AirPods
If the above steps haven’t worked, resetting your AirPods can often resolve deeper connection or software-related problems. You can find detailed instructions on how to reset your specific AirPods model on the Apple Support website by searching for “reset AirPods”. This process typically involves pressing a button on the charging case until the status light flashes amber and then white.
Addressing Volume and Balance Issues
If you do hear sound from your right AirPod, but it’s significantly quieter than the left, or there’s no sound at all even though it seems powered on, consider these points:
Clean Your AirPods
Earwax and debris are common culprits for reduced AirPod volume or complete sound blockage.
- Inspect the Mesh: Carefully examine the small speaker and microphone meshes on the right AirPod. Look for any visible buildup.
- Clean Gently: Use a soft, dry, lint-free cloth or a dry cotton swab to gently clean any debris from the meshes. Avoid using liquids or sharp objects that could damage the AirPods. For more thorough cleaning instructions, refer to Apple’s guide on “how to clean your AirPods” or “how to clean your AirPods Pro” depending on your model.
Check Audio Balance Settings
Sometimes, accessibility settings can inadvertently affect audio output balance.
- Navigate to Balance Settings: On your iPhone or iPad, go to Settings > Accessibility > Audio/Visual > Balance.
- Center the Balance: Ensure the balance slider is set precisely in the middle. If it’s shifted to the left, it could be reducing or eliminating audio output from the right AirPod.
By systematically working through these troubleshooting steps, you should be able to identify and resolve the reason why your right AirPod is not working and get back to enjoying your audio. If you continue to experience problems after trying these solutions, it might be necessary to contact Apple Support for further assistance.