Experiencing your iPhone not charging can be incredibly frustrating. You plug it in, expecting that familiar charging icon, only to be met with… nothing. Before you panic or rush to replace your device, know that many charging issues are easily fixable at home. This comprehensive guide will walk you through the common reasons why your iPhone might not be charging and provide step-by-step solutions to get you powered up again.
Common Reasons Why Your iPhone Isn’t Charging
Several factors can contribute to your iPhone’s charging woes. Understanding these potential culprits is the first step towards resolving the problem.
Problem with the Power Source
Sometimes, the issue isn’t with your iPhone itself, but with the power source you’re using.
- Faulty Wall Outlet: The simplest explanation is often overlooked. Try plugging your charger into a different wall outlet to rule out a dead or malfunctioning socket.
- Computer USB Port Issues: While convenient, computer USB ports, especially on older computers or keyboards, may not provide sufficient power to charge an iPhone efficiently, or at all. Always use a USB 2.0 or 3.0 port directly on the computer itself, and ensure the computer is turned on and not in sleep mode.
- Unpowered USB Hubs or Accessories: Not all USB hubs and docking stations are created equal. Some may not be powered adequately to charge your iPhone. Stick to Apple-certified power accessories or try plugging directly into a wall outlet or computer.
Faulty Charging Cable or Adapter
The charging cable and adapter are essential components, and damage to either can interrupt the charging process.
- Inspect for Physical Damage: Carefully examine your Lightning to USB cable and USB power adapter for any visible signs of damage. Look for fraying, breakage, bent prongs, or kinks in the cable. Damaged accessories should not be used as they can be hazardous.
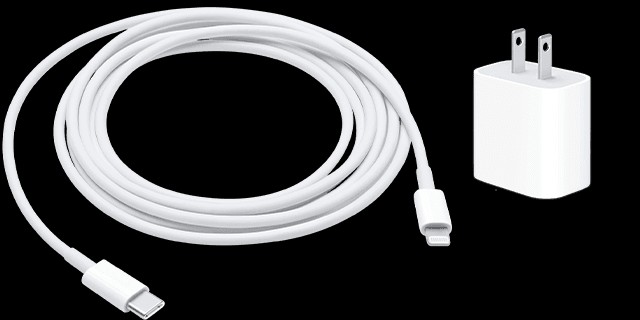 Image of a lightning to USB cable and a USB-C wall adapter
- Try a Different Cable and Adapter: If you suspect your cable or adapter is faulty, try using a different Apple-certified cable and adapter to see if that resolves the issue. This is a quick way to isolate whether the problem lies with your accessories.
Dirty or Damaged Charging Port
The Lightning port on your iPhone is susceptible to accumulating dust, lint, and debris over time. This buildup can prevent a proper connection between the charging cable and your iPhone.
- Inspect and Clean the Charging Port: Use a small, non-metallic, and anti-static tool, such as a toothpick or a SIM card ejector tool, to gently remove any visible debris from the charging port. Be careful not to damage the pins inside the port. Compressed air can also be helpful to dislodge stubborn particles.
Software Glitches and Restarting Your iPhone
Sometimes, temporary software glitches can interfere with the charging process. A simple restart can often resolve these minor software hiccups.
- Restart Your iPhone: A restart is a basic but effective troubleshooting step for many iPhone issues. Turn your iPhone off and then back on again.
- Force Restart if Necessary: If your iPhone is unresponsive or frozen, you may need to perform a force restart. The method for force restarting varies depending on your iPhone model:
- iPhone 8 or later and iPhone SE (2nd generation and later): Press and quickly release the volume up button, then press and quickly release the volume down button. Finally, press and hold the side button until the Apple logo appears.
- iPhone 7 and iPhone 7 Plus: Press and hold both the side button and the volume down button until the Apple logo appears.
- iPhone 6s or earlier, iPhone SE (1st generation): Press and hold both the side button and the Home button until the Apple logo appears.
Optimized Battery Charging Feature
If your iPhone charges to 80% and then stops, it might not be a problem but rather the Optimized Battery Charging feature at work.
- Understanding Optimized Battery Charging: Introduced in iOS 13 and later, this feature is designed to prolong battery lifespan by reducing the time your iPhone spends fully charged. It learns your charging habits and may pause charging at 80% until it predicts you’ll need your iPhone again.
- When it’s Active: Optimized Battery Charging is typically active when your iPhone anticipates being connected to a charger for an extended period, like overnight.
Overheating
Your iPhone can get slightly warm while charging, which is normal. However, excessive heat can trigger protective mechanisms that may limit charging.
- Temperature Considerations: If your iPhone gets too hot, the software might temporarily halt charging above 80% to protect the battery’s lifespan. Charging will resume once the temperature decreases.
- Cooling Down Your Device: If you suspect overheating, move your iPhone and charger to a cooler location away from direct sunlight or heat sources.
“Accessory May Not Be Supported” Alert
If you see an alert message stating that your accessory is not supported or certified, it indicates a potential compatibility issue.
- Reasons for the Alert: This alert can appear due to a dirty or damaged charging port, a defective or non-Apple certified accessory, or a USB charger not designed for devices.
- Troubleshooting Steps:
- Clean the charging port: As mentioned earlier, debris in the port can cause connection problems.
- Restart your iPhone: A restart can sometimes clear temporary software glitches causing the alert.
- Try different accessories: Use a different Apple-certified USB cable and charger to rule out a faulty accessory.
- Update iOS: Ensure your iPhone is running the latest version of iOS, as updates often include compatibility improvements and bug fixes.
Step-by-Step Troubleshooting for iPhone Charging Issues
Follow these steps in order, testing your iPhone’s charging capability after each step:
- Check the Power Outlet: Try a different wall outlet to ensure the issue isn’t with the power source.
- Use Wall Power Instead of Computer: If you’re charging via a computer USB port, switch to a wall outlet and Apple-certified adapter.
- Inspect and Replace Charging Accessories: Examine your cable and adapter for damage. Try using different, known-good Apple-certified accessories.
- Clean the Charging Port: Gently clean the Lightning port on your iPhone to remove any lint or debris.
- Restart Your iPhone: Perform a regular restart.
- Allow it to Charge for 30 Minutes: Plug your iPhone into a power source and let it charge for at least half an hour, even if it doesn’t immediately show signs of charging.
- Force Restart Your iPhone: If it still doesn’t power on or show a charging icon, perform a force restart.
- Let it Charge for Another 30 Minutes: After a force restart, allow your iPhone to charge for another half hour.
Alt: iPhone lock screen showing a large battery icon indicating charging, a visual cue that the device is receiving power.
When to Seek Professional Help
If you’ve tried all the troubleshooting steps and your iPhone still refuses to charge, it might indicate a more serious hardware problem. In such cases, it’s best to seek professional help.
- Contact Apple Support: Reach out to Apple Support online or visit an Apple Store or Authorized Service Provider. They have the expertise to diagnose and repair more complex charging issues.
By systematically working through these troubleshooting steps, you can often identify and resolve the reason why your iPhone is not charging and get your device powered up and running again.